
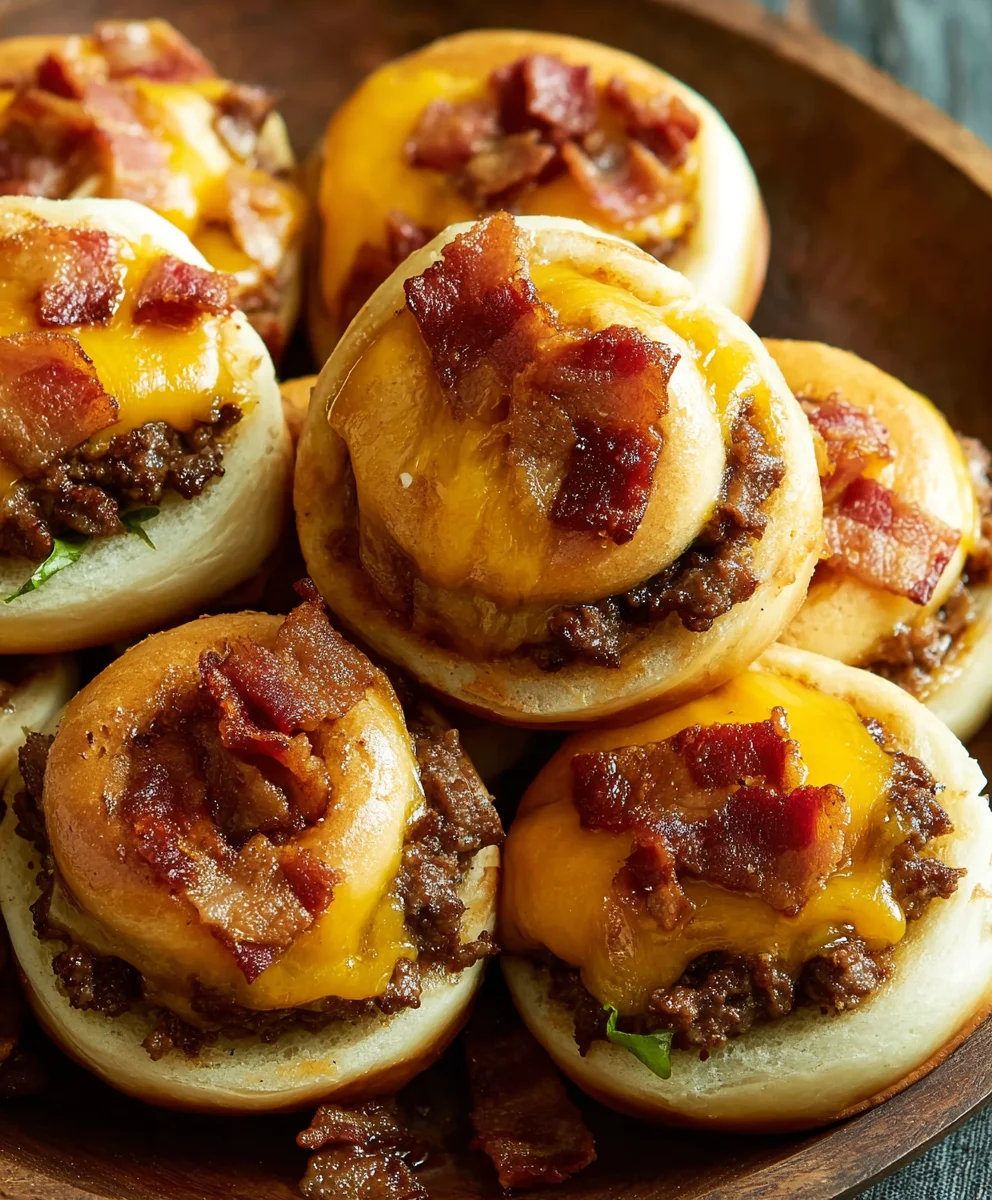
Beef Bacon Cheeseburger Rolls are more than just a meal; they’re an ingenious culinary invention that brings together the best of American comfort food in an exciting new format. Imagine taking all the quintessential flavors you adore from a classic cheeseburger—the juicy, savory beef, the crispy, salty bacon, and the perfectly melted, gooey cheese—and wrapping them up in a soft, golden-baked dough. It’s a truly irresistible combination that promises to be the star of any gathering!
I find immense joy in crafting dishes that offer both familiarity and a delightful twist, and these Beef Bacon Cheeseburger Rolls fit that description perfectly. While the traditional cheeseburger boasts a rich history as an American icon, evolving from humble diner fare to a global sensation, these rolls represent its playful, modern evolution. They capture the essence of a beloved classic, transforming it into a convenient, portable, and utterly delicious appetizer or main course. People absolutely adore this dish not only for its incredible taste and texture—the fluffy exterior giving way to a rich, cheesy, and meaty interior—but also for its sheer versatility. They are an absolute showstopper at potlucks, the ultimate game-day snack, or even a fun, interactive weeknight dinner that the whole family will love. Get ready to embark on a delightful culinary adventure with every bite!
Ingredients:
- 1 pound (450g) lean ground beef, I usually opt for 80/20 for a good balance of flavor and less grease
- 8 slices smoked bacon, diced into small pieces; my preference is thick-cut for extra flavor and texture
- 1 small yellow onion, finely diced; this adds a lovely aromatic sweetness
- ½ cup (120ml) dill pickle relish or finely chopped dill pickles; I find the relish distributes better
- ¼ cup (60ml) ketchup, choose your favorite brand, something robust
- 2 tablespoons (30ml) yellow mustard, classic American mustard works perfectly here
- 1 teaspoon garlic powder; a crucial flavor enhancer
- ½ teaspoon onion powder; complements the fresh onion beautifully
- ½ teaspoon black pepper, freshly ground if you have it for the best aroma
- ¼ teaspoon salt, or to taste, remember bacon is salty so adjust accordingly
- 2 tubes (8 ounces each, approximately 226g per tube) refrigerated crescent roll dough; this is my go-to for convenience and flakiness
- 1½ cups (170g) shredded sharp cheddar cheese; freshly grated melts better than pre-shredded, but either works
- 1 large egg, whisked with 1 tablespoon of water for an egg wash; this gives the rolls a beautiful golden sheen
- 1 tablespoon sesame seeds, optional but highly recommended for that classic burger bun look and a nutty crunch
Preparing the Filling for Your Beef Bacon Cheeseburger Rolls
- Crisp the Bacon: My first step is always to get that bacon cooking. Place your diced bacon in a large skillet over medium heat. Cook the bacon, stirring occasionally, until it’s beautifully crispy and all the fat has rendered. This usually takes about 7-10 minutes. Once done, use a slotted spoon to transfer the crispy bacon bits to a plate lined with paper towels to drain any excess grease. Don’t discard all that delicious bacon fat just yet! We’ll use a little of it to sauté our onions.
- Sauté the Onions: Reduce the heat to medium-low. If you have more than 2 tablespoons of bacon fat in the skillet, drain off the excess, leaving just enough to coat the bottom. Add your finely diced yellow onion to the skillet. Sauté the onions for about 5-7 minutes, stirring frequently, until they become soft, translucent, and slightly caramelized. This process brings out their natural sweetness and mellows their flavor, which is a fantastic addition to our Beef Bacon Cheeseburger Rolls.
- Brown the Ground Beef: Push the softened onions to one side of the skillet. Add your lean ground beef to the other side. Break the beef apart with a spoon and cook it over medium-high heat, stirring occasionally, until it’s completely browned and no pink remains. This usually takes about 8-10 minutes. It’s important to brown the beef thoroughly to develop its flavor. Once browned, carefully drain any excess grease from the skillet. Too much grease can make our rolls soggy later on.
-
Combine and Season the Filling: Now for the magic! Return the crispy bacon bits to the skillet with the cooked beef and onions. Stir in the dill pickle relish (or chopped pickles), ketchup, yellow mustard, garlic powder, onion powder, black pepper, and salt. Mix everything really well until all the ingredients are evenly distributed and the mixture is fragrant and cohesive. I love how all these classic burger flavors come together at this stage. Taste the mixture at this point and adjust any seasonings if you feel it needs more salt, pepper, or even a little extra ketchup or mustard for your personal preference.
Once seasoned, remove the skillet from the heat. This is a crucial step: Allow the filling to cool completely. You can spread it out on a baking sheet or a large plate to speed up the cooling process, or simply let it sit in the skillet for at least 30 minutes, or even pop it in the refrigerator for 15-20 minutes. If you try to assemble your Beef Bacon Cheeseburger Rolls with hot filling, it will melt the cheese prematurely and make the crescent dough difficult to handle, potentially leading to soggy rolls. Patience here will pay off!
Assembling the Beef Bacon Cheeseburger Rolls
- Prepare for Baking: While your filling is cooling, preheat your oven to 375°F (190°C). Line two large baking sheets with parchment paper. This prevents sticking and makes cleanup a breeze, which is something I always appreciate after a good cooking session. Having everything ready before you start assembling makes the process much smoother.
- Unroll the Crescent Dough: Open one tube of refrigerated crescent roll dough. Carefully unroll the dough onto a clean, lightly floured surface or directly onto your parchment-lined baking sheet. You’ll notice perforations for individual crescent rolls. My technique is to gently press these perforations together to create two large rectangles (each tube usually makes two rectangles, or one large sheet if you’re very careful). You want to form a relatively seamless sheet of dough. Repeat this with the second tube of dough. The goal here is to create a flat canvas for our delicious filling. I find pressing the seams firmly with my fingers helps prevent them from separating during baking.
- Distribute the Filling: Now, evenly spread half of your cooled beef and bacon mixture over each of the two large dough rectangles, leaving a small border (about ½ inch or 1 cm) around the edges. Don’t overfill them, but ensure you have a generous, even layer. You want a good ratio of filling to dough in every bite of your Beef Bacon Cheeseburger Rolls.
- Add the Cheese: Sprinkle half of the shredded sharp cheddar cheese evenly over the filling on each dough rectangle. I like to layer the cheese over the meat mixture because it helps to create a “cheese barrier” that can prevent some of the moisture from the filling from seeping directly into the dough, contributing to a flakier roll. Plus, who doesn’t love extra cheese?
- Roll Up the Dough: Starting from one of the long edges of each dough rectangle, carefully and tightly roll up the dough, creating a log shape. As you roll, try to keep the filling tucked in. Once you reach the end, pinch the seam firmly to seal it. Then, gently pinch and tuck in the ends of the log to prevent any filling from escaping during baking. A tight roll is key here for maintaining the structure of your Beef Bacon Cheeseburger Rolls.
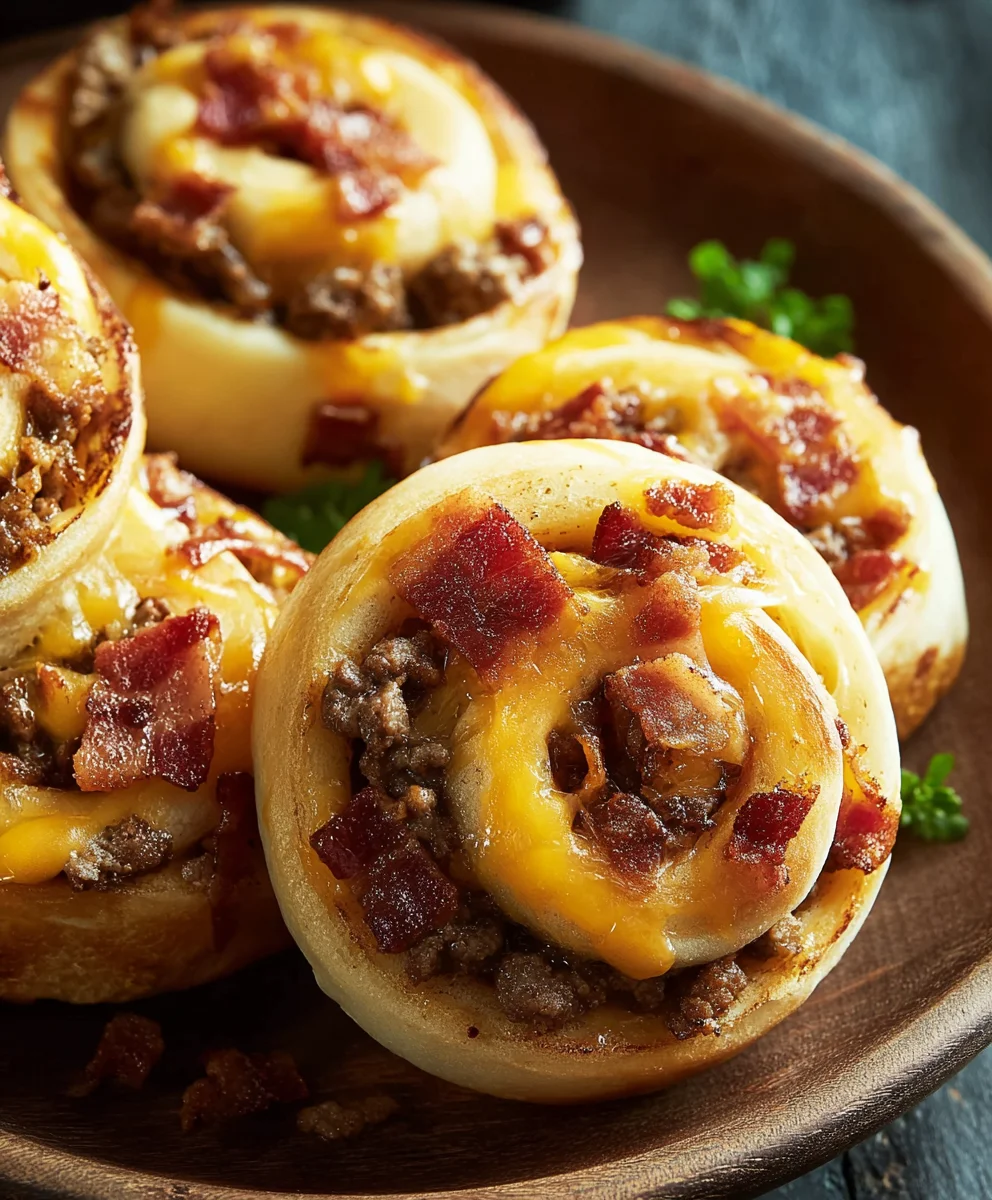
- Slice and Place: Using a sharp knife, carefully slice each log into 8 equal pieces, creating your individual Beef Bacon Cheeseburger Rolls. This will give you a total of 16 rolls from two tubes of dough. Arrange these sliced rolls cut-side up on your prepared baking sheets, leaving a little space between each one to allow them to puff up and get golden brown.
- Egg Wash and Sesame Seeds: In a small bowl, whisk together the large egg with 1 tablespoon of water to create an egg wash. Lightly brush the tops of each roll with this egg wash. This gives the Beef Bacon Cheeseburger Rolls that beautiful golden-brown, shiny crust, similar to a real burger bun. Finally, sprinkle the tops of the rolls with sesame seeds. This is my favorite finishing touch, as it truly makes them look like mini cheeseburger bites and adds a delightful subtle crunch.
Baking and Serving Your Delicious Beef Bacon Cheeseburger Rolls
- Bake to Golden Perfection: Place the baking sheets in your preheated oven. Bake for 18-22 minutes, or until the crescent dough is deeply golden brown, puffed up, and the cheese is melted and bubbly. The baking time can vary slightly depending on your oven, so keep an eye on them. You’re looking for a beautiful, appetizing color.
- Cool Before Serving: Once baked, carefully remove the baking sheets from the oven. It’s tempting, but let your Beef Bacon Cheeseburger Rolls cool on the baking sheets for at least 5-10 minutes before attempting to serve them. This cooling time allows the filling to set a bit, preventing it from spilling out when you bite into them, and ensures the dough is fully set and not too delicate. Trust me, it’s worth the wait for the perfect bite!
-
Serve and Enjoy!: These Beef Bacon Cheeseburger Rolls are fantastic served warm, straight from the oven. I love to offer them with extra ketchup, mustard, or even a side of my favorite “secret sauce” (a mix of mayo, ketchup, and relish) for dipping. They make a perfect appetizer for a party, a fun lunch, or a light dinner. They are incredibly satisfying and burst with all the classic flavors of a bacon cheeseburger, but in a convenient, rollable form.
You can also serve them alongside a simple green salad or some baked fries for a complete meal. Their versatility makes them a hit in my household every time I make them.
- Storage and Reheating: If you happen to have any leftovers (which is rare in my house!), these Beef Bacon Cheeseburger Rolls store beautifully. Place cooled rolls in an airtight container and refrigerate for up to 3 days. To reheat, I recommend warming them in a preheated oven at 350°F (175°C) for about 10-15 minutes, or until heated through and the dough crisps up again. This prevents them from getting soggy, which can happen in a microwave. They’re just as delicious the next day!
Conclusion:
So, there you have it, my friends! We’ve journeyed through the steps of creating something truly special, a dish that takes beloved flavors and transforms them into an irresistible, handheld delight. What makes this recipe an absolute must-try for everyone, from seasoned home cooks to those just dipping their toes into the culinary world? It’s the sheer genius of combining the comforting, savory notes of a classic cheeseburger – the rich ground beef, the crispy bacon, the gooey melted cheese – and encasing it all in a warm, golden pastry. It’s more than just a snack; it’s a culinary experience that packs a powerful punch of flavor and satisfaction in every single bite. Imagine the smiles when you bring these out! They are a conversation starter, a guaranteed crowd-pleaser, and a wonderfully innovative way to serve up a universally loved meal. I genuinely believe that once you experience the ease of preparation and the incredible taste of these incredible Beef Bacon Cheeseburger Rolls, they’ll quickly become a cherished staple in your recipe repertoire. They offer all the beloved elements of a hearty burger without the mess, making them perfect for almost any occasion, from casual game nights to sophisticated appetizers at a dinner party.
Now that you’re armed with the knowledge to craft these masterpieces, let’s talk about how to truly elevate your serving game or put your own unique spin on them. When it comes to serving, presentation can be just as exciting as the taste itself! I love arranging these golden-brown rolls on a rustic wooden board or a vibrant platter, perhaps garnished with a sprinkle of fresh chopped parsley or chives for a pop of color and an added layer of freshness. For dips, the possibilities are endless and frankly, quite fun to explore! Classic ketchup and mustard are always a hit, but why not branch out and impress your guests? A zesty homemade burger sauce, a creamy ranch dressing, a smoky BBQ sauce, or even a spicy sriracha mayo can add an extra layer of flavor and excitement, allowing everyone to customize their experience. Consider serving them alongside a crisp, fresh side salad – perhaps a simple mixed greens with a tangy vinaigrette, or a crunchy cucumber and tomato salad – to balance the richness and add a refreshing element. Or, if you’re leaning into the full comfort food vibe, a generous serving of crispy golden fries, a hearty potato salad, or a vibrant coleslaw would be absolutely perfect companions, completing the meal in true American diner style.
But don’t stop there; let your culinary creativity soar with variations! If you want to dial up the heat, a pinch of red pepper flakes in the beef mixture, a dash of your favorite hot sauce, or a thin slice of jalapeño within the roll before baking can add a delightful kick that will awaken the taste buds. For cheese lovers, experimenting with different cheese varieties is a fantastic idea; sharp cheddar, Monterey Jack, pepper jack for an extra zing, or even a smoked gouda could offer exciting new flavor profiles that make each batch feel unique. You could also finely dice some sautéed onions, caramelized onions for a sweeter note, or pickles and mix them directly into the beef filling for an added textural and flavor dimension that mimics a fully loaded burger. For a brunch-friendly version, consider adding a fried egg (or a soft-scrambled mixture) inside with the beef and bacon – a truly decadent twist that transforms them into a breakfast-for-dinner sensation! Or, if you’re hosting a larger gathering, you could make miniature versions for easy, bite-sized appetizers that disappear quickly, or slightly larger ones for a more substantial meal that satisfies even the hungriest guests. The beauty of these rolls is their incredible adaptability; they’re a fantastic canvas for whatever culinary inspiration strikes you, allowing you to personalize them to your taste and occasion.
I am so incredibly excited for you to try this recipe. Seriously, I can practically taste them just thinking about it! There’s a profound joy that comes from creating something delicious with your own hands, and I promise you, the satisfaction of pulling these out of the oven, golden and fragrant, is immense. Don’t be intimidated; the steps are straightforward, and the reward is truly magnificent. This isn’t just about following instructions; it’s about embarking on a fun, flavorful adventure in your own kitchen. I encourage you to set aside some time, gather your ingredients, put on some good music, and truly enjoy the process of bringing these delightful creations to life. Cooking should be an experience, not just a chore, and I believe this recipe perfectly embodies that spirit.
Once you’ve experienced the magic of these Beef Bacon Cheeseburger Rolls, I would absolutely love to hear about it! Your experiences, your triumphs, and even your little experiments are what make the cooking community so vibrant and inspiring. Please, come back and share your thoughts in the comments section below. Did you try a new dip? Did you add a unique ingredient? What was the reaction from your family and friends? Did you find a clever shortcut or a brilliant variation? Your insights and feedback are invaluable, not just to me, but to future readers who are looking for inspiration and tips. So, go forth, conquer your kitchen, and bake up a batch of these incredible rolls. I can’t wait to hear all about it! Happy cooking!
Beef Bacon Cheeseburger Rolls
An ingenious culinary invention, these Beef Bacon Cheeseburger Rolls combine juicy beef, crispy beef bacon, and gooey cheese, wrapped in golden-baked dough. A truly irresistible appetizer or main course, perfect for any gathering.
Ingredients
-
1 lb (450g) lean ground beef (80/20)
-
8 slices beef bacon, diced
-
1 small yellow onion, finely diced
-
½ cup (120ml) dill pickle relish
-
¼ cup (60ml) ketchup
-
2 tbsp (30ml) yellow mustard
-
1 tsp garlic powder
-
½ tsp onion powder
-
½ tsp black pepper
-
¼ tsp salt (or to taste)
-
2 tubes (8 oz each) refrigerated crescent roll dough
-
1½ cups (170g) shredded sharp cheddar cheese
-
1 large egg, whisked with 1 tbsp water (for egg wash)
-
1 tbsp sesame seeds (optional)
Instructions
-
Step 1
In a large skillet, cook diced beef bacon until crispy (7-10 min). Remove bacon, leaving 2 tbsp fat. Sauté diced onion in fat until soft (5-7 min). Add ground beef and brown thoroughly (8-10 min), then drain excess grease. -
Step 2
Return bacon to skillet. Stir in dill pickle relish, ketchup, mustard, garlic powder, onion powder, black pepper, and salt. Mix well. Remove from heat and cool filling completely (at least 30 min) to prevent dough sogginess. -
Step 3
Preheat oven to 375°F (190°C). Line two baking sheets with parchment paper. Unroll crescent dough tubes and press perforations to form two large seamless rectangles. -
Step 4
Spread half of the cooled filling evenly over each dough rectangle, leaving a ½ inch border. Sprinkle half of the shredded cheddar cheese over the filling on each. -
Step 5
Tightly roll up each dough rectangle from a long edge, forming a log. Pinch seams and ends to seal. Slice each log into 8 equal pieces (16 rolls total). -
Step 6
Arrange rolls cut-side up on prepared baking sheets. Whisk egg with 1 tbsp water for an egg wash; brush tops of rolls. Sprinkle with sesame seeds. Bake for 18-22 minutes, or until golden brown and cheese is bubbly. -
Step 7
Let rolls cool on baking sheets for 5-10 minutes before serving. Serve warm with desired dipping sauces. Store leftovers in an airtight container for up to 3 days; reheat in oven at 350°F (175°C) for 10-15 minutes.
Important Information
Nutrition Facts (Per Serving)
It is important to consider this information as approximate and not to use it as definitive health advice.
Allergy Information
Please check ingredients for potential allergens and consult a health professional if in doubt.


Leave a Comment