
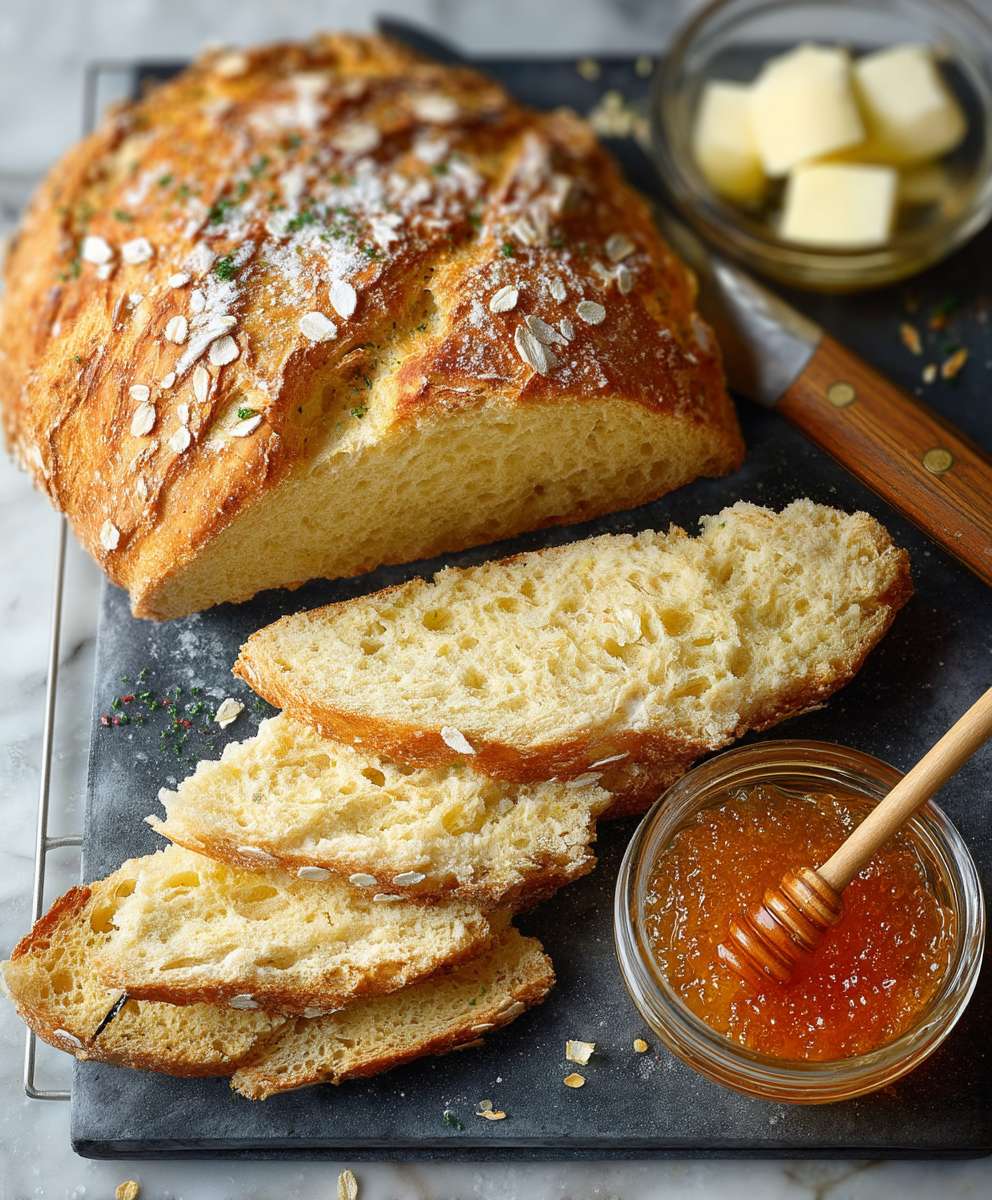
Easy No Yeast Bread: Imagine sinking your teeth into a warm, crusty loaf of homemade bread, without the fuss of yeast or lengthy rising times. Sounds too good to be true? It’s not! This recipe unlocks the secret to incredibly satisfying bread, perfect for busy weeknights or when you’re simply craving that comforting aroma filling your kitchen.
While traditional breadmaking boasts a rich history spanning millennia, relying on the magic of yeast, sometimes simplicity reigns supreme. This easy no yeast bread recipe draws inspiration from quick bread traditions found across various cultures, where baking soda or baking powder provide the lift and airy texture we all crave. Think of Irish soda bread, a staple born out of necessity and resourcefulness, or the countless variations of biscuits and scones that grace tables worldwide. These humble beginnings paved the way for this modern, streamlined approach to homemade bread.
So, why do people adore this type of bread? The answer is multifaceted. First, the convenience is undeniable. Forget proofing yeast or waiting hours for dough to rise. This recipe comes together in minutes, making it ideal for spontaneous baking. Second, the taste and texture are surprisingly delightful. While it may not have the exact same chew as a sourdough, this bread offers a satisfyingly dense yet tender crumb, perfect for sandwiches, toast, or simply enjoying with a pat of butter. Finally, it’s incredibly versatile. You can easily customize it with herbs, cheese, or even a touch of sweetness to suit your personal preferences. Get ready to experience the joy of baking without the hassle your homemade bread adventure starts here!
Ingredients:
- 3 cups all-purpose flour, plus more for dusting
- 1 teaspoon baking soda
- 1 teaspoon salt
- 1 ½ cups buttermilk (or 1 ½ cups milk mixed with 1 ½ tablespoons lemon juice or white vinegar, let sit for 5 minutes)
- 2 tablespoons melted butter, for brushing
Preparing the Dough:
Okay, let’s get started! This no-yeast bread is seriously the easiest thing you’ll ever bake. First things first, grab a large bowl. We’re going to combine all our dry ingredients in there.
- Combine Dry Ingredients: In your large bowl, whisk together the 3 cups of all-purpose flour, 1 teaspoon of baking soda, and 1 teaspoon of salt. Make sure everything is nicely combined. You don’t want any pockets of baking soda hiding in there! A good whisking ensures even distribution, which is key for a good rise and consistent flavor.
- Add the Buttermilk: Now, pour in the 1 ½ cups of buttermilk. If you don’t have buttermilk on hand (and let’s be honest, who always does?), you can easily make a substitute. Just mix 1 ½ cups of regular milk with 1 ½ tablespoons of lemon juice or white vinegar. Let it sit for about 5 minutes to curdle slightly. This gives it that tangy buttermilk flavor we’re looking for.
- Mix Until Just Combined: Using a wooden spoon or a spatula, gently mix the buttermilk into the dry ingredients. Important: Don’t overmix! Overmixing develops the gluten in the flour, which will result in a tough bread. You want to mix just until the ingredients are combined and you have a shaggy dough. It’s okay if there are a few streaks of flour remaining.
- Turn Out and Knead Lightly: Lightly flour a clean work surface. Turn the dough out onto the floured surface. Knead the dough very gently for just a minute or two. The goal here isn’t to develop gluten, but just to bring the dough together into a slightly smoother ball. If the dough is too sticky, add a little more flour, a tablespoon at a time, until it’s manageable. But remember, a slightly sticky dough is better than a dry, tough dough.
Baking the Bread:
Now that our dough is ready, let’s get it into the oven! This part is super simple.
- Prepare the Baking Sheet: Preheat your oven to 375°F (190°C). Line a baking sheet with parchment paper. This will prevent the bread from sticking and make cleanup a breeze. You can also lightly grease the baking sheet if you don’t have parchment paper.
- Shape the Dough: Gently shape the dough into a round or oval loaf. You can score the top of the loaf with a sharp knife or a lame (a special bread-scoring tool) in an “X” shape or a few parallel lines. This helps the bread expand evenly as it bakes and prevents it from cracking randomly.
- Bake the Bread: Place the loaf on the prepared baking sheet and bake for 45-55 minutes, or until the bread is golden brown and sounds hollow when tapped on the bottom. The baking time will vary depending on your oven, so keep an eye on it. If the top starts to brown too quickly, you can tent it with aluminum foil.
- Check for Doneness: To make sure the bread is fully baked, insert a wooden skewer or toothpick into the center. If it comes out clean, the bread is done. If it comes out with wet dough clinging to it, bake for a few more minutes and check again.
Cooling and Serving:
Almost there! The final step is to let the bread cool slightly before slicing and enjoying. This is important because the bread continues to cook internally as it cools.
- Cool on a Wire Rack: Remove the bread from the oven and transfer it to a wire rack to cool. Let it cool for at least 15-20 minutes before slicing. This will prevent the bread from becoming gummy.
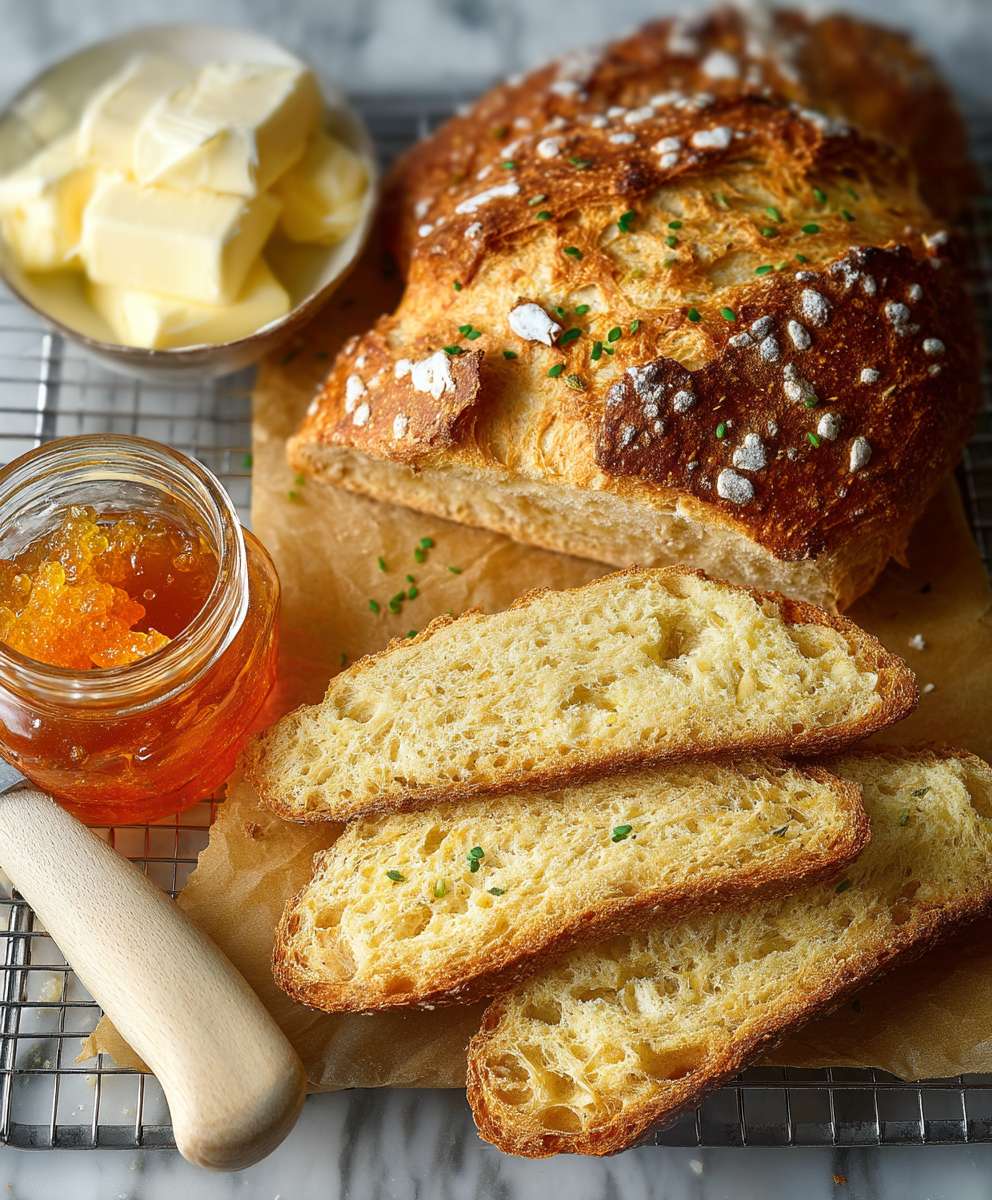
- Brush with Melted Butter (Optional): While the bread is still warm, brush the top with 2 tablespoons of melted butter. This will give it a beautiful sheen and add a little extra flavor. You can also sprinkle it with a little sea salt for an extra touch.
- Slice and Serve: Once the bread has cooled slightly, slice it with a serrated bread knife. Serve it warm with butter, jam, cheese, or your favorite toppings. It’s also delicious on its own!
Tips and Variations:
This recipe is super versatile, so feel free to experiment and make it your own! Here are a few ideas to get you started:
- Add Herbs: Mix in a tablespoon or two of chopped fresh herbs, such as rosemary, thyme, or oregano, to the dough for a savory twist.
- Add Cheese: Stir in a cup of shredded cheese, such as cheddar, mozzarella, or Parmesan, for a cheesy bread.
- Add Seeds: Sprinkle the top of the loaf with sesame seeds, poppy seeds, or sunflower seeds before baking for added texture and flavor.
- Make it Sweet: Add a quarter cup of sugar and a teaspoon of cinnamon to the dough for a sweet bread. You can also add raisins, dried cranberries, or chocolate chips.
- Use Whole Wheat Flour: Substitute up to half of the all-purpose flour with whole wheat flour for a healthier bread. Keep in mind that whole wheat flour absorbs more liquid, so you may need to add a little more buttermilk.
- Garlic Bread Variation: After baking, slice the bread and spread with garlic butter (melted butter mixed with minced garlic and herbs). Broil for a minute or two until the garlic butter is melted and bubbly.
- Irish Soda Bread: This recipe is very similar to Irish Soda Bread. For a more authentic Irish Soda Bread, add 1/4 cup of sugar and 1/2 cup of raisins or currants to the dough. You can also brush the top with an egg wash before baking for a shinier crust.
Troubleshooting:
Even the easiest recipes can sometimes have hiccups. Here are a few common problems and how to fix them:
- Bread is too dense: This is usually caused by overmixing the dough. Remember to mix just until the ingredients are combined. Also, make sure your baking soda is fresh.
- Bread is too dry: This could be caused by using too much flour or not enough buttermilk. Make sure you’re measuring your ingredients accurately. If you’re using whole wheat flour, you may need to add a little more buttermilk.
- Bread is too sticky: This could be caused by using too much buttermilk or not enough flour. Add a little more flour, a tablespoon at a time, until the dough is manageable.
- Bread is browning too quickly: Tent the top of the loaf with aluminum foil to prevent it from burning.
- Bread is not cooking through: Bake for a few more minutes and check again with a wooden skewer or toothpick.
Storage:
This no-yeast bread is best enjoyed fresh, but it can be stored at room temperature for up to 2 days. Wrap it tightly in plastic wrap or store it in an airtight container to prevent it from drying out. You can also freeze the bread for up to 2 months. Wrap it tightly in plastic wrap and then in aluminum foil. Thaw it at room temperature before slicing and serving.
Why This Recipe Works:
The magic of this recipe lies in the baking soda and buttermilk. The baking soda acts as a leavening agent, creating air bubbles that make the bread rise. The buttermilk adds a tangy flavor and helps to tenderize the dough. Because we’re not using yeast, there’s no need to wait for the dough to rise, which makes this a perfect recipe for busy weeknights.
Enjoy Your Homemade Bread!
I hope you enjoy this easy no-yeast bread recipe as much as I do! It’s a simple, satisfying, and delicious way to enjoy homemade bread without all the fuss. Happy baking!
Conclusion:
So there you have it! This easy no yeast bread recipe is truly a game-changer. I know what you’re thinking: “No yeast? Can it really be good?” Trust me, it is! The texture is wonderfully soft and chewy, the flavor is subtly tangy and satisfying, and the sheer simplicity of the process makes it a must-try for anyone, regardless of their baking experience. Forget kneading for hours or waiting for dough to rise this recipe delivers fresh, homemade bread in a fraction of the time. It’s perfect for busy weeknights, impromptu gatherings, or simply when you crave the comfort of warm, freshly baked bread without the fuss.
But the best part? It’s incredibly versatile! While this recipe is fantastic as is, feel free to experiment and make it your own. For a savory twist, try adding chopped herbs like rosemary, thyme, or chives to the dough. A sprinkle of everything bagel seasoning on top before baking adds a delightful crunch and flavor. If you’re feeling adventurous, incorporate some grated cheese, such as cheddar or parmesan, for an extra cheesy and delicious loaf. For a sweeter variation, add a touch of honey or maple syrup to the dough, along with some cinnamon and raisins. The possibilities are endless!
Serving suggestions? Oh, where do I even begin? This bread is absolutely divine toasted and slathered with butter or your favorite jam. It makes incredible sandwiches think grilled cheese, BLTs, or even just a simple turkey and avocado. It’s also perfect for dipping into soups, stews, or olive oil. And let’s not forget about using it to make croutons for salads or breadcrumbs for your favorite recipes. Honestly, once you have a loaf of this easy no yeast bread on hand, you’ll find yourself reaching for it again and again.
I’ve made this recipe countless times, and it always comes out perfectly. It’s become a staple in my kitchen, and I know it will become one in yours too. The satisfaction of pulling a warm, fragrant loaf of bread from the oven is simply unmatched. And knowing that you made it yourself, with minimal effort, makes it even more rewarding.
So, what are you waiting for? Gather your ingredients, preheat your oven, and get ready to experience the joy of baking your own easy no yeast bread. I promise you won’t be disappointed. And once you’ve tried it, I’d love to hear about your experience! Share your photos, your variations, and your serving suggestions in the comments below. Let’s create a community of no-yeast bread enthusiasts! Happy baking!
I’m confident that this recipe will become a go-to for you, just as it has for me. It’s a simple, satisfying, and delicious way to enjoy homemade bread without the hassle. Don’t be intimidated by baking this recipe is foolproof! Give it a try, and let me know what you think. I can’t wait to hear all about your baking adventures!
Easy No Yeast Bread: Simple Recipe for Delicious Homemade Bread
A simple and delicious homemade bread recipe that requires no yeast and is ready in under an hour! Perfect for busy weeknights.
Ingredients
- 3 cups all-purpose flour, plus more for dusting
- 1 teaspoon baking soda
- 1 teaspoon salt
- 1 ½ cups buttermilk (or 1 ½ cups milk mixed with 1 ½ tablespoons lemon juice or white vinegar, let sit for 5 minutes)
- 2 tablespoons melted butter, for brushing (optional)
Instructions
- Combine Dry Ingredients: In a large bowl, whisk together the flour, baking soda, and salt.
- Add Buttermilk: Pour in the buttermilk (or buttermilk substitute).
- Mix Until Just Combined: Gently mix the buttermilk into the dry ingredients until just combined. Do not overmix.
- Knead Lightly: Lightly flour a clean work surface. Turn the dough out and knead gently for 1-2 minutes to form a slightly smoother ball. Add a little more flour if the dough is too sticky.
- Prepare Baking Sheet: Preheat oven to 375°F (190°C). Line a baking sheet with parchment paper.
- Shape the Dough: Gently shape the dough into a round or oval loaf. Score the top of the loaf with a sharp knife.
- Bake the Bread: Place the loaf on the prepared baking sheet and bake for 45-55 minutes, or until golden brown and sounds hollow when tapped. If the top browns too quickly, tent with foil.
- Check for Doneness: Insert a wooden skewer or toothpick into the center. If it comes out clean, the bread is done.
- Cool on a Wire Rack: Remove the bread from the oven and transfer it to a wire rack to cool for at least 15-20 minutes.
- Brush with Melted Butter (Optional): While the bread is still warm, brush the top with melted butter.
- Slice and Serve: Slice and serve warm with butter, jam, cheese, or your favorite toppings.
Notes
- Buttermilk Substitute: If you don’t have buttermilk, mix 1 ½ cups of milk with 1 ½ tablespoons of lemon juice or white vinegar. Let it sit for 5 minutes before using.
- Don’t Overmix: Overmixing the dough will result in a tough bread. Mix just until the ingredients are combined.
- Scoring the Dough: Scoring the top of the loaf helps it expand evenly and prevents cracking.
- Variations: Add herbs, cheese, seeds, or spices to the dough for different flavors.
- Storage: Store at room temperature for up to 2 days in an airtight container or wrapped tightly in plastic wrap. Freeze for up to 2 months.


Leave a Comment