
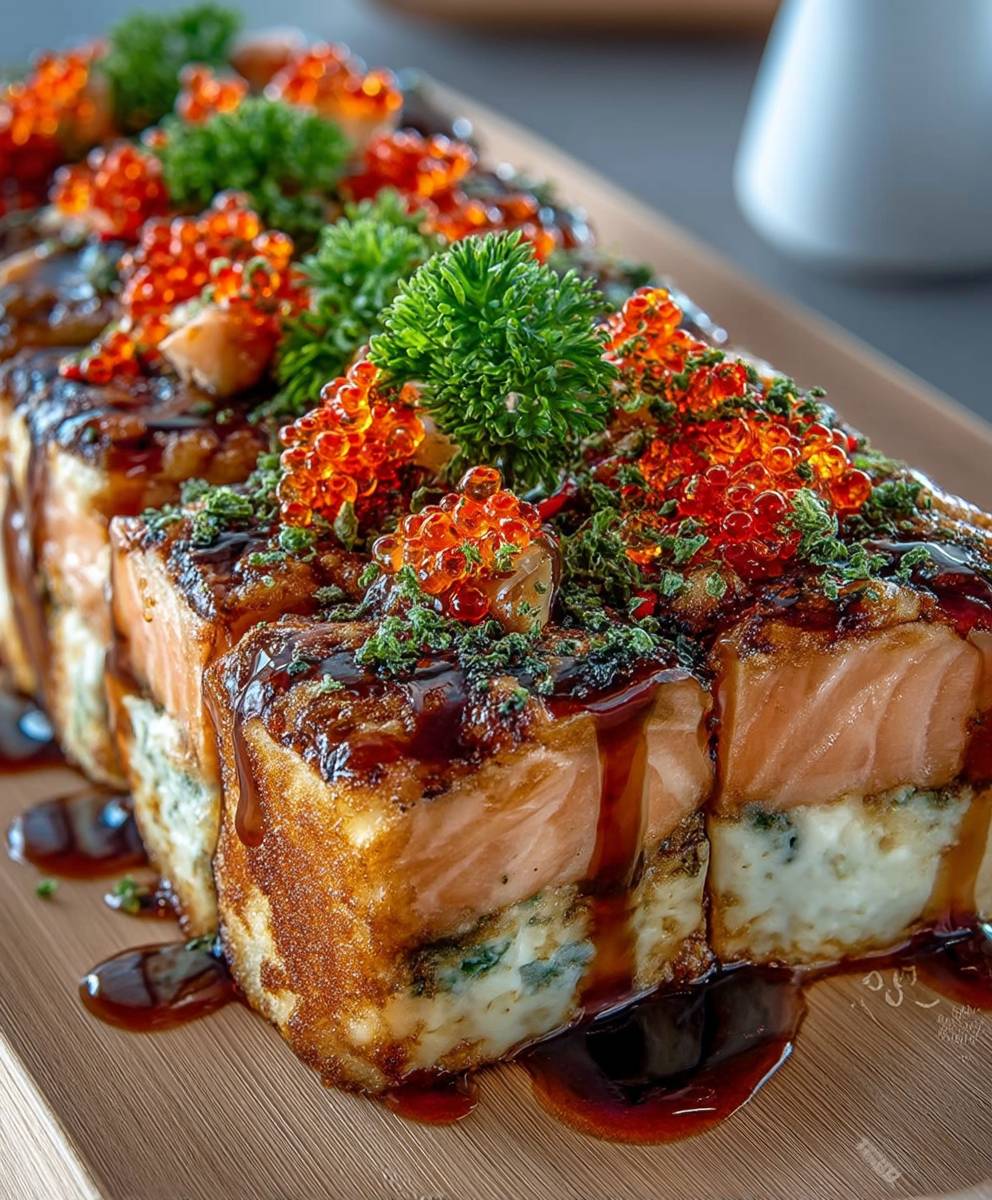
Spicy Salmon Sushi Bake: Prepare to experience sushi in a whole new, incredibly delicious way! Forget meticulously rolling individual pieces; this deconstructed sushi bake delivers all the familiar flavors you crave in a fraction of the time and with minimal effort. Have you ever thought about how sushi, traditionally a delicate art form perfected over centuries in Japan, could be transformed into a comforting, shareable casserole? While the origins of the sushi bake are more modern, its inspiration clearly lies in the rich history of Japanese cuisine and the desire to make these flavors accessible to everyone.
What makes this spicy salmon sushi bake so irresistible? It’s the perfect combination of creamy, spicy salmon, fluffy rice, and crispy nori seaweed. The contrasting textures and vibrant flavors create a symphony in your mouth. People adore this dish because it’s quick, easy to customize, and a guaranteed crowd-pleaser. Whether you’re hosting a casual get-together or simply craving a satisfying weeknight meal, this sushi bake is the answer. Get ready to dive into a culinary adventure that will redefine your sushi experience!
Ingredients:
- For the Sushi Rice:
- 2 cups sushi rice
- 2 cups water
- 1/4 cup rice vinegar
- 2 tablespoons sugar
- 1 teaspoon salt
- For the Spicy Salmon:
- 1 pound sushi-grade salmon, skin removed and finely diced
- 1/4 cup mayonnaise (Japanese mayo, like Kewpie, is preferred)
- 2-3 tablespoons sriracha (adjust to your spice preference)
- 1 tablespoon soy sauce
- 1 teaspoon sesame oil
- 1 tablespoon masago or tobiko (optional, for extra flavor and texture)
- 1 green onion, thinly sliced
- For the Toppings:
- 1 avocado, thinly sliced
- 1/4 cup eel sauce (unagi sauce)
- Sesame seeds (black and white)
- Nori seaweed sheets, cut into squares or strips
- Spicy mayo (optional, for drizzling)
- Crispy fried onions (optional, for added crunch)
Preparing the Sushi Rice:
- Rinse the Rice: Place the sushi rice in a fine-mesh sieve and rinse under cold running water until the water runs clear. This usually takes about 3-4 minutes. Rinsing removes excess starch, which helps the rice cook properly and prevents it from becoming too sticky.
- Cook the Rice: Transfer the rinsed rice to a rice cooker or a heavy-bottomed pot. Add 2 cups of water. If using a rice cooker, simply press the “cook” button. If using a pot, bring the water to a boil over high heat. Once boiling, reduce the heat to low, cover the pot tightly, and simmer for 18 minutes. It’s crucial not to lift the lid during this time, as the steam is essential for cooking the rice evenly.
- Rest the Rice: After 18 minutes, remove the pot from the heat and let it stand, covered, for 10 minutes. This allows the rice to fully absorb the remaining moisture and become perfectly fluffy.
- Prepare the Sushi Vinegar: While the rice is resting, prepare the sushi vinegar mixture. In a small saucepan, combine the rice vinegar, sugar, and salt. Heat over low heat, stirring constantly, until the sugar and salt are completely dissolved. Do not boil the mixture. Alternatively, you can microwave the mixture for about 30 seconds, stirring until dissolved.
- Season the Rice: Gently transfer the cooked rice to a large, non-metallic bowl (a wooden sushi rice tub, or hangiri, is ideal, but any large bowl will work). Pour the sushi vinegar mixture over the rice. Using a rice paddle or a wooden spoon, gently cut and fold the vinegar into the rice. Avoid mashing the rice. The goal is to evenly distribute the vinegar without breaking the grains. Fan the rice while mixing to help it cool down quickly. This also helps the rice absorb the vinegar better. Continue mixing and fanning until the rice is cooled to room temperature. This step is important because warm rice will make the salmon cook slightly when assembled.
Preparing the Spicy Salmon:
- Prepare the Salmon: Ensure your sushi-grade salmon is very fresh and has been properly handled. Remove any skin or bones. Finely dice the salmon into small, uniform pieces. The smaller the pieces, the easier it will be to mix and spread evenly in the bake.
- Make the Spicy Mayo Mixture: In a medium bowl, combine the mayonnaise (Kewpie is highly recommended for its richer flavor), sriracha, soy sauce, and sesame oil. Adjust the amount of sriracha to your desired level of spiciness. Start with 2 tablespoons and add more if you prefer a hotter flavor.
- Combine Salmon and Spicy Mayo: Add the diced salmon to the spicy mayo mixture. Gently fold the salmon into the mixture until it is evenly coated. Be careful not to overmix, as this can make the salmon mushy.
- Add Optional Ingredients: If using, stir in the masago or tobiko and the thinly sliced green onion. These ingredients add extra flavor, texture, and visual appeal to the spicy salmon mixture.
- Taste and Adjust: Taste the spicy salmon mixture and adjust the seasoning as needed. You may want to add a pinch of salt or a dash more soy sauce, depending on your preference.
Assembling the Spicy Salmon Sushi Bake:
- Preheat the Oven (Optional): While some people prefer to serve this bake cold, I personally enjoy it warm. If you prefer a warm bake, preheat your oven to 350°F (175°C). If you prefer it cold, skip this step.
- Prepare the Baking Dish: Choose a baking dish that is appropriately sized for the amount of rice and salmon you have. An 8×8 inch square dish or a similar-sized round dish works well. Lightly grease the bottom of the dish with cooking spray or a small amount of oil to prevent the rice from sticking.
- Layer the Sushi Rice: Spread the prepared sushi rice evenly over the bottom of the baking dish. Gently press the rice down to create a firm, even layer. This layer should be about 1-1.5 inches thick.
- Layer the Spicy Salmon: Carefully spread the spicy salmon mixture evenly over the layer of sushi rice. Make sure the salmon covers the entire surface of the rice.
- Bake (Optional): If you are baking the sushi bake, place the dish in the preheated oven and bake for 10-15 minutes, or until the salmon is heated through and slightly browned on top. Keep a close eye on it to prevent the salmon from drying out. If you are serving it cold, skip this step.
- Cool Slightly (If Baked): If you baked the sushi bake, remove it from the oven and let it cool slightly for a few minutes before adding the toppings.
- Add the Toppings: Arrange the thinly sliced avocado over the top of the spicy salmon. Drizzle generously with eel sauce. Sprinkle with black and white sesame seeds. If desired, drizzle with additional spicy mayo and sprinkle with crispy fried onions.
- Cut and Serve: Cut the sushi bake into squares or rectangles. Serve immediately with nori seaweed sheets for wrapping. You can also serve it with additional soy sauce or wasabi, if desired.
Serving Suggestions:
- Nori Seaweed: Provide small squares or strips of nori seaweed for your guests to wrap the sushi bake. This is the most traditional way to enjoy it.
- Soy Sauce and Wasabi: Offer soy sauce and wasabi on the side for those who want to add extra flavor.
- Spicy Mayo: A drizzle of extra spicy mayo can add an extra kick of heat.
- Crispy Fried Onions: These add a delightful crunch and savory flavor.
- Edamame: Serve a side of steamed edamame for a complete and balanced meal.
- Miso Soup: A warm bowl of miso soup complements the sushi bake perfectly.
- Pickled Ginger: Pickled ginger (gari) is a classic sushi accompaniment that helps cleanse the palate between bites.
Tips and Variations:
- Salmon Substitute: If you’re not a fan of salmon, you can substitute it with tuna, crab meat, or even cooked shrimp.
- Vegetarian Option: For a vegetarian version, use marinated tofu or avocado instead of salmon.
- Spice Level: Adjust the amount of sriracha to control the spice level. You can also add a pinch of cayenne pepper for extra heat.
- Rice Variety: While sushi rice is recommended, you can use other short-grain rice varieties if necessary. Just make sure to adjust the cooking time and water ratio accordingly.
- Make Ahead: You can prepare the sushi rice and spicy salmon mixture ahead of time and store them separately in the refrigerator. Assemble the sushi bake just before serving.
- Broiling: For a more intense browning on top, you can broil the sushi bake for a minute or two after baking. Watch it carefully to prevent burning.
- Individual Servings: For a more elegant presentation, you can assemble the sushi bake in individual ramekins or small baking dishes.
- Adding Vegetables: Consider adding other vegetables like cucumber, carrots, or bell peppers for added flavor and texture. Finely dice them and mix them into the spicy salmon mixture.
- Cream Cheese: For a richer flavor, you can add a layer of cream cheese between the rice and the salmon.
- 2 cups sushi rice
- 2 cups water
- 1/4 cup rice vinegar
- 2 tablespoons sugar
- 1 teaspoon salt
- 1 pound sushi-grade salmon, skin removed and finely diced
- 1/4 cup mayonnaise (Japanese mayo, like Kewpie, is preferred)
- 2-3 tablespoons sriracha (adjust to your spice preference)
- 1 tablespoon soy sauce
- 1 teaspoon sesame oil
- 1 tablespoon masago or tobiko (optional, for extra flavor and texture)
- 1 green onion, thinly sliced
- 1 avocado, thinly sliced
- 1/4 cup eel sauce (unagi sauce)
- Sesame seeds (black and white)
- Nori seaweed sheets, cut into squares or strips
- Spicy mayo (optional, for drizzling)
- Crispy fried onions (optional, for added crunch)
- Rinse the Rice: Place the sushi rice in a fine-mesh sieve and rinse under cold running water until the water runs clear (3-4 minutes).
- Cook the Rice: Transfer the rinsed rice to a rice cooker or a heavy-bottomed pot. Add 2 cups of water. If using a rice cooker, simply press the “cook” button. If using a pot, bring the water to a boil over high heat. Once boiling, reduce the heat to low, cover the pot tightly, and simmer for 18 minutes.
- Rest the Rice: After 18 minutes, remove the pot from the heat and let it stand, covered, for 10 minutes.
- Prepare the Sushi Vinegar: While the rice is resting, prepare the sushi vinegar mixture. In a small saucepan, combine the rice vinegar, sugar, and salt. Heat over low heat, stirring constantly, until the sugar and salt are completely dissolved. Do not boil the mixture. Alternatively, you can microwave the mixture for about 30 seconds, stirring until dissolved.
- Season the Rice: Gently transfer the cooked rice to a large, non-metallic bowl. Pour the sushi vinegar mixture over the rice. Using a rice paddle or a wooden spoon, gently cut and fold the vinegar into the rice. Avoid mashing the rice. Fan the rice while mixing to help it cool down quickly. Continue mixing and fanning until the rice is cooled to room temperature.
- Prepare the Salmon: Ensure your sushi-grade salmon is very fresh and has been properly handled. Remove any skin or bones. Finely dice the salmon into small, uniform pieces.
- Make the Spicy Mayo Mixture: In a medium bowl, combine the mayonnaise (Kewpie is highly recommended for its richer flavor), sriracha, soy sauce, and sesame oil. Adjust the amount of sriracha to your desired level of spiciness.
- Combine Salmon and Spicy Mayo: Add the diced salmon to the spicy mayo mixture. Gently fold the salmon into the mixture until it is evenly coated. Be careful not to overmix, as this can make the salmon mushy.
- Add Optional Ingredients: If using, stir in the masago or tobiko and the thinly sliced green onion.
- Taste and Adjust: Taste the spicy salmon mixture and adjust the seasoning as needed.
- (Optional) Preheat the Oven: Preheat your oven to 350°F (175°C) if you prefer a warm bake.
- Prepare the Baking Dish: Choose a baking dish (8×8 inch square or similar). Lightly grease the bottom of the dish with cooking spray or a small amount of oil to prevent the rice from sticking.
- Layer the Sushi Rice: Spread the prepared sushi rice evenly over the bottom of the baking dish. Gently press the rice down to create a firm, even layer (about 1-1.5 inches thick).
- Layer the Spicy Salmon: Carefully spread the spicy salmon mixture evenly over the layer of sushi rice. Make sure the salmon covers the entire surface of the rice.
- (Optional) Bake: If you are baking the sushi bake, place the dish in the preheated oven and bake for 10-15 minutes, or until the salmon is heated through and slightly browned on top. Keep a close eye on it to prevent the salmon from drying out.
- (If Baked) Cool Slightly: If you baked the sushi bake, remove it from the oven and let it cool slightly for a few minutes before adding the toppings.
- Add the Toppings: Arrange the thinly sliced avocado over the top of the spicy salmon. Drizzle generously with eel sauce. Sprinkle with black and white sesame seeds. If desired, drizzle with additional spicy mayo and sprinkle with crispy fried onions.
- Cut and Serve: Cut the sushi bake into squares or rectangles. Serve immediately with nori seaweed sheets for wrapping. You can also serve it with additional soy sauce or wasabi, if desired.
- Use sushi-grade salmon for safety.
- Kewpie mayonnaise is recommended for its richer flavor.
- Adjust the amount of sriracha to your spice preference.
- Fanning the rice while mixing with the vinegar helps it cool quickly and absorb the vinegar better.
- You can prepare the sushi rice and spicy salmon mixture ahead of time and store them separately in the refrigerator.
- For a vegetarian version, use marinated tofu or avocado instead of salmon.
- Serve with nori seaweed, soy sauce, wasabi, edamame, miso soup, and pickled ginger.
Conclusion:
This Spicy Salmon Sushi Bake isn’t just another recipe; it’s a flavor explosion waiting to happen! From the creamy, spicy salmon topping to the perfectly seasoned sushi rice, every bite is a delightful dance of textures and tastes. I truly believe this is a must-try dish for anyone who loves sushi but wants a quicker, easier, and more budget-friendly way to enjoy those familiar flavors. Forget spending a fortune at the sushi restaurant; you can create a restaurant-quality meal right in your own kitchen.
Why is this Spicy Salmon Sushi Bake a game-changer? It’s all about the simplicity and the incredible taste. It’s perfect for a weeknight dinner when you’re short on time but still craving something satisfying and delicious. It’s also fantastic for potlucks or gatherings because it’s easy to transport and always a crowd-pleaser. Plus, it’s incredibly versatile!
Looking for serving suggestions? I love to serve this bake with a side of edamame and a crisp cucumber salad for a complete and balanced meal. A drizzle of extra sriracha mayo on top adds an extra kick for those who like it extra spicy. You could also garnish it with some toasted sesame seeds, chopped green onions, or even a sprinkle of furikake for added flavor and visual appeal.
But the fun doesn’t stop there! Feel free to experiment with variations to make this recipe your own. If you’re not a fan of salmon, you could easily substitute it with tuna, shrimp, or even imitation crab meat. For a vegetarian option, try using marinated tofu or a mix of sautéed mushrooms and vegetables. You can also adjust the level of spiciness to your liking by adding more or less sriracha to the mayo mixture.
Here are a few more ideas to get your creative juices flowing:
* Deluxe Version: Add a layer of avocado slices between the rice and the salmon topping for extra creaminess and healthy fats.
* Crunchy Version: Sprinkle some panko breadcrumbs mixed with melted butter on top before baking for a crispy, golden crust.
* Deconstructed Version: Serve the rice and salmon topping separately, allowing everyone to assemble their own “sushi bowls.”
I’m so excited for you to try this recipe! I poured my heart into perfecting it, and I know you’re going to love it as much as I do. The beauty of this Spicy Salmon Sushi Bake lies in its adaptability and the sheer joy of creating something delicious and satisfying with your own hands.
So, what are you waiting for? Gather your ingredients, preheat your oven, and get ready to embark on a culinary adventure. I promise you won’t be disappointed.
Once you’ve made this Spicy Salmon Sushi Bake, I would absolutely love to hear about your experience! Did you make any modifications? What did you serve it with? What did your family and friends think? Please share your photos and comments with me. Your feedback is invaluable, and it helps me continue to create and share recipes that you’ll love. Happy baking (or should I say, happy baking and sushi-ing!) and I can’t wait to see your creations! Let me know if you have any questions, and I’ll do my best to answer them. Enjoy!
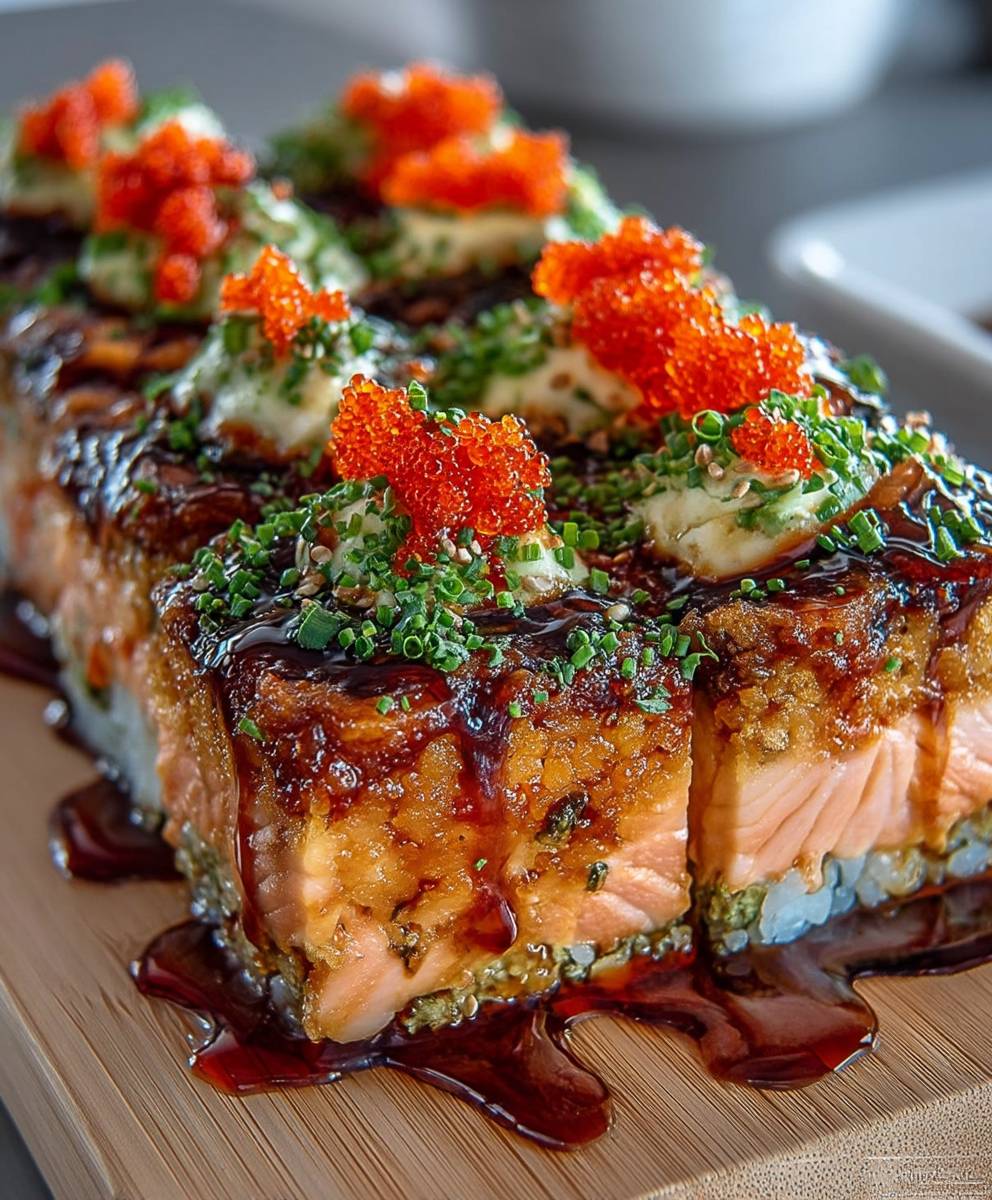
Spicy Salmon Sushi Bake: The Ultimate Recipe & Guide
Deconstructed spicy salmon sushi bake with seasoned rice, spicy salmon, avocado, eel sauce, and sesame seeds. A warm, shareable, and delicious dish!


Leave a Comment