
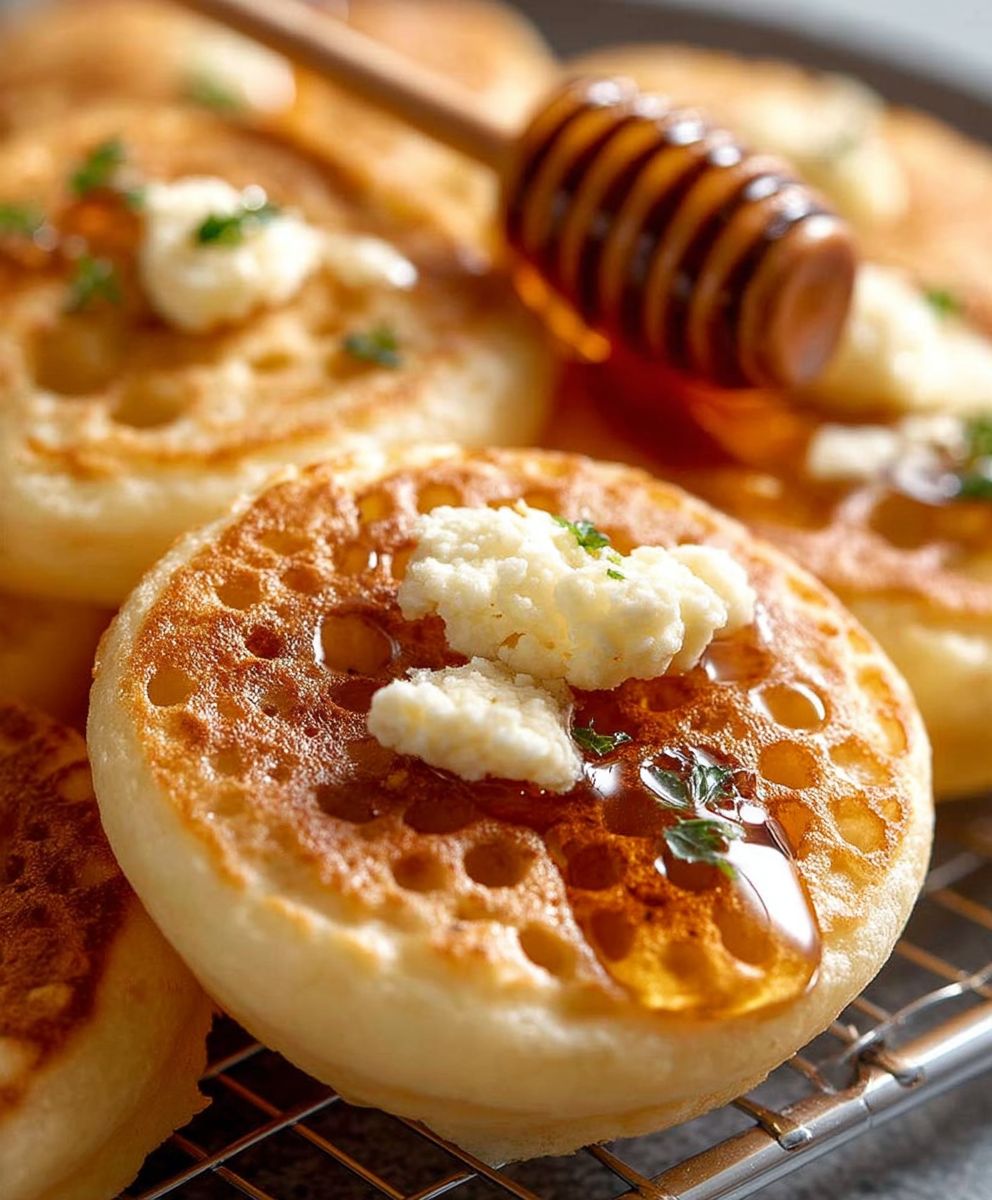
Homemade Crumpets, those delightfully spongy and hole-filled breakfast treats, are easier to make than you might think! Forget the store-bought variety; imagine waking up to the aroma of freshly baked crumpets, ready to be slathered with butter and your favorite toppings. Are you ready to ditch the pre-packaged and embark on a crumpet-making adventure?
Crumpets have a rich history, tracing back to early medieval Britain. Originally cooked on griddles or over open fires, they were a staple in the diets of the working class. Over time, they evolved into the beloved breakfast and tea-time treat we know today. Their unique texture, a delightful combination of chewy and airy, is what sets them apart. The characteristic holes, perfect for trapping melted butter or jam, are a testament to the magic of yeast and a hot griddle.
People adore homemade crumpets for several reasons. First, the taste is simply superior. Freshly made, they have a subtle sweetness and a satisfying chewiness that pre-made versions often lack. Second, they are incredibly versatile. Enjoy them with sweet toppings like honey, maple syrup, or fruit preserves, or savory options like cheese, avocado, or even a fried egg. Finally, making your own crumpets is a rewarding experience. It’s a chance to connect with a culinary tradition and create something truly special from scratch. So, let’s get started and unlock the secrets to perfect homemade crumpets!
Ingredients:
- 225g (8oz) plain flour, plus extra for dusting
- 1 tsp baking powder
- ½ tsp bicarbonate of soda
- ½ tsp salt
- 300ml (10fl oz) milk, lukewarm
- 150ml (5fl oz) water, lukewarm
- 1 tbsp melted butter, plus extra for greasing
- Vegetable oil, for greasing
Preparing the Crumpet Batter
Okay, let’s get started! Making crumpets from scratch might seem a little daunting, but trust me, it’s totally worth the effort. The key is getting the batter just right, so pay close attention to these steps.
- Sifting the Dry Ingredients: First things first, grab a large mixing bowl. We need to sift together the flour, baking powder, bicarbonate of soda, and salt. Sifting is crucial because it helps to aerate the flour and ensures that the baking powder and bicarbonate of soda are evenly distributed. This will give us those lovely little holes that are characteristic of a good crumpet. So, sift the 225g of plain flour, 1 tsp of baking powder, ½ tsp of bicarbonate of soda, and ½ tsp of salt into the bowl. Give it a good whisk to make sure everything is combined properly.
- Creating the Well: Now, make a well in the center of the dry ingredients. This is where we’ll pour in the wet ingredients.
- Adding the Wet Ingredients: In a separate jug, combine the 300ml of lukewarm milk and 150ml of lukewarm water. It’s important that the milk and water are lukewarm, not hot or cold. Lukewarm liquid activates the yeast (if you were using it, which we aren’t in this recipe) and helps the batter to rise properly. Pour the milk and water mixture into the well you created in the dry ingredients.
- Mixing the Batter: Using a whisk, gradually start incorporating the dry ingredients into the wet ingredients. Start from the center and work your way outwards. Be careful not to overmix the batter. You want to mix it until just combined. A few lumps are perfectly fine in fact, they’re preferable to a completely smooth batter. Overmixing can develop the gluten in the flour, which will result in tough crumpets. We want light and airy crumpets, so gentle mixing is key!
- Adding the Melted Butter: Now, add the 1 tbsp of melted butter to the batter. The melted butter adds richness and flavor to the crumpets. Gently fold the butter into the batter until it’s evenly distributed.
- Resting the Batter: This is a crucial step, so don’t skip it! Cover the bowl with a clean tea towel or plastic wrap and let the batter rest at room temperature for at least 30 minutes, or even up to an hour. This resting period allows the gluten in the flour to relax, which will result in a more tender crumpet. It also gives the baking powder and bicarbonate of soda time to work their magic, creating those all-important air bubbles.
Cooking the Crumpets
Alright, the batter’s rested, and we’re ready to cook! This part requires a little bit of technique, but with a little practice, you’ll be churning out perfect crumpets in no time.
- Preparing the Rings and Pan: You’ll need crumpet rings for this step. If you don’t have crumpet rings, you can use metal cookie cutters or even tuna cans with the bottoms removed. Just make sure they’re clean and food-safe. Lightly grease the inside of the rings with vegetable oil. This will prevent the crumpets from sticking to the rings. Now, lightly grease a large frying pan or griddle with vegetable oil. Place the pan over medium-low heat. It’s important to use medium-low heat because you want the crumpets to cook slowly and evenly. If the heat is too high, they’ll burn on the outside before they’re cooked through on the inside.
- Placing the Rings in the Pan: Carefully place the greased crumpet rings in the hot pan. Make sure they’re evenly spaced apart.
- Pouring the Batter: Give the batter a gentle stir. Then, using a ladle or a measuring cup, carefully pour the batter into the rings, filling them about halfway full. Don’t overfill the rings, as the batter will rise as it cooks.
- Cooking the Crumpets: Now, the patience game begins! Cook the crumpets for about 8-10 minutes, or until bubbles start to appear on the surface and the tops look set. The tops should no longer be wet or sticky. The edges of the crumpets should also start to look golden brown.
- Removing the Rings: Once the tops of the crumpets are set, carefully remove the rings using a pair of tongs or a spatula. If the crumpets are sticking to the rings, gently run a knife around the inside of the rings to loosen them.
- Flipping the Crumpets (Optional): This step is optional, but I like to flip the crumpets over and cook them for another minute or two on the other side. This helps to ensure that they’re cooked through and gives them a nice golden brown color on both sides.
- Repeat: Repeat the process with the remaining batter, greasing the rings and pan as needed.
Serving Your Homemade Crumpets
Congratulations, you’ve made your own homemade crumpets! Now for the best part enjoying them!
- Toasting (Optional): While not strictly necessary, toasting the crumpets lightly before serving enhances their texture and flavor. Pop them in a toaster or under a broiler for a minute or two until they’re golden brown and crispy.
- Serving Suggestions: The possibilities are endless! Here are a few of my favorite ways to serve crumpets:
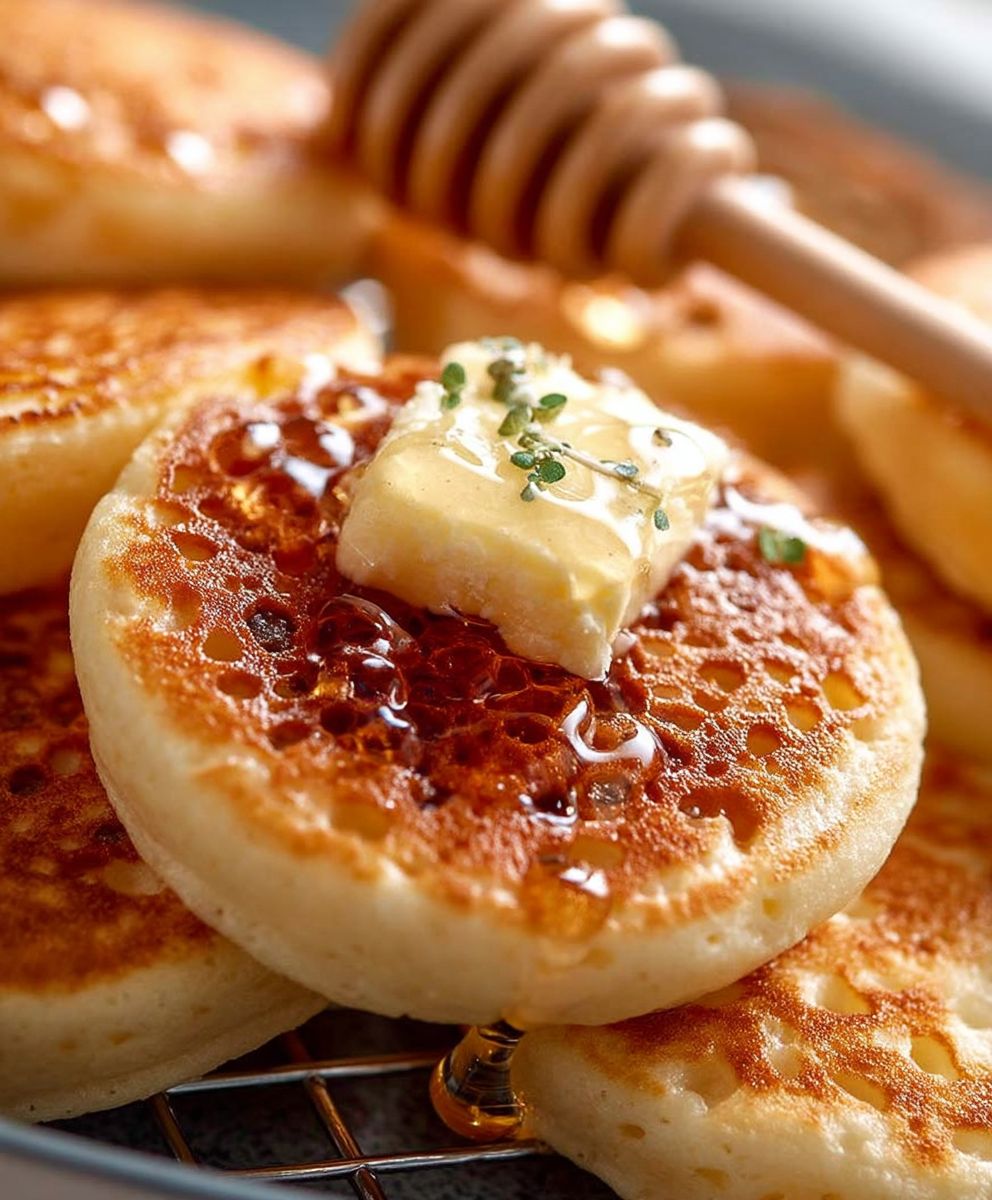
- With Butter: The classic choice! Simply spread with plenty of butter and enjoy.
- With Jam: Another classic! Choose your favorite jam strawberry, raspberry, or even marmalade.
- With Honey: A drizzle of honey adds a touch of sweetness.
- With Cheese: For a savory option, top with grated cheese and melt under the broiler.
- With Eggs: Top with a poached or fried egg for a delicious breakfast or brunch.
- With Avocado: For a trendy twist, top with mashed avocado, a sprinkle of salt and pepper, and a squeeze of lemon juice.
- Enjoy Immediately: Crumpets are best enjoyed fresh and warm. So, grab a cup of tea or coffee, sit back, and savor the fruits of your labor!
Tips for Perfect Crumpets:
- Use Lukewarm Liquids: As mentioned earlier, lukewarm milk and water are essential for activating the baking powder and bicarbonate of soda.
- Don’t Overmix the Batter: Overmixing will result in tough crumpets.
- Rest the Batter: This allows the gluten to relax and the baking powder and bicarbonate of soda to work their magic.
- Use Medium-Low Heat: This ensures that the crumpets cook evenly and don’t burn on the outside.
- Grease the Rings and Pan Well: This prevents the crumpets from sticking.
- Be Patient: Cooking crumpets takes time, so be patient and don’t rush the process.
Storing Leftover Crumpets:
If you happen to have any leftover crumpets (which is unlikely!), you can store them in an airtight container at room temperature for up to 2 days. You can also freeze them for up to 2 months. To reheat, simply toast them or warm them in a microwave.
Conclusion:
So, there you have it! I truly believe this homemade crumpets recipe is a must-try for anyone who appreciates a warm, comforting breakfast or a delightful afternoon treat. Forget the store-bought versions once you taste the difference that freshly made crumpets offer, you’ll never go back. The slightly tangy flavor, the perfect balance of chewy and airy textures, and those glorious nooks and crannies just waiting to be filled with melted butter its an experience that elevates the simple crumpet to something truly special.
But why is this recipe so special, you might ask? It’s all about the process, the ingredients, and the love you put into it. This isn’t just a recipe; it’s a journey into the heart of baking, a chance to connect with the simple pleasures of creating something delicious from scratch. The satisfaction of seeing those bubbles form on the griddle, knowing that each one promises a pocket of buttery goodness, is simply unmatched. And the aroma that fills your kitchen as they cook? Pure bliss!
Beyond the sheer deliciousness, these homemade crumpets are incredibly versatile. Of course, the classic serving suggestion is generous slatherings of butter, perhaps with a drizzle of honey or maple syrup. But don’t stop there! Get creative with your toppings. Try a dollop of clotted cream and a spoonful of your favorite jam for a truly decadent treat. Or, for a savory twist, top them with poached eggs, smoked salmon, and a sprinkle of fresh dill. They also make a fantastic base for mini pizzas or open-faced sandwiches.
Looking for variations? Experiment with different flours! Whole wheat flour will add a nutty flavor and a slightly denser texture. You could even try adding a pinch of cinnamon or nutmeg to the batter for a warm, spiced crumpet. For a vegan version, simply substitute the milk with your favorite plant-based milk and ensure your baking powder is aluminum-free. The possibilities are endless!
I’ve poured my heart and soul into perfecting this recipe, and I’m confident that you’ll love it as much as I do. It might seem a little daunting at first, but trust me, it’s easier than you think. Just follow the instructions carefully, and don’t be afraid to experiment and adjust to your own preferences. Remember, baking is all about having fun and creating something delicious to share with loved ones.
So, what are you waiting for? Gather your ingredients, preheat your griddle, and get ready to embark on a crumpet-making adventure! I’m absolutely certain that you’ll be rewarded with the most delicious, satisfying, and utterly irresistible homemade crumpets you’ve ever tasted.
I’m so excited for you to try this recipe! Once you’ve made your own batch of these delightful homemade crumpets, please, please, please come back and share your experience in the comments below. I’d love to hear about your successes, your variations, and any tips or tricks you discovered along the way. Did you try a unique topping? Did you experiment with different flours? Let me know! Your feedback is invaluable, and it helps me to continue improving and refining my recipes. Happy baking!
Homemade Crumpets: The Ultimate Guide to Perfect Crumpets
Light and airy homemade crumpets with signature holes, perfect with butter, jam, or your favorite toppings!
Ingredients
- 225g (8oz) plain flour, plus extra for dusting
- 1 tsp baking powder
- ½ tsp bicarbonate of soda
- ½ tsp salt
- 300ml (10fl oz) milk, lukewarm
- 150ml (5fl oz) water, lukewarm
- 1 tbsp melted butter, plus extra for greasing
- Vegetable oil, for greasing
Instructions
- Sift Dry Ingredients: In a large bowl, sift together the flour, baking powder, bicarbonate of soda, and salt. Whisk to combine.
- Create a Well: Make a well in the center of the dry ingredients.
- Add Wet Ingredients: In a separate jug, combine the lukewarm milk and water. Pour the milk and water mixture into the well.
- Mix the Batter: Gradually incorporate the dry ingredients into the wet ingredients, starting from the center and working outwards. Mix until just combined; a few lumps are okay.
- Add Melted Butter: Add the melted butter to the batter and gently fold until evenly distributed.
- Rest the Batter: Cover the bowl with a clean tea towel or plastic wrap and let the batter rest at room temperature for at least 30 minutes, or up to an hour.
- Prepare Rings and Pan: Lightly grease the inside of crumpet rings (or metal cookie cutters/tuna cans) with vegetable oil. Lightly grease a large frying pan or griddle with vegetable oil and place over medium-low heat.
- Place Rings in Pan: Carefully place the greased crumpet rings in the hot pan, evenly spaced apart.
- Pour the Batter: Gently stir the batter. Using a ladle or measuring cup, carefully pour the batter into the rings, filling them about halfway full.
- Cook the Crumpets: Cook for about 8-10 minutes, or until bubbles start to appear on the surface and the tops look set. The edges should start to look golden brown.
- Remove the Rings: Carefully remove the rings using tongs or a spatula. If the crumpets are sticking, run a knife around the inside of the rings to loosen them.
- Flip (Optional): Flip the crumpets over and cook for another minute or two on the other side for a golden brown color.
- Repeat: Repeat the process with the remaining batter, greasing the rings and pan as needed.
- Serve: Toast lightly (optional). Serve with butter, jam, honey, cheese, eggs, avocado, or your favorite toppings. Enjoy immediately!
Notes
- Use lukewarm liquids for best results.
- Don’t overmix the batter.
- Resting the batter is crucial.
- Use medium-low heat to prevent burning.
- Grease the rings and pan well.
- Be patient during cooking.
- Leftover crumpets can be stored in an airtight container at room temperature for up to 2 days or frozen for up to 2 months. Reheat by toasting or microwaving.

Leave a Comment