
Cream Cheese Tarts, those delightful little bites of creamy, tangy goodness, are about to become your new favorite dessert! Imagine sinking your teeth into a buttery, flaky crust that gives way to a smooth, rich filling. Are you drooling yet? I know I am just thinking about them! This isn’t just a recipe; it’s an invitation to experience a taste of pure indulgence.
While the exact origins of cream cheese tarts are a bit hazy, similar custard-filled pastries have graced tables for centuries across various cultures. The use of cream cheese, however, adds a uniquely modern twist, elevating the classic tart to a whole new level of deliciousness. Think of them as a sophisticated cousin to cheesecake, but in a perfectly portioned, utterly irresistible package.
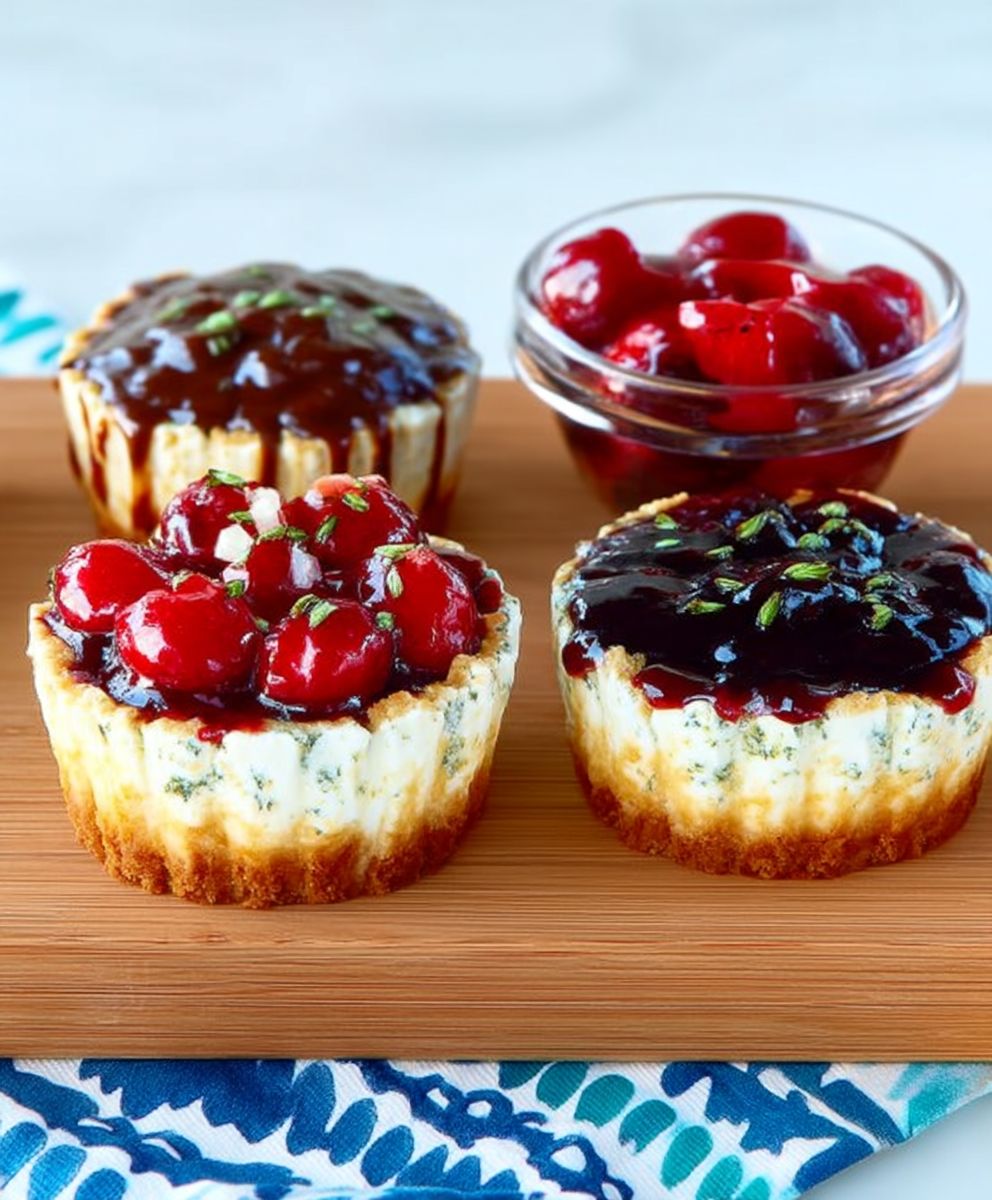
So, why do people adore these miniature marvels? Well, for starters, the combination of textures is simply divine. The crisp, buttery crust provides the perfect counterpoint to the velvety smooth cream cheese filling. The slight tang of the cream cheese balances the sweetness beautifully, preventing it from becoming cloying. But beyond the taste and texture, cream cheese tarts are incredibly versatile. They’re elegant enough for a dinner party, yet simple enough to whip up for a casual weekend treat. Plus, they’re just so darn cute! Get ready to impress your friends and family with these little gems they’ll be begging for the recipe!
Ingredients:
- For the Crust:
- 1 ½ cups all-purpose flour
- ½ cup (1 stick) unsalted butter, cold and cubed
- ¼ cup granulated sugar
- ¼ teaspoon salt
- 3-5 tablespoons ice water
- For the Cream Cheese Filling:
- 16 ounces (2 packages) cream cheese, softened
- ¾ cup granulated sugar
- 2 large eggs
- 1 teaspoon vanilla extract
- ½ teaspoon lemon zest (optional, but highly recommended!)
- Pinch of salt
- Optional Toppings:
- Fresh berries (strawberries, blueberries, raspberries)
- Fruit preserves (raspberry, apricot)
- Chocolate shavings
- Powdered sugar
Preparing the Crust:
Okay, let’s get started with the crust. This is the foundation of our delicious cream cheese tarts, so we want to make sure it’s nice and flaky. Don’t be intimidated; it’s easier than you think!
- Combine Dry Ingredients: In a large bowl, whisk together the flour, sugar, and salt. This ensures everything is evenly distributed.
- Cut in the Butter: Add the cold, cubed butter to the flour mixture. Using a pastry blender (or your fingertips work quickly!), cut the butter into the flour until the mixture resembles coarse crumbs. The key here is to keep the butter cold. If it gets too warm, the crust will be tough instead of flaky. You should see small pieces of butter still visible.
- Add Ice Water: Gradually add the ice water, one tablespoon at a time, mixing gently after each addition. The amount of water you need will vary depending on the humidity, so start with 3 tablespoons and add more only if necessary. Mix until the dough just comes together. It should be slightly shaggy, not a smooth ball.
- Form the Dough: Gently gather the dough into a disc. Be careful not to overwork it. Overworking the dough will develop the gluten and make the crust tough.
- Chill the Dough: Wrap the dough in plastic wrap and flatten it into a disc about 1 inch thick. This helps it chill evenly. Refrigerate for at least 30 minutes, or up to 2 hours. Chilling the dough allows the gluten to relax, which will result in a more tender crust.
- Preheat Oven: While the dough is chilling, preheat your oven to 375°F (190°C).
- Roll Out the Dough: Lightly flour a clean work surface. Remove the chilled dough from the refrigerator and unwrap it. Roll out the dough to about 1/8 inch thickness. You want it thin enough to be delicate, but not so thin that it tears easily.
- Cut and Press into Tart Pans: Use a cookie cutter or a knife to cut out circles of dough slightly larger than the diameter of your tart pans. Gently press the dough circles into the tart pans, making sure to press the dough firmly against the bottom and sides. Trim any excess dough from the edges. You can use a rolling pin to roll across the top of the tart pan to neatly trim the edges.
- Dock the Crusts: Use a fork to prick the bottom of each tart crust several times. This prevents the crust from puffing up during baking.
- Blind Bake (Optional, but Recommended): For a crispier crust, you can blind bake the crusts before adding the filling. Line each tart crust with parchment paper and fill with pie weights or dried beans. Bake for 10-12 minutes, then remove the parchment paper and weights and bake for another 5-7 minutes, or until the crusts are lightly golden brown. If you skip this step, the crust might be a little softer.
Preparing the Cream Cheese Filling:
Now for the star of the show the creamy, dreamy filling! This part is super easy.
- Cream the Cream Cheese and Sugar: In a large bowl, beat the softened cream cheese and sugar together until smooth and creamy. Make sure your cream cheese is truly softened, or you’ll end up with lumps. I usually leave mine out at room temperature for at least an hour.
- Add Eggs: Beat in the eggs one at a time, mixing well after each addition. Don’t overmix at this stage, as it can incorporate too much air into the filling, which can cause it to crack during baking.
- Add Vanilla and Lemon Zest: Stir in the vanilla extract, lemon zest (if using), and salt. The lemon zest adds a lovely brightness to the filling, but it’s optional if you prefer a more classic flavor.
Assembling and Baking the Tarts:
Almost there! Now we just need to put everything together and bake these beauties.
- Fill the Tart Crusts: Pour the cream cheese filling into the prepared tart crusts, filling them almost to the top.
- Bake: Bake in the preheated oven for 18-22 minutes, or until the filling is set around the edges but still slightly jiggly in the center. The tarts will continue to set as they cool.
- Cool: Remove the tarts from the oven and let them cool completely in the tart pans. As they cool, the filling will firm up.
- Chill (Optional): For best results, chill the tarts in the refrigerator for at least 2 hours before serving. This allows the filling to fully set and the flavors to meld together.
Serving and Topping:
The best part! Get creative with your toppings and enjoy!
- Remove from Tart Pans: Gently remove the tarts from the tart pans. If they’re sticking, you can run a thin knife around the edges to loosen them.
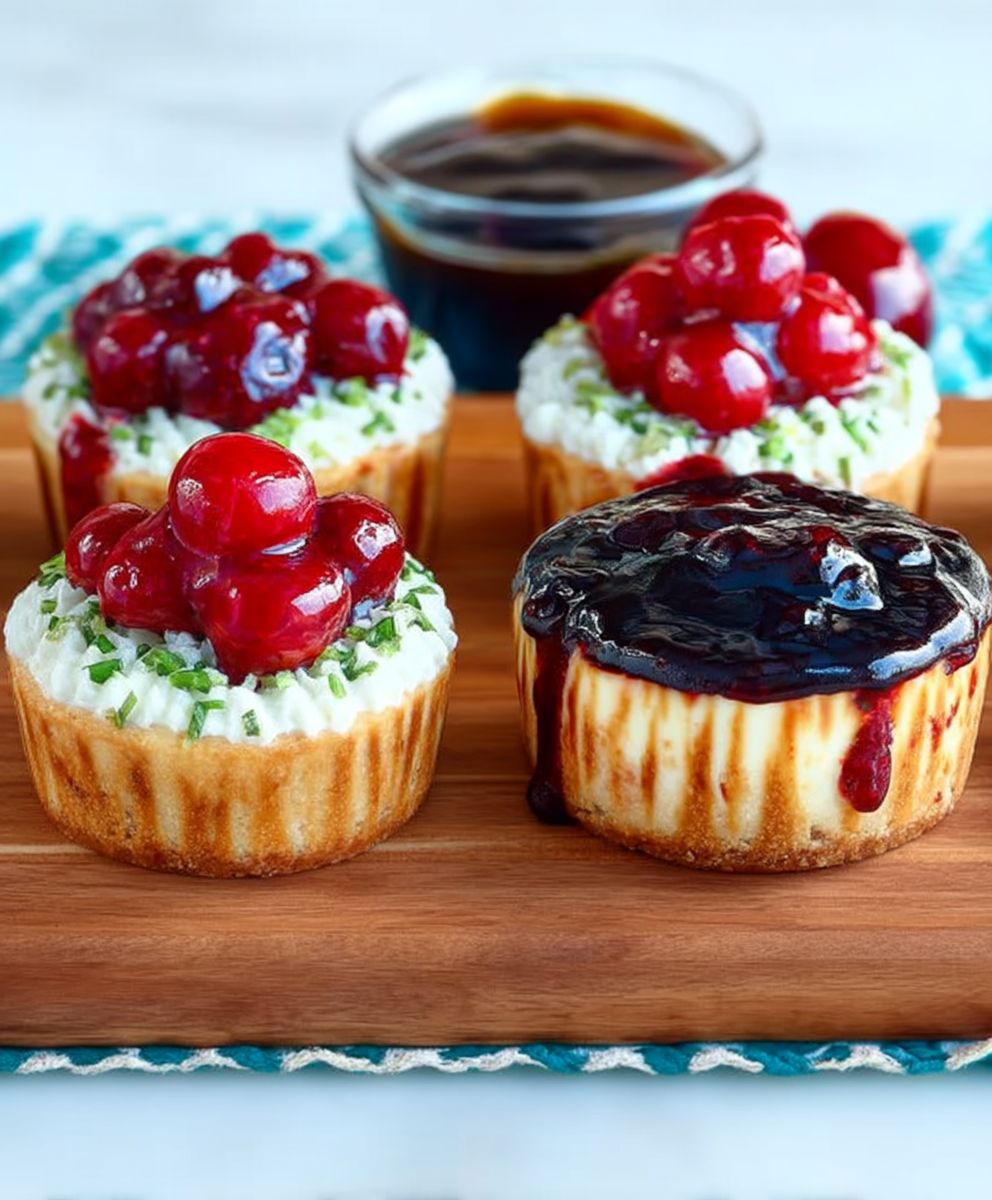
- Add Toppings: Top the tarts with your favorite toppings. Fresh berries, fruit preserves, chocolate shavings, and powdered sugar are all great options.
- Serve: Serve the tarts chilled or at room temperature. They’re perfect for parties, desserts, or just a special treat for yourself!
Tips and Variations:
- Crust Variations: For a graham cracker crust, combine 1 ½ cups graham cracker crumbs, 5 tablespoons melted butter, and ¼ cup sugar. Press into the tart pans and bake for 8-10 minutes before adding the filling.
- Flavor Variations: Add a tablespoon of lemon juice to the filling for a more pronounced lemon flavor. You can also add a teaspoon of almond extract or a pinch of nutmeg.
- Chocolate Cream Cheese Tarts: Add 2 tablespoons of cocoa powder to the cream cheese filling for a chocolatey twist.
- Mini Tarts: Use mini muffin tins instead of tart pans to make mini cream cheese tarts. Reduce the baking time accordingly.
- Preventing Cracks: To minimize the risk of cracks in the filling, bake the tarts at a lower temperature (325°F/160°C) for a longer time (25-30 minutes). Also, avoid opening the oven door during baking.
- Storage: Store leftover tarts in the refrigerator for up to 3 days.
Enjoy your homemade Cream Cheese Tarts! I hope you love them as much as I do!
Conclusion:
And there you have it! These Cream Cheese Tarts are truly a must-try for anyone who loves a delightful, creamy, and utterly satisfying dessert. From the simple, buttery crust to the tangy-sweet filling, every bite is a little piece of heaven. I know I’ve made a lot of desserts in my time, but these little tarts consistently rank among my favorites, and I’m confident they’ll become a staple in your kitchen too.
What makes them so special? Well, beyond the incredible flavor, they’re surprisingly easy to make. You don’t need any fancy equipment or advanced baking skills. The recipe is straightforward, and the results are consistently impressive. Whether you’re a seasoned baker or just starting out, you can absolutely nail these Cream Cheese Tarts. Plus, they’re perfect for any occasion. Need a quick and easy dessert for a weeknight dinner? These tarts are your answer. Want to impress guests at a party? They’ll be raving about them for days. Looking for a sweet treat to brighten up your day? One bite of these tarts will do the trick.
But the best part about these tarts is their versatility. While the classic recipe is divine, there are so many ways to customize them to your liking. For a burst of fruity flavor, try adding a layer of your favorite jam to the bottom of the crust before adding the cream cheese filling. Raspberry, strawberry, or apricot jam would all be delicious choices. Or, for a more decadent treat, swirl in some melted chocolate into the cream cheese filling before baking. You could even top them with fresh berries, a dusting of powdered sugar, or a drizzle of chocolate sauce after they’ve cooled.
Serving suggestions? These Cream Cheese Tarts are wonderful on their own, but they also pair beautifully with a scoop of vanilla ice cream or a dollop of whipped cream. A cup of coffee or tea is the perfect accompaniment, and a glass of dessert wine would elevate the experience even further. For a truly special occasion, arrange the tarts on a pretty platter and garnish with fresh mint leaves or edible flowers.
I truly believe that everyone should have this recipe in their repertoire. It’s a guaranteed crowd-pleaser, and it’s so easy to adapt to your own tastes and preferences. So, what are you waiting for? Gather your ingredients, preheat your oven, and get ready to bake some magic!
I’m so excited for you to try these Cream Cheese Tarts! Once you do, I’d love to hear about your experience. Did you make any variations? What did you think of the flavor? What did your friends and family say? Share your photos and stories in the comments below! I can’t wait to see what you create. Happy baking! And remember, the best desserts are made with love (and a generous helping of cream cheese!). I hope you enjoy making and eating these as much as I do. They are a perfect little treat for any time of day, and I know you’ll find them to be a delightful addition to your baking collection. Don’t be afraid to experiment with different toppings and flavors to make them your own signature dessert. These tarts are a blank canvas just waiting for your creative touch.
Cream Cheese Tarts: The Ultimate Guide to Baking Delicious Tarts
Flaky, buttery crusts filled with a creamy, tangy cream cheese filling. These Cream Cheese Tarts are a delightful and easy-to-make dessert perfect for any occasion.
Ingredients
- 1 ½ cups all-purpose flour
- ½ cup (1 stick) unsalted butter, cold and cubed
- ¼ cup granulated sugar
- ¼ teaspoon salt
- 3-5 tablespoons ice water
- 16 ounces (2 packages) cream cheese, softened
- ¾ cup granulated sugar
- 2 large eggs
- 1 teaspoon vanilla extract
- ½ teaspoon lemon zest (optional, but highly recommended!)
- Pinch of salt
- Fresh berries (strawberries, blueberries, raspberries)
- Fruit preserves (raspberry, apricot)
- Chocolate shavings
- Powdered sugar
Instructions
- Combine Dry Ingredients: In a large bowl, whisk together the flour, sugar, and salt.
- Cut in the Butter: Add the cold, cubed butter to the flour mixture. Using a pastry blender (or your fingertips work quickly!), cut the butter into the flour until the mixture resembles coarse crumbs.
- Add Ice Water: Gradually add the ice water, one tablespoon at a time, mixing gently after each addition. Mix until the dough just comes together.
- Form the Dough: Gently gather the dough into a disc.
- Chill the Dough: Wrap the dough in plastic wrap and flatten it into a disc about 1 inch thick. Refrigerate for at least 30 minutes, or up to 2 hours.
- Preheat Oven: While the dough is chilling, preheat your oven to 375°F (190°C).
- Roll Out the Dough: Lightly flour a clean work surface. Remove the chilled dough from the refrigerator and unwrap it. Roll out the dough to about 1/8 inch thickness.
- Cut and Press into Tart Pans: Use a cookie cutter or a knife to cut out circles of dough slightly larger than the diameter of your tart pans. Gently press the dough circles into the tart pans, making sure to press the dough firmly against the bottom and sides. Trim any excess dough from the edges.
- Dock the Crusts: Use a fork to prick the bottom of each tart crust several times.
- Blind Bake (Optional, but Recommended): Line each tart crust with parchment paper and fill with pie weights or dried beans. Bake for 10-12 minutes, then remove the parchment paper and weights and bake for another 5-7 minutes, or until the crusts are lightly golden brown.
- Cream the Cream Cheese and Sugar: In a large bowl, beat the softened cream cheese and sugar together until smooth and creamy.
- Add Eggs: Beat in the eggs one at a time, mixing well after each addition.
- Add Vanilla and Lemon Zest: Stir in the vanilla extract, lemon zest (if using), and salt.
- Fill the Tart Crusts: Pour the cream cheese filling into the prepared tart crusts, filling them almost to the top.
- Bake: Bake in the preheated oven for 18-22 minutes, or until the filling is set around the edges but still slightly jiggly in the center.
- Cool: Remove the tarts from the oven and let them cool completely in the tart pans.
- Chill (Optional): For best results, chill the tarts in the refrigerator for at least 2 hours before serving.
- Remove from Tart Pans: Gently remove the tarts from the tart pans.
- Add Toppings: Top the tarts with your favorite toppings. Fresh berries, fruit preserves, chocolate shavings, and powdered sugar are all great options.
- Serve: Serve the tarts chilled or at room temperature.
Notes
- Crust Variations: For a graham cracker crust, combine 1 ½ cups graham cracker crumbs, 5 tablespoons melted butter, and ¼ cup sugar. Press into the tart pans and bake for 8-10 minutes before adding the filling.
- Flavor Variations: Add a tablespoon of lemon juice to the filling for a more pronounced lemon flavor. You can also add a teaspoon of almond extract or a pinch of nutmeg.
- Chocolate Cream Cheese Tarts: Add 2 tablespoons of cocoa powder to the cream cheese filling for a chocolatey twist.
- Mini Tarts: Use mini muffin tins instead of tart pans to make mini cream cheese tarts. Reduce the baking time accordingly.
- Preventing Cracks: To minimize the risk of cracks in the filling, bake the tarts at a lower temperature (325°F/160°C) for a longer time (25-30 minutes). Also, avoid opening the oven door during baking.
- Storage: Store leftover tarts in the refrigerator for up to 3 days.
- The key to a flaky crust is keeping the butter cold.
- Don’t overmix the cream cheese filling after adding the eggs.

Leave a Comment