
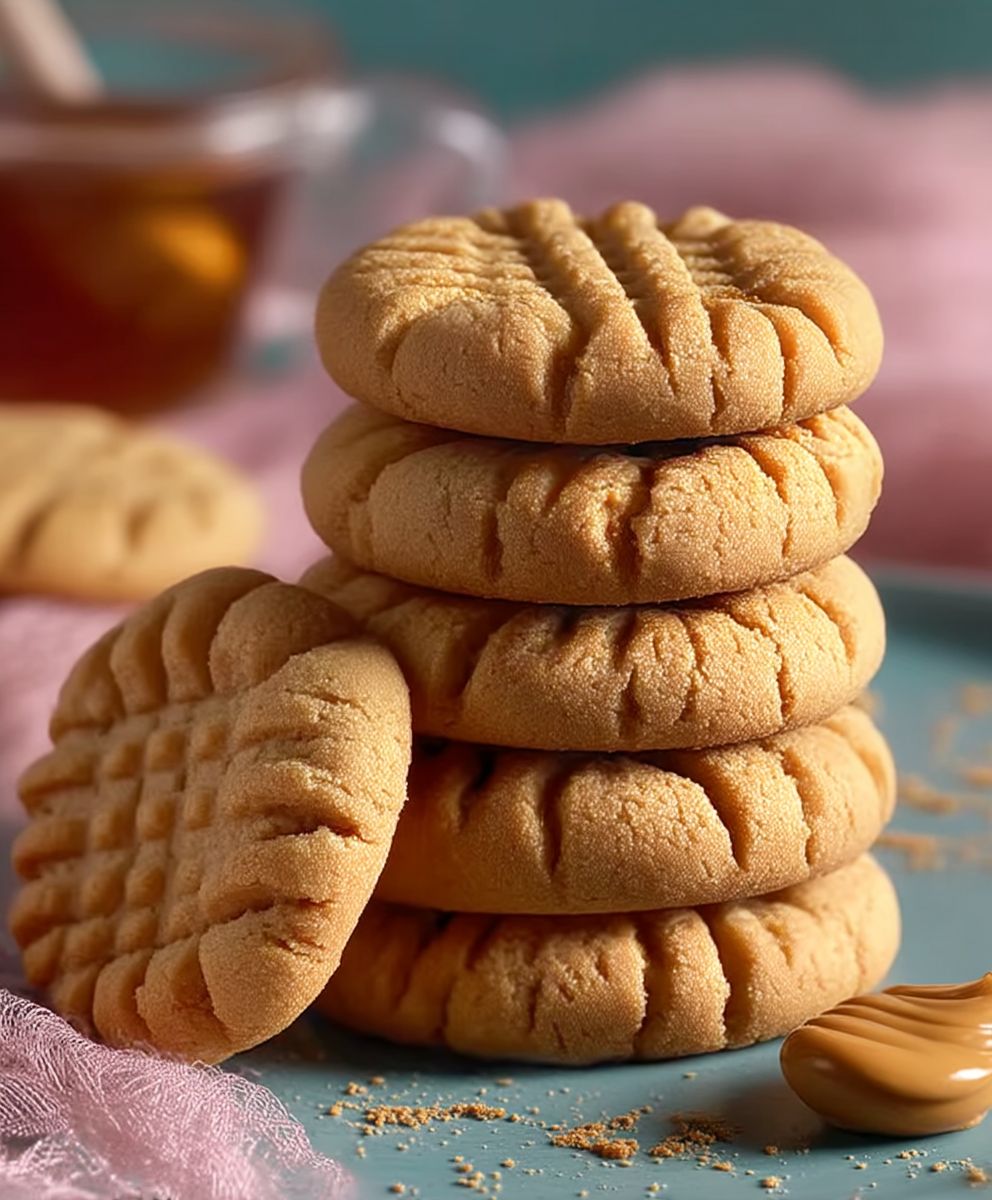
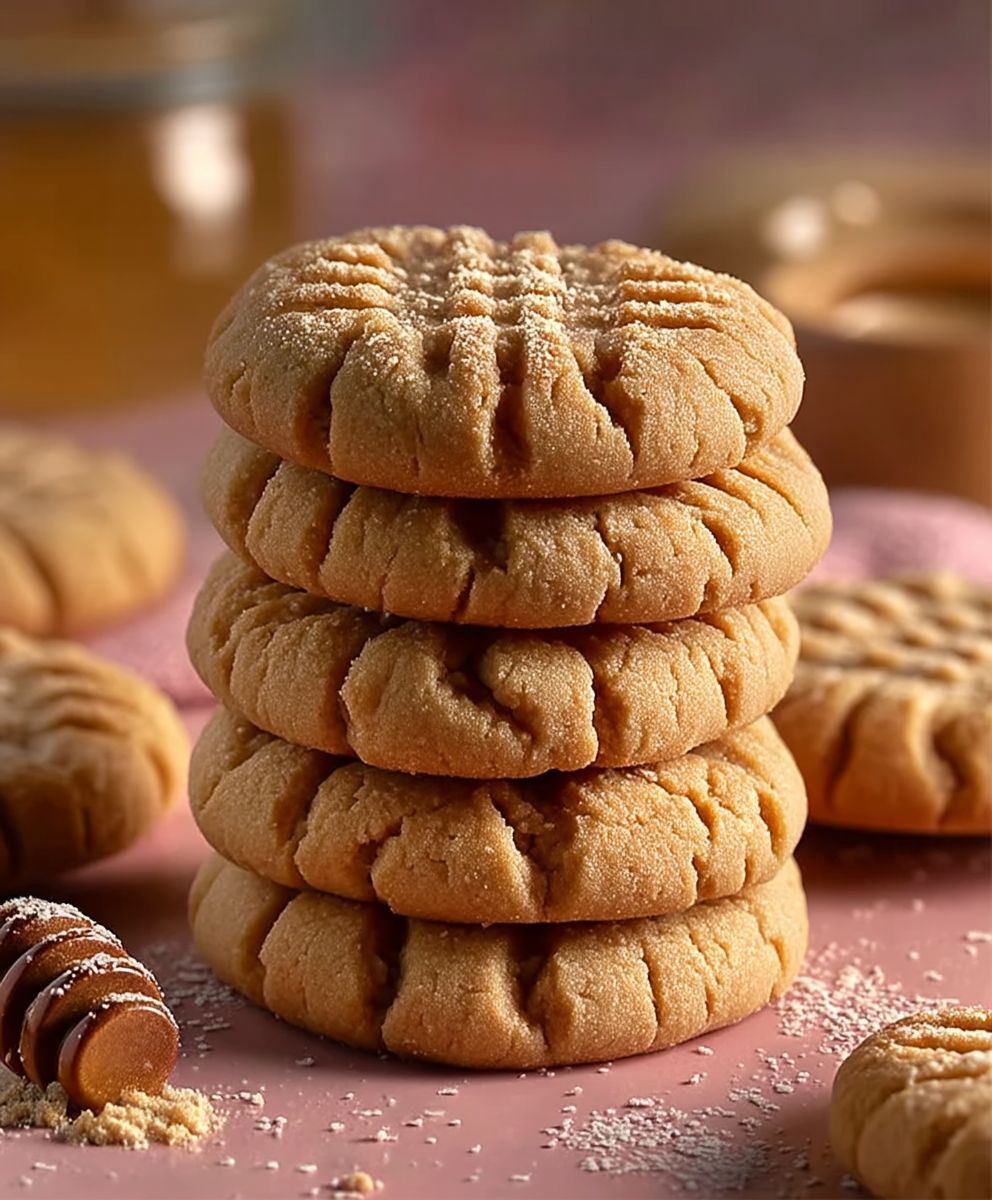
Peanut butter cookies: just the name conjures up images of warm, gooey goodness, doesn’t it? I’m about to share my absolute favorite recipe, one that guarantees soft, chewy perfection every single time. Forget those dry, crumbly disappointments these cookies are a peanut butter lover’s dream come true!
While the exact origins of the peanut butter cookie are a little hazy, they gained immense popularity in the early 20th century, coinciding with the rise of commercially produced peanut butter. It’s a truly American classic, and for good reason. The simple combination of ingredients creates a flavor profile that’s both comforting and irresistible.
What is it about peanut butter cookies that makes them so universally adored? I think it’s the perfect balance of sweet and salty, the satisfyingly dense yet melt-in-your-mouth texture, and the sheer convenience of whipping up a batch with ingredients you probably already have in your pantry. Plus, that iconic criss-cross pattern pressed into the top isn’t just for looks it helps the cookies bake evenly! Get ready to experience peanut butter cookie bliss!
Ingredients:
- 1 cup (2 sticks) unsalted butter, softened
- 1 cup granulated sugar
- 1 cup packed brown sugar
- 2 large eggs
- 1 teaspoon vanilla extract
- 1 cup creamy peanut butter
- 2 1/2 cups all-purpose flour
- 1 teaspoon baking soda
- 1/2 teaspoon baking powder
- 1/2 teaspoon salt
- Optional: Granulated sugar for rolling
Preparing the Dough:
- Cream the butter and sugars: In a large bowl, or the bowl of your stand mixer, cream together the softened butter, granulated sugar, and brown sugar until light and fluffy. This usually takes about 3-5 minutes. Make sure to scrape down the sides of the bowl occasionally to ensure everything is evenly mixed. The mixture should be pale and airy.
- Incorporate the wet ingredients: Beat in the eggs one at a time, mixing well after each addition. Then, stir in the vanilla extract and peanut butter until fully combined. The mixture should be smooth and creamy. Don’t overmix at this stage, just ensure everything is well incorporated.
- Combine the dry ingredients: In a separate medium bowl, whisk together the flour, baking soda, baking powder, and salt. Whisking ensures that the baking soda and baking powder are evenly distributed throughout the flour, which is crucial for the cookies to rise properly.
- Gradually add the dry ingredients to the wet ingredients: Gradually add the dry ingredients to the wet ingredients, mixing on low speed until just combined. Be careful not to overmix the dough, as this can result in tough cookies. Mix until you no longer see streaks of flour. The dough will be thick and slightly sticky.
- Chill the dough (optional, but recommended): Cover the bowl with plastic wrap and chill the dough in the refrigerator for at least 30 minutes, or up to 2 hours. Chilling the dough helps to prevent the cookies from spreading too much during baking and also allows the flavors to meld together. If you’re short on time, you can skip this step, but the cookies may spread more.
Shaping and Baking the Cookies:
- Preheat the oven: Preheat your oven to 375°F (190°C). Line baking sheets with parchment paper or silicone baking mats. Parchment paper helps prevent the cookies from sticking and makes cleanup easier.
- Shape the cookies: Roll the dough into 1-inch balls. You can use a cookie scoop to ensure uniform size. If desired, roll the dough balls in granulated sugar before placing them on the baking sheets. This adds a nice sparkle and a slightly crisp texture to the cookies.
- Arrange the cookies on the baking sheets: Place the dough balls on the prepared baking sheets, leaving about 2 inches between each cookie to allow for spreading.
- Flatten the cookies with a fork: Use a fork to flatten the cookies in a crisscross pattern. This is a classic peanut butter cookie technique that helps to create a more even thickness and also adds a decorative touch. Dip the fork in sugar between flattenings to prevent it from sticking to the dough.
- Bake the cookies: Bake for 8-10 minutes, or until the edges are lightly golden brown. The centers of the cookies may still appear slightly soft, but they will firm up as they cool.
- Cool the cookies: Remove the baking sheets from the oven and let the cookies cool on the baking sheets for a few minutes before transferring them to a wire rack to cool completely. This prevents them from breaking apart while they are still warm and soft.
Tips and Variations:
- For extra peanut butter flavor: Add 1/2 cup of chopped peanuts to the dough.
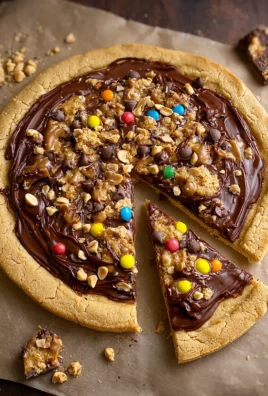
- Chocolate chips: Stir in 1 cup of chocolate chips (milk, dark, or semi-sweet) for a chocolate peanut butter cookie.
- Reese’s Pieces: Press Reese’s Pieces candies into the tops of the cookies before baking.
- Sea salt: Sprinkle a pinch of sea salt on top of the cookies after baking for a sweet and salty treat.
- Storage: Store the cookies in an airtight container at room temperature for up to 5 days.
- Freezing: You can freeze the cookie dough for up to 2 months. Roll the dough into balls, flatten with a fork, and then freeze on a baking sheet. Once frozen, transfer the cookies to a freezer bag. Bake from frozen, adding a few extra minutes to the baking time. You can also freeze baked cookies for up to 2 months.
- Adjusting for altitude: If you live at a high altitude, you may need to adjust the recipe slightly. Try reducing the amount of baking powder by 1/4 teaspoon and adding 1-2 tablespoons of extra flour.
- Troubleshooting: If your cookies are spreading too much, try chilling the dough for a longer period of time or adding a tablespoon or two of extra flour. If your cookies are too dry, try adding a tablespoon of milk or water to the dough.
Detailed Explanation of Ingredients:
Butter:
Using softened butter is crucial for achieving the right texture in these cookies. The butter should be soft enough to easily cream with the sugars, but not melted. If the butter is too soft, the cookies may spread too much during baking. I usually take the butter out of the refrigerator about an hour before I plan to bake.
Sugars:
The combination of granulated sugar and brown sugar provides both sweetness and moisture to the cookies. Brown sugar also adds a slightly chewy texture and a caramel-like flavor. You can use light or dark brown sugar, depending on your preference. Dark brown sugar will result in a slightly richer flavor.
Eggs:
Eggs bind the ingredients together and add moisture to the cookies. Use large eggs for best results. Make sure the eggs are at room temperature, as this will help them to incorporate more easily into the dough.
Vanilla Extract:
Vanilla extract enhances the flavor of the cookies. Use pure vanilla extract for the best flavor. You can also use vanilla bean paste or vanilla powder.
Peanut Butter:
Creamy peanut butter is recommended for this recipe, but you can also use chunky peanut butter if you prefer. Just make sure to use a good quality peanut butter that is not too oily or dry. Natural peanut butter can be used, but it may require a little extra mixing to incorporate it fully into the dough.
Flour:
All-purpose flour is the standard flour for making cookies. Be sure to measure the flour accurately. Spoon the flour into a measuring cup and level it off with a knife. Do not pack the flour into the measuring cup, as this will result in too much flour and dry cookies.
Baking Soda and Baking Powder:
Baking soda and baking powder are leavening agents that help the cookies to rise. Baking soda reacts with the acids in the brown sugar to create carbon dioxide, which helps the cookies to puff up. Baking powder contains both an acid and a base, so it can leaven the cookies even without the presence of an acid. Make sure your baking soda and baking powder are fresh, as they lose their potency over time.
Salt:
Salt enhances the flavor of the cookies and balances the sweetness. Use table salt or sea salt.
Enjoy Your Homemade Peanut Butter Cookies!
Conclusion:
And there you have it! These aren’t just any cookies; they’re the ultimate peanut butter cookies, guaranteed to become a family favorite. From the incredibly simple preparation to the melt-in-your-mouth texture and intense peanut butter flavor, this recipe ticks all the boxes. I truly believe this is a must-try for anyone who loves a classic, comforting treat.
Why is this recipe a must-try? Well, beyond the sheer deliciousness, it’s incredibly versatile. Need a quick dessert for a potluck? These cookies are perfect. Craving something sweet after dinner? These cookies are the answer. Want to impress your friends with your baking skills without spending hours in the kitchen? You guessed it these cookies are your secret weapon! The recipe is straightforward, using ingredients you likely already have in your pantry. Plus, the satisfyingly chewy texture and rich peanut butter taste are simply irresistible. I’ve made these countless times, and they disappear within minutes every single time.
But the fun doesn’t stop there! Feel free to experiment with variations to make these cookies your own. For a chocolatey twist, add a handful of chocolate chips (milk, dark, or even white chocolate would work beautifully!) to the dough before baking. If you’re feeling adventurous, try swirling in a spoonful of Nutella for an extra layer of nutty goodness. Or, for a salty-sweet combination, sprinkle a pinch of sea salt on top of the cookies before they go into the oven.
Serving Suggestions:
These cookies are fantastic on their own, but they’re also delicious when paired with a few simple accompaniments. Imagine enjoying a warm peanut butter cookie with a cold glass of milk pure perfection! They’re also wonderful with a scoop of vanilla ice cream for a decadent dessert. For a more sophisticated pairing, try them with a cup of strong coffee or a glass of dessert wine. And if you’re feeling creative, you could even use them to make ice cream sandwiches!
Variations to Explore:
* Peanut Butter Blossoms: Roll the dough in sugar before baking and press a Hershey’s Kiss into the center immediately after they come out of the oven.
* Double Peanut Butter: Add peanut butter chips to the dough for an extra burst of peanut butter flavor.
* Oatmeal Peanut Butter: Incorporate rolled oats into the dough for a heartier, chewier cookie.
* Gluten-Free Peanut Butter Cookies: Substitute the all-purpose flour with a gluten-free blend.
* Vegan Peanut Butter Cookies: Replace the butter with a vegan butter alternative and the egg with a flax egg (1 tablespoon of ground flaxseed mixed with 3 tablespoons of water).
I’m so excited for you to try this recipe and experience the joy of homemade peanut butter cookies. I truly believe you’ll love them as much as I do. Don’t be afraid to get creative with the variations and make them your own.
Now, it’s your turn! Head to the kitchen, gather your ingredients, and bake up a batch of these amazing cookies. And most importantly, don’t forget to share your experience! I’d love to hear what you think of the recipe, what variations you tried, and how much everyone enjoyed them. Leave a comment below, tag me in your photos on social media I can’t wait to see your creations! Happy baking!
Peanut Butter Cookies: The Ultimate Guide to Baking Perfection
Classic, soft, and chewy peanut butter cookies with a perfect balance of sweet and nutty flavor. These easy-to-make cookies are a guaranteed crowd-pleaser!
Ingredients
- 1 cup (2 sticks) unsalted butter, softened
- 1 cup granulated sugar
- 1 cup packed brown sugar
- 2 large eggs
- 1 teaspoon vanilla extract
- 1 cup creamy peanut butter
- 2 1/2 cups all-purpose flour
- 1 teaspoon baking soda
- 1/2 teaspoon baking powder
- 1/2 teaspoon salt
- Optional: Granulated sugar for rolling
Instructions
- Cream the butter and sugars: In a large bowl, or the bowl of your stand mixer, cream together the softened butter, granulated sugar, and brown sugar until light and fluffy (3-5 minutes). Scrape down the sides of the bowl occasionally.
- Incorporate the wet ingredients: Beat in the eggs one at a time, mixing well after each addition. Stir in the vanilla extract and peanut butter until fully combined.
- Combine the dry ingredients: In a separate medium bowl, whisk together the flour, baking soda, baking powder, and salt.
- Gradually add the dry ingredients to the wet ingredients: Gradually add the dry ingredients to the wet ingredients, mixing on low speed until just combined. Be careful not to overmix.
- Chill the dough (optional, but recommended): Cover the bowl with plastic wrap and chill the dough in the refrigerator for at least 30 minutes, or up to 2 hours.
- Preheat the oven: Preheat your oven to 375°F (190°C). Line baking sheets with parchment paper or silicone baking mats.
- Shape the cookies: Roll the dough into 1-inch balls. If desired, roll the dough balls in granulated sugar before placing them on the baking sheets.
- Arrange the cookies on the baking sheets: Place the dough balls on the prepared baking sheets, leaving about 2 inches between each cookie to allow for spreading.
- Flatten the cookies with a fork: Use a fork to flatten the cookies in a crisscross pattern. Dip the fork in sugar between flattenings to prevent it from sticking to the dough.
- Bake the cookies: Bake for 8-10 minutes, or until the edges are lightly golden brown. The centers of the cookies may still appear slightly soft.
- Cool the cookies: Remove the baking sheets from the oven and let the cookies cool on the baking sheets for a few minutes before transferring them to a wire rack to cool completely.
Notes
- For extra peanut butter flavor: Add 1/2 cup of chopped peanuts to the dough.
- Chocolate chips: Stir in 1 cup of chocolate chips (milk, dark, or semi-sweet) for a chocolate peanut butter cookie.
- Reese’s Pieces: Press Reese’s Pieces candies into the tops of the cookies before baking.
- Sea salt: Sprinkle a pinch of sea salt on top of the cookies after baking for a sweet and salty treat.
- Storage: Store the cookies in an airtight container at room temperature for up to 5 days.
- Freezing: You can freeze the cookie dough for up to 2 months. Roll the dough into balls, flatten with a fork, and then freeze on a baking sheet. Once frozen, transfer the cookies to a freezer bag. Bake from frozen, adding a few extra minutes to the baking time. You can also freeze baked cookies for up to 2 months.
- Adjusting for altitude: If you live at a high altitude, you may need to adjust the recipe slightly. Try reducing the amount of baking powder by 1/4 teaspoon and adding 1-2 tablespoons of extra flour.
- Troubleshooting: If your cookies are spreading too much, try chilling the dough for a longer period of time or adding a tablespoon or two of extra flour. If your cookies are too dry, try adding a tablespoon of milk or water to the dough.
Leave a Comment