
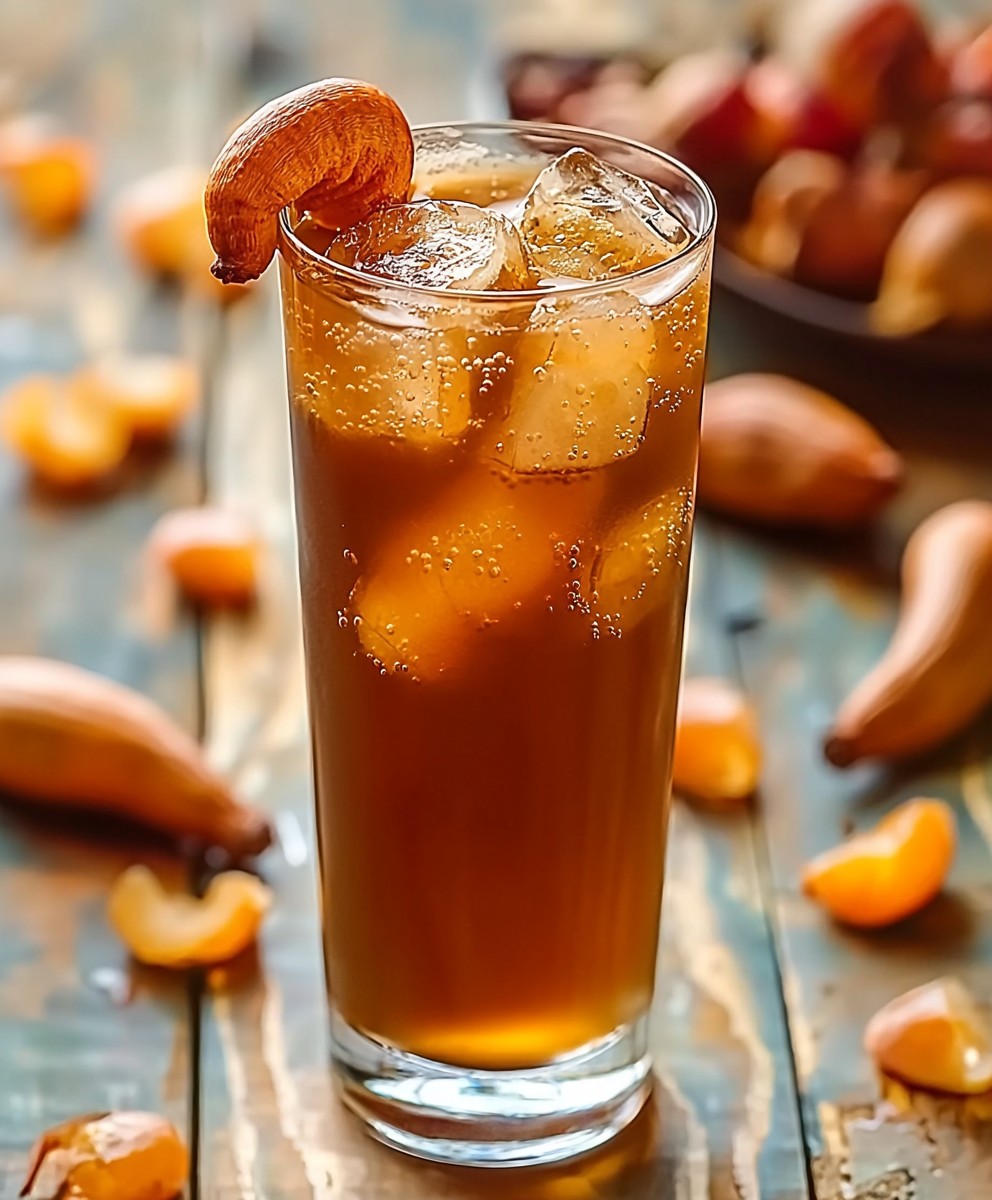
Tamarind juice benefits extend far beyond just a refreshing taste! Have you ever tasted something so uniquely sweet and sour that it instantly transports you to a sun-drenched tropical paradise? That’s the magic of tamarind, and its juice is a powerhouse of flavor and goodness. For centuries, cultures across Asia, Africa, and Latin America have revered the tamarind fruit, not just for its culinary versatility, but also for its impressive health properties. In some cultures, it’s even considered a sacred fruit, used in traditional medicines and religious ceremonies.
But what makes tamarind juice so special? Beyond its intriguing sweet and tangy flavor profile, which is a delightful dance on the palate, it’s packed with vitamins, minerals, and antioxidants. People love it for its refreshing qualities, especially on a hot day, and its ability to quench thirst like no other beverage. Plus, the potential tamarind juice benefits are numerous, ranging from aiding digestion to boosting immunity. So, are you ready to unlock the secrets of this amazing fruit and discover how to make your own delicious and healthy tamarind juice at home? Let’s dive in!
Ingredients:
- For the Dough:
- 3 cups all-purpose flour, plus more for dusting
- 1 teaspoon salt
- 1 cup (2 sticks) unsalted butter, cold and cubed
- 6-8 tablespoons ice water
- For the Tamarind Glaze:
- 1 cup tamarind pulp (seedless)
- 1 cup water
- 1/2 cup granulated sugar
- 1/4 cup light brown sugar, packed
- 1 tablespoon soy sauce (low sodium preferred)
- 1 tablespoon rice vinegar
- 1 teaspoon grated fresh ginger
- 1 clove garlic, minced
- 1/2 teaspoon red pepper flakes (optional, for heat)
- 1 tablespoon cornstarch
- 2 tablespoons cold water
- For the Filling:
- 1 pound ground pork (or ground chicken/turkey for a lighter option)
- 1 medium onion, finely chopped
- 2 cloves garlic, minced
- 1 inch ginger, grated
- 1 red bell pepper, finely diced
- 1 green bell pepper, finely diced
- 1/2 cup chopped cilantro
- 2 tablespoons soy sauce (low sodium preferred)
- 1 tablespoon sesame oil
- 1 teaspoon ground cumin
- 1/2 teaspoon ground coriander
- 1/4 teaspoon black pepper
- 1/4 teaspoon salt, or to taste
- For Egg Wash:
- 1 large egg
- 1 tablespoon milk or water
- Optional Garnish:
- Sesame seeds
- Chopped green onions
Preparing the Dough:
This dough is a classic pie crust, and the key is to keep everything cold! Cold butter creates those flaky layers we all love.
- Combine Dry Ingredients: In a large bowl, whisk together the flour and salt. This ensures the salt is evenly distributed throughout the dough.
- Cut in the Butter: Add the cold, cubed butter to the flour mixture. Using a pastry blender or your fingertips (work quickly!), cut the butter into the flour until the mixture resembles coarse crumbs. You should still see small pieces of butter that’s what creates the flakiness. Don’t overmix!
- Add Ice Water: Gradually add the ice water, one tablespoon at a time, mixing gently after each addition. The amount of water you need will vary depending on the humidity. Stop adding water when the dough just comes together and is slightly shaggy. Be careful not to add too much water, or the dough will be tough.
- Form into Disks: Divide the dough in half and gently form each half into a disk. Wrap each disk tightly in plastic wrap.
- Chill the Dough: Refrigerate the dough for at least 30 minutes, or up to 2 hours. This allows the gluten to relax and makes the dough easier to roll out. Longer chilling times are perfectly fine; you can even make the dough a day ahead.
Making the Tamarind Glaze:
The tamarind glaze is what makes these hand pies truly special. It’s sweet, tangy, and slightly savory a flavor explosion in every bite!
- Prepare the Tamarind Pulp: If you’re using a block of tamarind pulp with seeds, soak it in the 1 cup of warm water for about 30 minutes, or until softened. Use your fingers to break it down and remove the seeds and any fibrous strands. Strain the mixture through a fine-mesh sieve to remove any remaining solids. You should have about 1 cup of tamarind juice. If you are using seedless tamarind pulp, simply mix it with the water.
- Combine Ingredients: In a medium saucepan, combine the tamarind juice, granulated sugar, brown sugar, soy sauce, rice vinegar, grated ginger, minced garlic, and red pepper flakes (if using).
- Simmer the Glaze: Bring the mixture to a simmer over medium heat, stirring occasionally. Reduce the heat to low and simmer for about 15-20 minutes, or until the glaze has thickened slightly.
- Thicken with Cornstarch Slurry: In a small bowl, whisk together the cornstarch and 2 tablespoons of cold water to create a slurry. Pour the slurry into the simmering glaze and stir constantly until the glaze thickens to your desired consistency. It should be thick enough to coat the back of a spoon.
- Cool the Glaze: Remove the glaze from the heat and let it cool completely. As it cools, it will thicken further.
Preparing the Filling:
This filling is packed with flavor and complements the tamarind glaze perfectly. Feel free to adjust the spices to your liking!
- Cook the Aromatics: In a large skillet or wok, heat the sesame oil over medium heat. Add the chopped onion and cook until softened, about 5 minutes. Add the minced garlic and grated ginger and cook for another minute, until fragrant.
- Brown the Ground Pork: Add the ground pork to the skillet and cook, breaking it up with a spoon, until browned and cooked through. Drain off any excess grease.
- Add the Vegetables: Add the diced red and green bell peppers to the skillet and cook for about 5 minutes, or until slightly softened.
- Season the Filling: Stir in the soy sauce, cumin, coriander, black pepper, and salt. Taste and adjust the seasonings as needed.
- Finish the Filling: Remove the skillet from the heat and stir in the chopped cilantro. Let the filling cool completely before assembling the hand pies. This prevents the dough from becoming soggy.
Assembling and Baking the Hand Pies:
Now for the fun part! Assembling the hand pies is a bit like making mini empanadas. Don’t worry if they’re not perfect the rustic look adds to their charm.
- Preheat Oven: Preheat your oven to 375°F (190°C). Line a baking sheet with parchment paper.
- Roll Out the Dough: On a lightly floured surface, roll out one disk of dough to about 1/8 inch thickness. Use a 4-inch round cookie cutter or a knife to cut out circles of dough.
- Fill the Hand Pies: Place about 2 tablespoons of the cooled pork filling in the center of each dough circle.
- Add the Glaze: Spoon about 1 teaspoon of the tamarind glaze over the filling. Be careful not to overfill, or the filling will leak out during baking.
- Fold and Seal: Fold the dough circle in half to form a half-moon shape. Crimp the edges with a fork to seal the hand pie. This prevents the filling from escaping and creates a decorative edge.
- Repeat: Repeat the process with the remaining dough and filling. If you have any leftover dough scraps, you can reroll them and cut out more circles.
- Prepare Egg Wash: In a small bowl, whisk together the egg and milk or water.
- Brush with Egg Wash: Brush the tops of the hand pies with the egg wash. This will give them a golden-brown color and a shiny finish.
- Garnish (Optional): Sprinkle the tops of the hand pies with sesame seeds and/or chopped green onions, if desired.
- Bake: Place the hand pies on the prepared baking sheet and bake for 20-25 minutes, or until golden brown.
- Cool and Serve: Let the hand pies cool on the baking sheet for a few minutes before transferring them to a wire rack to cool completely. Serve warm or at room temperature. They are delicious on their own or with a side of extra tamarind glaze for dipping.
Tips and Variations:
- Make it Vegetarian: Substitute the ground pork with crumbled tofu or a mixture of sautéed vegetables like mushrooms, carrots, and peas.
- Spice it Up: Add more red pepper flakes to the tamarind glaze or filling for a spicier kick. You can also use a pinch of cayenne pepper.
- Add Some Crunch: Mix some chopped peanuts or cashews into the filling for added texture.
- Make it Ahead: The dough and filling can be made ahead of time and stored in the refrigerator for up to 2 days. Assemble and bake the hand pies just before serving.
- Freezing
Conclusion:
So, there you have it! This tamarind juice recipe isn’t just another drink; it’s a vibrant, tangy, and incredibly refreshing experience that’s packed with goodness. I truly believe it’s a must-try for anyone looking to add a healthy and delicious twist to their beverage routine. The unique flavor profile, a delightful dance between sweet and sour, is unlike anything you’ve probably tasted before, and the potential tamarind juice benefits are simply too good to ignore.
Think of it as sunshine in a glass, perfect for those hot summer days or whenever you need a little pick-me-up. But don’t just limit yourself to enjoying it as is! There are so many ways to customize this recipe to suit your personal preferences.
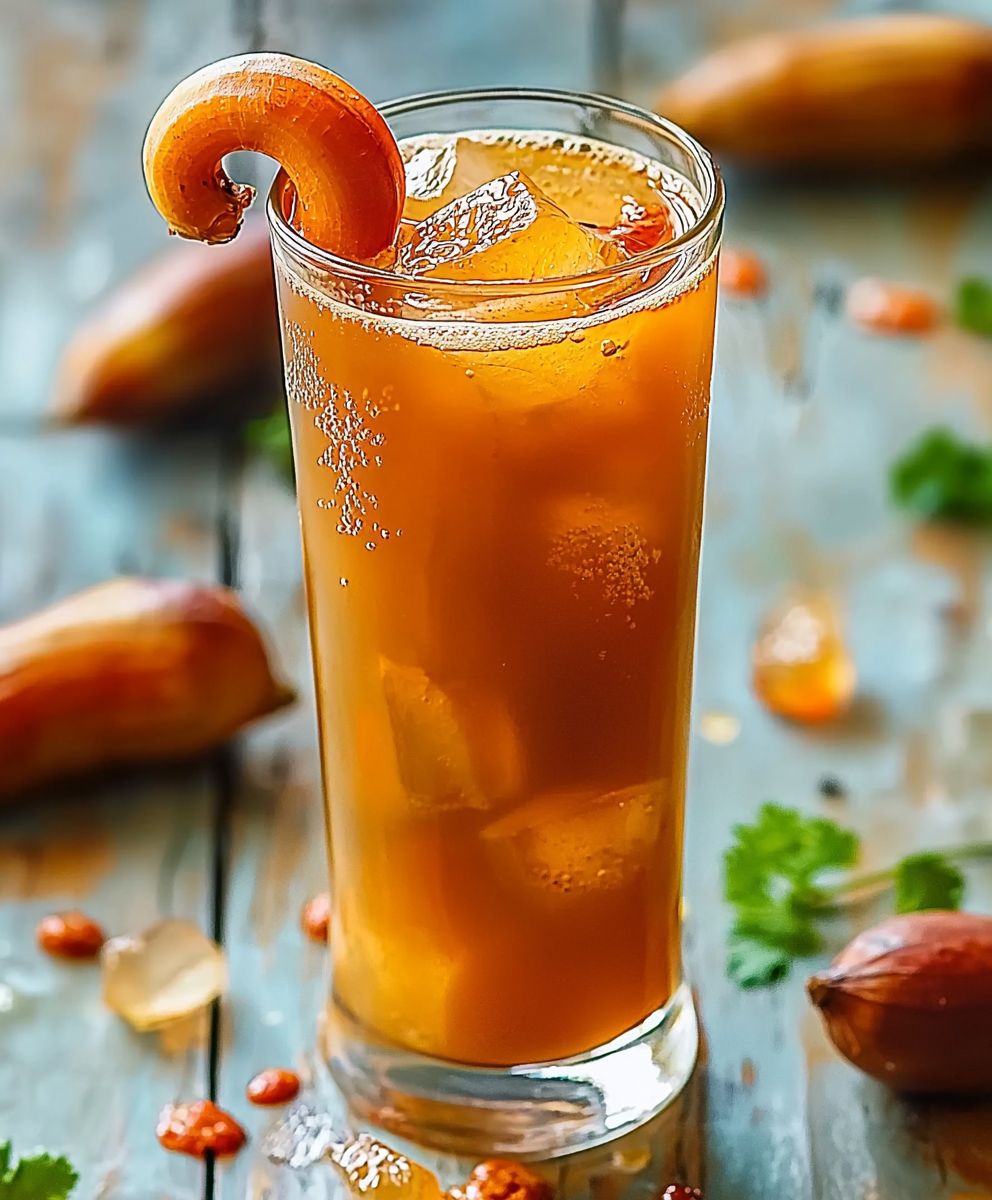
Serving Suggestions and Variations:
* Sparkling Tamarind Refresher: Top your tamarind juice with sparkling water or club soda for a fizzy and invigorating drink. A sprig of mint and a slice of lime will elevate it even further.
* Tamarind Ice Pops: Pour the juice into popsicle molds and freeze for a healthy and refreshing treat on a hot day. Kids (and adults!) will absolutely love these.
* Tamarind Margarita: For a grown-up twist, add a shot of tequila and a splash of orange liqueur to your tamarind juice. Shake with ice and strain into a salt-rimmed glass for a unique and flavorful margarita.
* Spiced Tamarind Tea: Warm up the juice and add a cinnamon stick, a few cloves, and a star anise for a cozy and aromatic tea. This is perfect for those chilly evenings.
* Sweetness Adjustment: Feel free to adjust the amount of sweetener to your liking. Honey, agave nectar, or even stevia can be used as alternatives to sugar.
* Spice it Up: Add a pinch of cayenne pepper or a small piece of ginger to the juice for a spicy kick. This will not only add flavor but also boost the health benefits.
* Tamarind Smoothie Booster: Add a splash of tamarind juice to your favorite smoothie recipe for a tangy and nutritious boost. It pairs particularly well with tropical fruits like mango and pineapple.I’ve tried all of these variations myself, and each one offers a unique and delightful experience. The possibilities are truly endless, so don’t be afraid to experiment and find your own perfect tamarind juice concoction.
I’m so excited for you to try this recipe and experience the amazing flavor and potential tamarind juice benefits for yourself. It’s a simple yet incredibly rewarding recipe that I’m confident you’ll love.
So, what are you waiting for? Gather your ingredients, follow the instructions, and get ready to enjoy a truly special drink. And most importantly, don’t forget to share your experience with me! I’d love to hear how you customized the recipe, what variations you tried, and what you thought of the overall flavor. Leave a comment below, tag me on social media, or simply tell a friend about it. Let’s spread the word about this amazing and healthy beverage! Happy juicing! I can’t wait to hear all about your tamarind juice adventures!
Tamarind Juice Benefits: A Comprehensive Guide
Savory hand pies filled with spiced ground pork and a tangy-sweet tamarind glaze, all encased in a flaky homemade crust.
Ingredients
- 3 cups all-purpose flour, plus more for dusting
- 1 teaspoon salt
- 1 cup (2 sticks) unsalted butter, cold and cubed
- 6-8 tablespoons ice water
- 1 cup tamarind pulp (seedless)
- 1 cup water
- 1/2 cup granulated sugar
- 1/4 cup light brown sugar, packed
- 1 tablespoon soy sauce (low sodium preferred)
- 1 tablespoon rice vinegar
- 1 teaspoon grated fresh ginger
- 1 clove garlic, minced
- 1/2 teaspoon red pepper flakes (optional, for heat)
- 1 tablespoon cornstarch
- 2 tablespoons cold water
- 1 pound ground pork (or ground chicken/turkey for a lighter option)
- 1 medium onion, finely chopped
- 2 cloves garlic, minced
- 1 inch ginger, grated
- 1 red bell pepper, finely diced
- 1 green bell pepper, finely diced
- 1/2 cup chopped cilantro
- 2 tablespoons soy sauce (low sodium preferred)
- 1 tablespoon sesame oil
- 1 teaspoon ground cumin
- 1/2 teaspoon ground coriander
- 1/4 teaspoon black pepper
- 1/4 teaspoon salt, or to taste
- 1 large egg
- 1 tablespoon milk or water
- Sesame seeds
- Chopped green onions
Instructions
- In a large bowl, whisk together the flour and salt.
- Add the cold, cubed butter to the flour mixture. Using a pastry blender or your fingertips, cut the butter into the flour until the mixture resembles coarse crumbs.
- Gradually add the ice water, one tablespoon at a time, mixing gently after each addition. Stop adding water when the dough just comes together and is slightly shaggy.
- Divide the dough in half and gently form each half into a disk. Wrap each disk tightly in plastic wrap.
- Refrigerate the dough for at least 30 minutes, or up to 2 hours.
- If using a block of tamarind pulp with seeds, soak it in the 1 cup of warm water for about 30 minutes, or until softened. Break it down and remove the seeds. Strain the mixture. If using seedless tamarind pulp, simply mix it with the water.
- In a medium saucepan, combine the tamarind juice, granulated sugar, brown sugar, soy sauce, rice vinegar, grated ginger, minced garlic, and red pepper flakes (if using).
- Bring the mixture to a simmer over medium heat, stirring occasionally. Reduce the heat to low and simmer for about 15-20 minutes, or until the glaze has thickened slightly.
- In a small bowl, whisk together the cornstarch and 2 tablespoons of cold water to create a slurry. Pour the slurry into the simmering glaze and stir constantly until the glaze thickens to your desired consistency.
- Remove the glaze from the heat and let it cool completely.
- In a large skillet or wok, heat the sesame oil over medium heat. Add the chopped onion and cook until softened, about 5 minutes. Add the minced garlic and grated ginger and cook for another minute, until fragrant.
- Add the ground pork to the skillet and cook, breaking it up with a spoon, until browned and cooked through. Drain off any excess grease.
- Add the diced red and green bell peppers to the skillet and cook for about 5 minutes, or until slightly softened.
- Stir in the soy sauce, cumin, coriander, black pepper, and salt. Taste and adjust the seasonings as needed.
- Remove the skillet from the heat and stir in the chopped cilantro. Let the filling cool completely before assembling the hand pies.
- Preheat your oven to 375°F (190°C). Line a baking sheet with parchment paper.
- On a lightly floured surface, roll out one disk of dough to about 1/8 inch thickness. Use a 4-inch round cookie cutter or a knife to cut out circles of dough.
- Place about 2 tablespoons of the cooled pork filling in the center of each dough circle.
- Spoon about 1 teaspoon of the tamarind glaze over the filling.
- Fold the dough circle in half to form a half-moon shape. Crimp the edges with a fork to seal the hand pie.
- Repeat the process with the remaining dough and filling.
- In a small bowl, whisk together the egg and milk or water.
- Brush the tops of the hand pies with the egg wash.
- Sprinkle the tops of the hand pies with sesame seeds and/or chopped green onions, if desired.
- Place the hand pies on the prepared baking sheet and bake for 20-25 minutes, or until golden brown.
- Let the hand pies cool on the baking sheet for a few minutes before transferring them to a wire rack to cool completely. Serve warm or at room temperature.
Notes
- Keep the dough cold for the flakiest crust.
- Adjust the spices in the filling to your preference.
- Don’t overfill the hand pies, or the filling will leak out during baking.
- The dough and filling can be made ahead of time.
- For a vegetarian option, substitute the ground pork with crumbled tofu or sautéed vegetables.
- Add more red pepper flakes for a spicier kick.
- Mix chopped peanuts or cashews into the filling for added texture.


Leave a Comment