
School Pizza: Remember that rectangular slice of cheesy, saucy goodness from your school cafeteria? The one that, despite its humble appearance, held a special place in your heart? Well, get ready to relive those nostalgic lunchroom days because we’re bringing that iconic pizza back to your kitchen!
While the exact origins of school pizza are shrouded in mystery (and likely vary from district to district!), its cultural significance is undeniable. For generations, it has been a shared culinary experience for students across the nation, a symbol of lunchtime camaraderie and simple pleasures. It wasn’t gourmet, it wasn’t fancy, but it was reliably delicious and comforting.
So, what makes this pizza so beloved? It’s the perfect combination of a soft, slightly chewy crust, a tangy tomato sauce, and a generous blanket of melted mozzarella cheese. It’s the kind of pizza that’s easy to eat, satisfyingly filling, and evokes a sense of childhood nostalgia with every bite. Plus, it’s incredibly easy to make at home, making it a perfect weeknight meal for busy families. Get ready to bake up a batch of this classic and transport yourself back to those carefree school days!

Ingredients:
- For the Dough:
- 3 ½ cups all-purpose flour, plus more for dusting
- 1 teaspoon sugar
- 1 teaspoon salt
- 1 packet (2 ¼ teaspoons) active dry yeast
- 1 ½ cups warm water (105-115°F)
- 2 tablespoons olive oil, plus more for greasing
- For the Sauce:
- 1 (28 ounce) can crushed tomatoes
- 1 (6 ounce) can tomato paste
- 1 teaspoon dried oregano
- 1 teaspoon dried basil
- ½ teaspoon garlic powder
- ½ teaspoon onion powder
- ¼ teaspoon red pepper flakes (optional)
- 1 tablespoon olive oil
- Salt and pepper to taste
- For the Topping:
- 1 pound ground beef
- 1 medium onion, finely chopped
- 2 cloves garlic, minced
- 2 cups shredded mozzarella cheese
- ½ cup shredded cheddar cheese (optional, for that extra school pizza flavor!)
Preparing the Dough:
- Activate the Yeast: In a large bowl, dissolve the sugar and yeast in warm water. Let it stand for 5-10 minutes, or until foamy. This step is crucial to ensure your yeast is alive and active. If it doesn’t foam, your yeast might be old, and you’ll need to start over with fresh yeast.
- Combine Wet and Dry Ingredients: Add the olive oil to the yeast mixture. Gradually add the flour and salt, mixing with a wooden spoon or your hands until a shaggy dough forms.
- Knead the Dough: Turn the dough out onto a lightly floured surface. Knead for 8-10 minutes, or until the dough is smooth and elastic. If the dough is too sticky, add a little more flour, a tablespoon at a time. If it’s too dry, add a teaspoon of water at a time. Kneading develops the gluten, which gives the pizza its chewy texture.
- First Rise: Lightly grease a large bowl with olive oil. Place the dough in the bowl, turning to coat. Cover the bowl with plastic wrap or a clean kitchen towel. Let it rise in a warm place for 1-1.5 hours, or until doubled in size. This rising time allows the yeast to work its magic and create a light and airy dough.
Making the Sauce:
- Sauté Aromatics: In a medium saucepan, heat the olive oil over medium heat. Add the crushed tomatoes, tomato paste, oregano, basil, garlic powder, onion powder, and red pepper flakes (if using).
- Simmer the Sauce: Bring the sauce to a simmer, then reduce the heat to low. Simmer for 15-20 minutes, stirring occasionally, to allow the flavors to meld together.
- Season to Taste: Season the sauce with salt and pepper to taste. Remember, you can always add more seasoning, but you can’t take it away!
- Cool Slightly: Remove the sauce from the heat and let it cool slightly before using. This prevents the sauce from making the dough soggy.
Preparing the Topping:
- Brown the Ground Beef: In a large skillet, brown the ground beef over medium-high heat. Break it up with a spoon as it cooks.
- Sauté Onion and Garlic: Once the ground beef is browned, drain off any excess grease. Add the chopped onion and minced garlic to the skillet and cook until softened, about 5 minutes.
- Season the Beef: Season the ground beef mixture with salt and pepper to taste. You can also add a pinch of Italian seasoning for extra flavor.
- Set Aside: Remove the ground beef mixture from the heat and set aside.
Assembling and Baking the Pizza:
- Preheat the Oven: Preheat your oven to 450°F (232°C). Place a pizza stone or baking sheet in the oven while it preheats. This helps to create a crispy crust.
- Prepare the Dough: Punch down the risen dough to release the air. Turn it out onto a lightly floured surface.
- Shape the Dough: Divide the dough in half. Roll out each half into a large rectangle, about 12×16 inches. The shape doesn’t have to be perfect school pizza wasn’t! You can also use your hands to stretch the dough.
- Transfer to Baking Sheet: Carefully transfer each rectangle of dough to a greased baking sheet. You can also use parchment paper for easier cleanup.
- Add the Sauce: Spread a generous layer of sauce over each pizza crust, leaving a small border around the edges.
- Add the Toppings: Sprinkle the ground beef mixture evenly over the sauce. Then, sprinkle with the mozzarella cheese and cheddar cheese (if using). Don’t be shy with the cheese school pizza was always loaded!
- Bake the Pizza: Bake for 12-15 minutes, or until the crust is golden brown and the cheese is melted and bubbly. Keep a close eye on the pizza to prevent it from burning.
- Cool Slightly and Serve: Remove the pizza from the oven and let it cool for a few minutes before slicing and serving. Enjoy your homemade school pizza!
Tips and Variations:
- Crust Thickness: For a thinner crust, roll the dough out thinner. For a thicker crust, use less pressure when rolling.
- Cheese Variations: Feel free to use other types of cheese, such as provolone, Monterey Jack, or a blend of Italian cheeses.
- Vegetarian Option: Omit the ground beef and add your favorite vegetables, such as bell peppers, mushrooms, onions, and olives.
- Spice it Up: Add a pinch of red pepper flakes to the sauce or sprinkle some on top of the pizza for a little heat.
- Make Ahead: The dough can be made ahead of time and stored in the refrigerator for up to 2 days. Just bring it to room temperature before rolling it out. The sauce can also be made ahead of time and stored in the refrigerator for up to 3 days.
- Freezing Instructions: You can freeze the baked pizza for up to 2 months. Let it cool completely, then wrap it tightly in plastic wrap and aluminum foil. To reheat, bake in a preheated oven at 350°F (175°C) for 15-20 minutes, or until heated through.
- School Pizza Secret: Some schools used a slightly sweet sauce. If you want to replicate that, add a teaspoon of sugar to the sauce while it simmers.
Conclusion:
So, there you have it! This isn’t just any pizza; it’s a nostalgic trip back to those carefree school days, but elevated with fresh ingredients and a whole lot of love. I truly believe this school pizza recipe is a must-try for anyone craving a comforting, familiar flavor with a homemade touch. It’s simple enough for a weeknight dinner, yet special enough to impress at a casual gathering.
Why is it a must-try? Because it perfectly balances simplicity and satisfaction. The crispy, slightly chewy crust, the tangy tomato sauce, and the generous blanket of melted mozzarella create a symphony of flavors that will transport you back to the lunchroom (in the best way possible!). Plus, its incredibly versatile. You can easily adapt it to your own preferences and dietary needs.
Looking for serving suggestions? This pizza is fantastic on its own, but it also pairs beautifully with a crisp green salad and a side of garlic bread. For a fun twist, try cutting it into squares, just like they did in school! It’s also a great option for kids’ parties they’ll love the familiar taste and you’ll appreciate how easy it is to make.
But the fun doesn’t stop there! Feel free to experiment with variations to make this recipe your own. Want to add some extra veggies? Sliced bell peppers, onions, and mushrooms would be delicious. Craving a little heat? Sprinkle on some red pepper flakes or add a pinch of cayenne pepper to the sauce. For a meatier version, consider adding cooked ground beef, Italian sausage, or pepperoni. You could even try using different types of cheese, like provolone or cheddar, for a unique flavor profile.
Another fun variation is to use a different type of crust. While this recipe calls for a classic pizza dough, you could also try using a pre-made crust, a flatbread, or even a cauliflower crust for a healthier option. The possibilities are endless!
Don’t be afraid to get creative and have fun with it. After all, cooking should be an enjoyable experience. And I promise, this school pizza recipe is one that you’ll want to make again and again. It’s a guaranteed crowd-pleaser that will bring back fond memories and create new ones.
I’m so excited for you to try this recipe! I truly believe you’ll love it as much as I do. It’s a comforting, nostalgic, and incredibly satisfying meal that’s perfect for any occasion.
So, what are you waiting for? Gather your ingredients, preheat your oven, and get ready to bake up a batch of this amazing school pizza. I can’t wait to hear what you think!
Once you’ve tried it, please come back and share your experience in the comments below. Let me know what variations you tried, what you loved about it, and any tips or tricks you discovered along the way. I’m always looking for new ideas and inspiration, and I love hearing from my readers.
Happy baking! And remember, the best part about cooking is sharing your creations with the people you love. Enjoy!
School Pizza: A Guide to Nutritious and Delicious Options
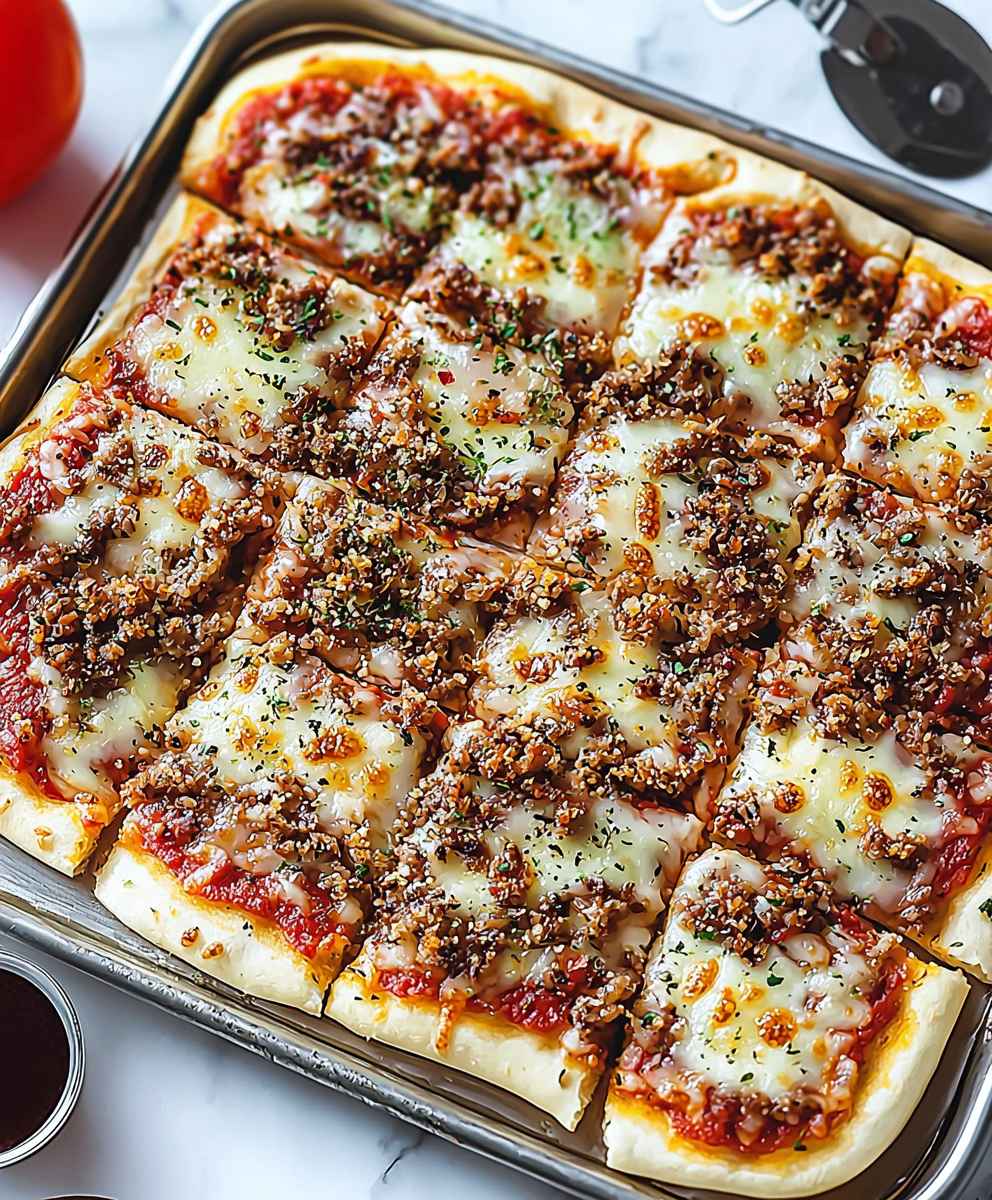
Nostalgic homemade school pizza with a chewy crust, flavorful tomato sauce, seasoned ground beef topping, and plenty of cheese.
Ingredients
- 3 ½ cups all-purpose flour, plus more for dusting
- 1 teaspoon sugar
- 1 teaspoon salt
- 1 packet (2 ¼ teaspoons) active dry yeast
- 1 ½ cups warm water (105-115°F)
- 2 tablespoons olive oil, plus more for greasing
- 1 (28 ounce) can crushed tomatoes
- 1 (6 ounce) can tomato paste
- 1 teaspoon dried oregano
- 1 teaspoon dried basil
- ½ teaspoon garlic powder
- ½ teaspoon onion powder
- ¼ teaspoon red pepper flakes (optional)
- 1 tablespoon olive oil
- Salt and pepper to taste
- 1 pound ground beef
- 1 medium onion, finely chopped
- 2 cloves garlic, minced
- 2 cups shredded mozzarella cheese
- ½ cup shredded cheddar cheese (optional)
Instructions
- Activate the Yeast: In a large bowl, dissolve the sugar and yeast in warm water. Let it stand for 5-10 minutes, or until foamy.
- Combine Wet and Dry Ingredients: Add the olive oil to the yeast mixture. Gradually add the flour and salt, mixing until a shaggy dough forms.
- Knead the Dough: Turn the dough out onto a lightly floured surface. Knead for 8-10 minutes, or until the dough is smooth and elastic. Add flour or water as needed.
- First Rise: Lightly grease a large bowl with olive oil. Place the dough in the bowl, turning to coat. Cover and let rise in a warm place for 1-1.5 hours, or until doubled in size.
- Sauté Aromatics: In a medium saucepan, heat the olive oil over medium heat. Add the crushed tomatoes, tomato paste, oregano, basil, garlic powder, onion powder, and red pepper flakes (if using).
- Simmer the Sauce: Bring the sauce to a simmer, then reduce the heat to low. Simmer for 15-20 minutes, stirring occasionally.
- Season to Taste: Season the sauce with salt and pepper to taste.
- Cool Slightly: Remove the sauce from the heat and let it cool slightly before using.
- Brown the Ground Beef: In a large skillet, brown the ground beef over medium-high heat. Break it up with a spoon as it cooks.
- Sauté Onion and Garlic: Once the ground beef is browned, drain off any excess grease. Add the chopped onion and minced garlic to the skillet and cook until softened, about 5 minutes.
- Season the Beef: Season the ground beef mixture with salt and pepper to taste.
- Set Aside: Remove the ground beef mixture from the heat and set aside.
- Preheat the Oven: Preheat your oven to 450°F (232°C). Place a pizza stone or baking sheet in the oven while it preheats.
- Prepare the Dough: Punch down the risen dough to release the air. Turn it out onto a lightly floured surface.
- Shape the Dough: Divide the dough in half. Roll out each half into a large rectangle, about 12×16 inches.
- Transfer to Baking Sheet: Carefully transfer each rectangle of dough to a greased baking sheet.
- Add the Sauce: Spread a generous layer of sauce over each pizza crust, leaving a small border around the edges.
- Add the Toppings: Sprinkle the ground beef mixture evenly over the sauce. Then, sprinkle with the mozzarella cheese and cheddar cheese (if using).
- Bake the Pizza: Bake for 12-15 minutes, or until the crust is golden brown and the cheese is melted and bubbly.
- Cool Slightly and Serve: Remove the pizza from the oven and let it cool for a few minutes before slicing and serving.
Notes
- For a thinner crust, roll the dough out thinner. For a thicker crust, use less pressure when rolling.
- Feel free to use other types of cheese, such as provolone, Monterey Jack, or a blend of Italian cheeses.
- Omit the ground beef and add your favorite vegetables, such as bell peppers, mushrooms, onions, and olives for a vegetarian option.
- Add a pinch of red pepper flakes to the sauce or sprinkle some on top of the pizza for a little heat.
- The dough can be made ahead of time and stored in the refrigerator for up to 2 days. Just bring it to room temperature before rolling it out. The sauce can also be made ahead of time and stored in the refrigerator for up to 3 days.
- You can freeze the baked pizza for up to 2 months. Let it cool completely, then wrap it tightly in plastic wrap and aluminum foil. To reheat, bake in a preheated oven at 350°F (175°C) for 15-20 minutes, or until heated through.
- Some schools used a slightly sweet sauce. If you want to replicate that, add a teaspoon of sugar to the sauce while it simmers.


Leave a Comment