
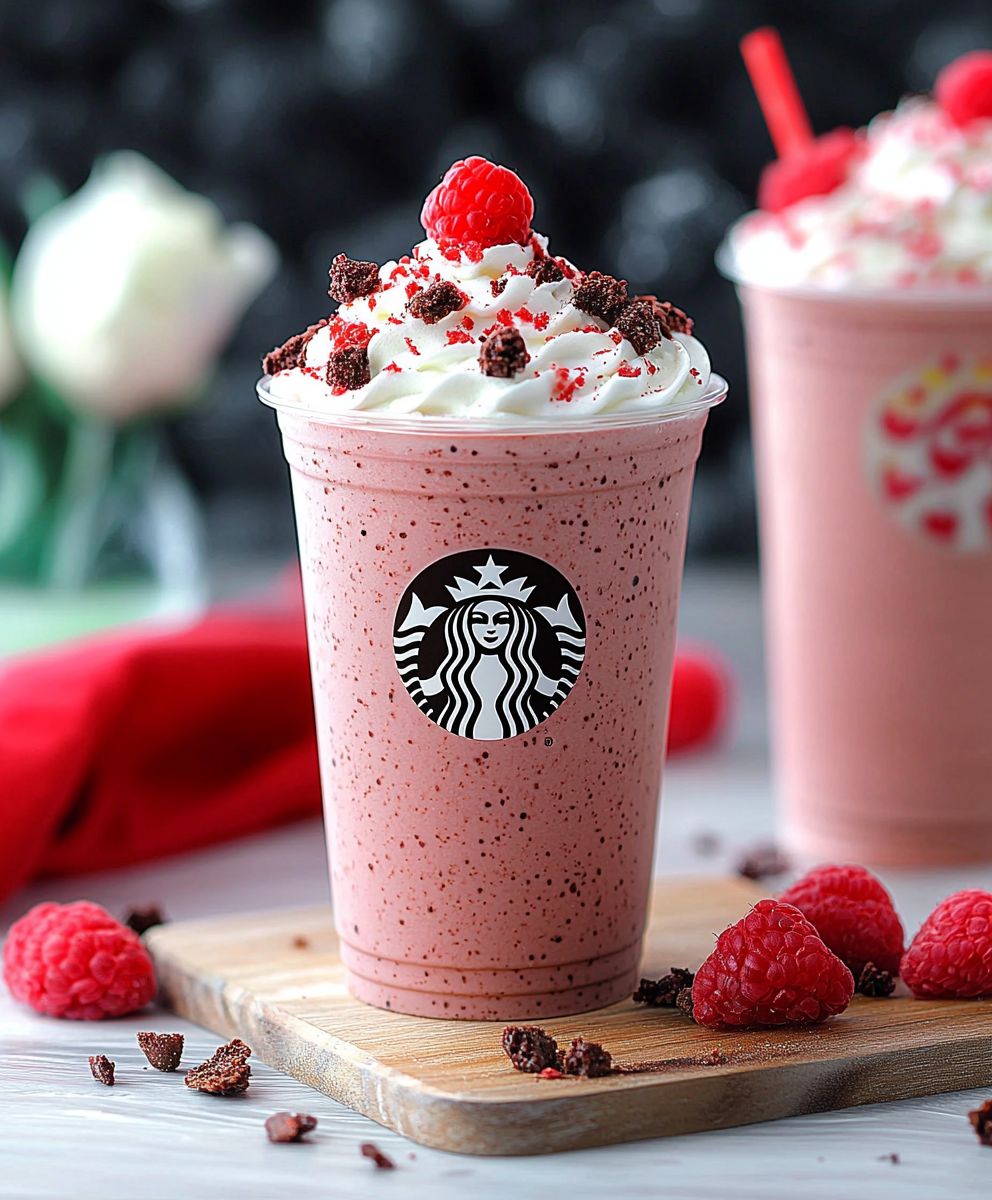
Red Velvet Frappuccino: Prepare to indulge in a decadent, dreamy beverage that tastes just like a slice of red velvet cake in a cup! Forget your usual coffee run; this homemade version is so much better than anything you’ll find at a chain, and it’s surprisingly easy to make.
The allure of red velvet, with its intriguing crimson hue and subtle cocoa notes, has captivated taste buds for generations. While the exact origins are debated, its popularity soared in the mid-20th century, becoming a symbol of Southern elegance and indulgence. This Red Velvet Frappuccino captures that same luxurious feeling, transforming the classic cake into a refreshing, icy treat.
What makes this frappuccino so irresistible? It’s the perfect balance of sweet and slightly tangy, with a velvety smooth texture that melts in your mouth. The hint of chocolate complements the creamy base, creating a symphony of flavors that will leave you wanting more. Plus, it’s incredibly convenient! Whether you’re craving a midday pick-me-up or a delightful dessert, this frappuccino is ready in minutes. So, ditch the drive-thru and treat yourself to this homemade delight you deserve it!
Ingredients:
- For the Red Velvet Base:
- 1 cup milk (any kind, I prefer whole milk for richness)
- 2 tablespoons red velvet cake mix (the dry powder)
- 1 tablespoon granulated sugar (adjust to your sweetness preference)
- 1/2 teaspoon unsweetened cocoa powder
- 1/4 teaspoon vanilla extract
- Pinch of salt
- 1 1/2 cups ice cubes
- For the Whipped Cream Topping:
- 1 cup heavy cream (must be cold)
- 2 tablespoons powdered sugar
- 1/2 teaspoon vanilla extract
- For the Chocolate Shavings (Optional):
- 1 ounce dark chocolate or milk chocolate
- For the Red Velvet Crumble (Optional):
- Leftover red velvet cake (or a store-bought red velvet cupcake)
- For the Garnish (Optional):
- Red sprinkles
- Chocolate syrup
Preparing the Red Velvet Base:
- Combine the Base Ingredients: In a blender, combine the milk, red velvet cake mix, granulated sugar, cocoa powder, vanilla extract, and salt. Make sure the cake mix is well incorporated to avoid any clumps. I like to whisk it together with the milk before adding it to the blender to ensure a smooth base.
- Blend Until Smooth: Blend the mixture on medium speed until everything is fully combined and smooth. This usually takes about 30 seconds. Check for any remaining cake mix powder at the bottom of the blender and blend again if necessary.
- Add Ice: Add the ice cubes to the blender. The amount of ice will determine the thickness of your Frappuccino, so adjust accordingly. If you prefer a thicker Frappuccino, add a little more ice. If you want it thinner, use a little less.
- Blend Until Frappe Consistency: Blend on high speed until the mixture reaches a smooth, Frappuccino-like consistency. This may take a minute or two, depending on your blender. Stop occasionally to scrape down the sides of the blender with a spatula to ensure all the ice is incorporated. You’re looking for a thick, icy, and creamy texture.
- Taste and Adjust: Taste the Frappuccino base and adjust the sweetness or cocoa flavor as needed. If it’s not sweet enough, add a little more sugar. If you want a richer chocolate flavor, add a pinch more cocoa powder. Blend again briefly to incorporate any additions.
Making the Whipped Cream Topping:
- Chill Your Equipment: This is crucial! Place your mixing bowl and whisk attachment (or beaters if using a hand mixer) in the freezer for about 15-20 minutes before you start. Cold equipment helps the cream whip up faster and hold its shape better.
- Combine Cream, Sugar, and Vanilla: Pour the cold heavy cream into the chilled mixing bowl. Add the powdered sugar and vanilla extract.
- Whip the Cream: Begin whipping the cream on medium speed. As the cream starts to thicken, gradually increase the speed to high. Watch it carefully! You want to whip it until stiff peaks form. This means that when you lift the whisk or beaters, the peaks of the whipped cream stand up straight and hold their shape. Be careful not to overwhip, as this can turn the cream into butter.
- Store Properly: If you’re not using the whipped cream immediately, store it in an airtight container in the refrigerator. It will hold its shape for a few hours.
Assembling the Red Velvet Frappuccino:
- Prepare Your Glass: If desired, drizzle chocolate syrup around the inside of your serving glass for a decorative touch. This is totally optional, but it adds a nice visual appeal and a little extra chocolate flavor.
- Pour the Frappuccino: Carefully pour the red velvet Frappuccino base into your prepared glass, leaving some room at the top for the whipped cream.
- Top with Whipped Cream: Generously top the Frappuccino with the freshly whipped cream. You can use a piping bag for a more professional look, or simply spoon it on top.
- Add Chocolate Shavings (Optional): If you’re using chocolate shavings, sprinkle them over the whipped cream. You can use a vegetable peeler to create chocolate shavings from a block of chocolate.
- Add Red Velvet Crumble (Optional): If you have leftover red velvet cake or a cupcake, crumble it over the whipped cream for an extra layer of red velvet flavor and texture.
- Garnish (Optional): For a final touch, sprinkle red sprinkles over the whipped cream and drizzle with a little more chocolate syrup.
- Serve Immediately: Serve your Red Velvet Frappuccino immediately and enjoy! It’s best when it’s cold and the whipped cream is still fluffy.
Tips and Variations:
- Adjusting Sweetness: The amount of sugar in this recipe is a guideline. Adjust it to your personal preference. If you prefer a less sweet Frappuccino, reduce the amount of sugar. If you have a sweet tooth, add a little more.
- Using Different Milk: Feel free to use any type of milk you prefer. Almond milk, soy milk, or oat milk are all great dairy-free options. Keep in mind that the type of milk you use will affect the overall flavor and creaminess of the Frappuccino.
- Adding Coffee: If you want a caffeinated Red Velvet Frappuccino, add a shot of espresso or 1/4 cup of strong brewed coffee to the blender along with the other base ingredients.
- Making it Vegan: To make this recipe vegan, use a plant-based milk, vegan red velvet cake mix, and vegan whipped cream. There are many delicious vegan whipped cream options available in stores or you can make your own using coconut cream.
- Red Food Coloring: Some red velvet cake mixes may not provide a vibrant red color. If you want a more intense red hue, you can add a few drops of red food coloring to the blender. I prefer to use gel food coloring as it’s more concentrated and doesn’t water down the Frappuccino.
- Experiment with Extracts: Try adding a different extract to the base, such as almond extract or peppermint extract, for a unique flavor twist.
- Make it Ahead: You can prepare the red velvet base ahead of time and store it in the refrigerator for up to 24 hours. Just be sure to blend it again before adding the ice.
- For a Thicker Frappuccino: If your Frappuccino is not thick enough, add a little more ice and blend again. You can also add a tablespoon of xanthan gum, which is a natural thickening agent.
- For a Smoother Frappuccino: If your Frappuccino is too icy, add a splash of milk and blend again.
- Red Velvet Cake Mix Alternatives: If you can’t find red velvet cake mix, you can use a combination of regular cake mix, red food coloring, and a little bit of vinegar to mimic the red velvet flavor.
Enjoy your homemade Red Velvet Frappuccino!
Conclusion:
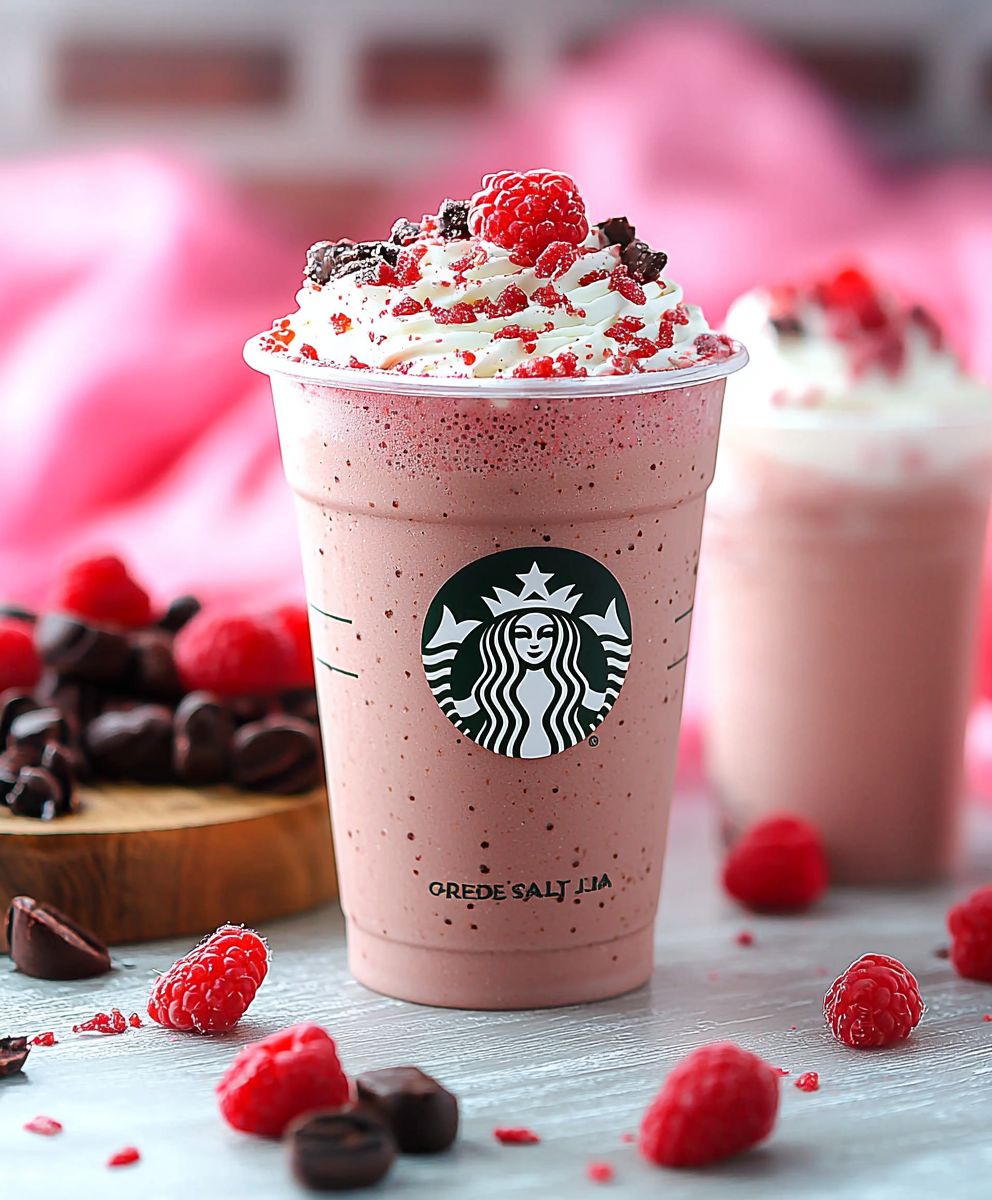
This Red Velvet Frappuccino isn’t just a drink; it’s an experience, a little slice of indulgence that you can whip up in your own kitchen. The vibrant color, the creamy texture, and that unmistakable red velvet flavor it’s a symphony of deliciousness that’s guaranteed to brighten your day. If you’re looking for a treat that’s both visually stunning and incredibly satisfying, then this recipe is an absolute must-try. Trust me, once you taste it, you’ll be hooked!
But the best part? It’s incredibly versatile! While the recipe as written is divine, feel free to experiment and make it your own. Craving something extra decadent? Add a dollop of whipped cream and a sprinkle of chocolate shavings on top. For a more intense red velvet flavor, consider adding a teaspoon of red velvet emulsion to the mix. If you’re watching your sugar intake, you can easily substitute the sugar with your favorite sugar-free sweetener. And for a truly unique twist, try adding a splash of coffee liqueur for an adult-friendly version.
Serving suggestions are endless! This frappuccino is perfect as an afternoon pick-me-up, a delightful dessert after dinner, or even a fun treat to share with friends at your next gathering. Imagine serving these beauties in tall glasses, garnished with a red velvet cupcake on the side talk about a showstopper! You could even create a “frappuccino bar” with different toppings and mix-ins, allowing your guests to customize their own creations. Think chocolate chips, sprinkles, caramel sauce, and even mini marshmallows. The possibilities are truly limitless!
I’ve poured my heart into perfecting this recipe, and I’m confident that you’ll love it as much as I do. It’s a simple yet elegant way to enjoy the classic red velvet flavor in a refreshing and exciting new way. The combination of the creamy base, the subtle chocolate notes, and that signature red hue makes it a truly unforgettable drink.
So, what are you waiting for? Gather your ingredients, dust off your blender, and get ready to embark on a red velvet adventure! I promise you won’t be disappointed. And once you’ve tried it, I’d absolutely love to hear about your experience. Did you make any modifications? What toppings did you add? What did your friends and family think? Share your photos and stories in the comments below I can’t wait to see your creations! Don’t forget to tag me in your social media posts so I can admire your Red Velvet Frappuccino masterpieces. Happy blending!
Red Velvet Frappuccino: The Ultimate Guide to Making It at Home
Creamy, icy homemade Red Velvet Frappuccino with classic red velvet flavor. Topped with whipped cream and optional chocolate shavings and red velvet crumble.
Ingredients
- 1 cup milk (any kind, I prefer whole milk for richness)
- 2 tablespoons red velvet cake mix (the dry powder)
- 1 tablespoon granulated sugar (adjust to your sweetness preference)
- 1/2 teaspoon unsweetened cocoa powder
- 1/4 teaspoon vanilla extract
- Pinch of salt
- 1 1/2 cups ice cubes
- 1 cup heavy cream (must be cold)
- 2 tablespoons powdered sugar
- 1/2 teaspoon vanilla extract
- 1 ounce dark chocolate or milk chocolate
- Leftover red velvet cake (or a store-bought red velvet cupcake)
- Red sprinkles
- Chocolate syrup
Instructions
- Combine the Base Ingredients: In a blender, combine the milk, red velvet cake mix, granulated sugar, cocoa powder, vanilla extract, and salt. Make sure the cake mix is well incorporated to avoid any clumps. Whisk it together with the milk before adding it to the blender to ensure a smooth base.
- Blend Until Smooth: Blend the mixture on medium speed until everything is fully combined and smooth. This usually takes about 30 seconds. Check for any remaining cake mix powder at the bottom of the blender and blend again if necessary.
- Add Ice: Add the ice cubes to the blender. The amount of ice will determine the thickness of your Frappuccino, so adjust accordingly. If you prefer a thicker Frappuccino, add a little more ice. If you want it thinner, use a little less.
- Blend Until Frappe Consistency: Blend on high speed until the mixture reaches a smooth, Frappuccino-like consistency. This may take a minute or two, depending on your blender. Stop occasionally to scrape down the sides of the blender with a spatula to ensure all the ice is incorporated. You’re looking for a thick, icy, and creamy texture.
- Taste and Adjust: Taste the Frappuccino base and adjust the sweetness or cocoa flavor as needed. If it’s not sweet enough, add a little more sugar. If you want a richer chocolate flavor, add a pinch more cocoa powder. Blend again briefly to incorporate any additions.
- Chill Your Equipment: Place your mixing bowl and whisk attachment (or beaters if using a hand mixer) in the freezer for about 15-20 minutes before you start. Cold equipment helps the cream whip up faster and hold its shape better.
- Combine Cream, Sugar, and Vanilla: Pour the cold heavy cream into the chilled mixing bowl. Add the powdered sugar and vanilla extract.
- Whip the Cream: Begin whipping the cream on medium speed. As the cream starts to thicken, gradually increase the speed to high. Watch it carefully! You want to whip it until stiff peaks form. This means that when you lift the whisk or beaters, the peaks of the whipped cream stand up straight and hold their shape. Be careful not to overwhip, as this can turn the cream into butter.
- Store Properly: If you’re not using the whipped cream immediately, store it in an airtight container in the refrigerator. It will hold its shape for a few hours.
- Prepare Your Glass: If desired, drizzle chocolate syrup around the inside of your serving glass for a decorative touch. This is totally optional, but it adds a nice visual appeal and a little extra chocolate flavor.
- Pour the Frappuccino: Carefully pour the red velvet Frappuccino base into your prepared glass, leaving some room at the top for the whipped cream.
- Top with Whipped Cream: Generously top the Frappuccino with the freshly whipped cream. You can use a piping bag for a more professional look, or simply spoon it on top.
- Add Chocolate Shavings (Optional): If you’re using chocolate shavings, sprinkle them over the whipped cream. You can use a vegetable peeler to create chocolate shavings from a block of chocolate.
- Add Red Velvet Crumble (Optional): If you have leftover red velvet cake or a cupcake, crumble it over the whipped cream for an extra layer of red velvet flavor and texture.
- Garnish (Optional): For a final touch, sprinkle red sprinkles over the whipped cream and drizzle with a little more chocolate syrup.
- Serve Immediately: Serve your Red Velvet Frappuccino immediately and enjoy! It’s best when it’s cold and the whipped cream is still fluffy.
Notes
- Adjusting Sweetness: The amount of sugar in this recipe is a guideline. Adjust it to your personal preference. If you prefer a less sweet Frappuccino, reduce the amount of sugar. If you have a sweet tooth, add a little more.
- Using Different Milk: Feel free to use any type of milk you prefer. Almond milk, soy milk, or oat milk are all great dairy-free options. Keep in mind that the type of milk you use will affect the overall flavor and creaminess of the Frappuccino.
- Adding Coffee: If you want a caffeinated Red Velvet Frappuccino, add a shot of espresso or 1/4 cup of strong brewed coffee to the blender along with the other base ingredients.
- Making it Vegan: To make this recipe vegan, use a plant-based milk, vegan red velvet cake mix, and vegan whipped cream. There are many delicious vegan whipped cream options available in stores or you can make your own using coconut cream.
- Red Food Coloring: Some red velvet cake mixes may not provide a vibrant red color. If you want a more intense red hue, you can add a few drops of red food coloring to the blender. I prefer to use gel food coloring as it’s more concentrated and doesn’t water down the Frappuccino.
- Experiment with Extracts: Try adding a different extract to the base, such as almond extract or peppermint extract, for a unique flavor twist.
- Make it Ahead: You can prepare the red velvet base ahead of time and store it in the refrigerator for up to 24 hours. Just be sure to blend it again before adding the ice.
- For a Thicker Frappuccino: If your Frappuccino is not thick enough, add a little more ice and blend again. You can also add a tablespoon of xanthan gum, which is a natural thickening agent.
- For a Smoother Frappuccino: If your Frappuccino is too icy, add a splash of milk and blend again.
- Red Velvet Cake Mix Alternatives: If you can’t find red velvet cake mix, you can use a combination of regular cake mix, red food coloring, and a little bit of vinegar to mimic the red velvet flavor.


Leave a Comment