
Banana Pudding Cups are a delightful treat that never fails to bring a smile to my face. This classic dessert has roots deeply embedded in Southern cuisine, where it has been cherished for generations. The creamy layers of vanilla pudding, fresh bananas, and crunchy Nilla wafers create a harmonious blend of flavors and textures that is simply irresistible. I love how Banana Pudding Cups are not only delicious but also incredibly convenient to prepare, making them a perfect choice for gatherings or a sweet indulgence at home.
What truly makes Banana Pudding Cups special is their ability to evoke nostalgia, reminding many of family gatherings and warm summer days. The combination of the smooth, velvety pudding with the soft bananas and the satisfying crunch of the wafers creates a dessert experience that is both comforting and satisfying. Whether youre serving them at a picnic or enjoying them as a late-night snack, Banana Pudding Cups are sure to please everyone. Join me as we dive into this easy-to-make recipe that will surely become a favorite in your household!
Ingredients:
- 4 ripe bananas
- 1 box (3.4 oz) instant vanilla pudding mix
- 2 cups cold milk
- 1 cup heavy whipping cream
- 1/2 cup powdered sugar
- 1 teaspoon vanilla extract
- 1 box (12 oz) vanilla wafers
- Fresh mint leaves (for garnish, optional)
Preparing the Pudding
1. In a medium-sized mixing bowl, combine the instant vanilla pudding mix and cold milk. Whisk them together until the mixture is smooth and well combined. This should take about 2 minutes. Youll notice it thickening up nicely as you whisk. 2. Once the pudding has thickened, cover the bowl with plastic wrap and place it in the refrigerator to chill for about 15 minutes. This step is crucial as it allows the flavors to meld together and the pudding to set properly.Whipping the Cream
3. While the pudding is chilling, its time to whip the cream. In a large mixing bowl, pour in the heavy whipping cream. Using an electric mixer, beat the cream on medium-high speed until it starts to thicken. 4. Gradually add the powdered sugar and vanilla extract to the cream. Continue to beat the mixture until stiff peaks form. This usually takes about 3-5 minutes. Be careful not to overbeat, as it can turn into butter!Combining the Pudding and Whipped Cream
5. Once the pudding has chilled, remove it from the refrigerator. Gently fold the whipped cream into the pudding mixture using a spatula. Start by adding a small amount of whipped cream to lighten the pudding, then gradually fold in the rest. This will keep the mixture light and airy.Slicing the Bananas
6. Peel the ripe bananas and slice them into thin rounds. Aim for about 1/4 inch thick slices. You want them to be thick enough to hold their shape but thin enough to fit nicely in the cups.Assembling the Banana Pudding Cups
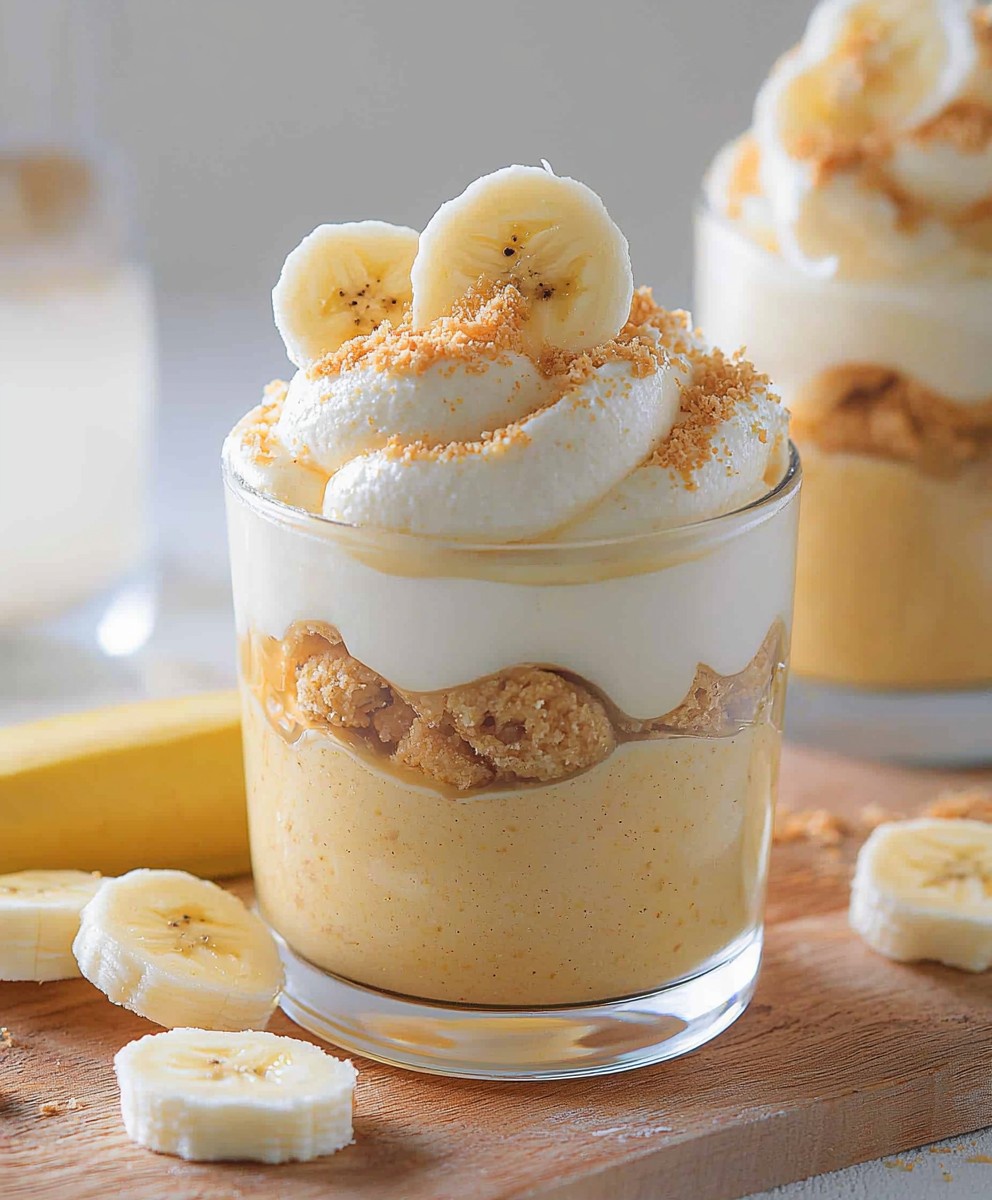
7. Now its time to assemble the banana pudding cups! Grab your serving cups or bowls. I like to use clear cups so you can see the beautiful layers. 8. Start by placing a layer of vanilla wafers at the bottom of each cup. You can break some of the wafers into smaller pieces to fill in any gaps. 9. Next, add a layer of the banana slices on top of the wafers. Make sure to distribute them evenly across all cups. 10. Spoon a generous layer of the pudding mixture over the bananas, filling the cups about halfway. 11. Repeat the layering process: add another layer of vanilla wafers, followed by more banana slices, and then top it off with the remaining pudding mixture. You can create as many layers as you like, but I usually stick to two or three layers for a balanced dessert. 12. If you have any leftover vanilla wafers, you can crush them and sprinkle them on top of the final layer of pudding for a nice crunch.Chilling the Cups
13. Once all the cups are assembled, cover them with plastic wrap or lids if you have them. Place the cups in the refrigerator for at least 2 hours, or overnight if you have the time. This chilling period allows the flavors to meld and the wafers to soften slightly, creating a delightful texture.Garnishing and Serving
14. When youre ready to serve, remove the cups from the refrigerator. If youd like, you can add a dollop of whipped cream on top of each cup for an extra touch of indulgence. 15. For a pop of color and freshness, garnish each cup with a mint leaf. It adds a lovely aroma and a beautiful presentation. 16. Serve the banana pudding cups chilled. I love to dig in with a spoon and enjoy the layers of creamy pudding, sweet bananas, and crunchy wafers. Its a delightful treat thats sure to impress!Tips and Variations
17. If you want to add a twist to your banana pudding cups, consider incorporating other fruits like strawberries or blueberries for a mixed fruit version. 18. For a chocolatey variation, you can use chocolate pudding mix instead of vanilla. It pairs wonderfully with the bananas! 19. If youre looking for a gluten-free option, make sure to use gluten-free vanilla wafers. There are several brands available that taste just as good. 20. You can also make this dessert in a large tr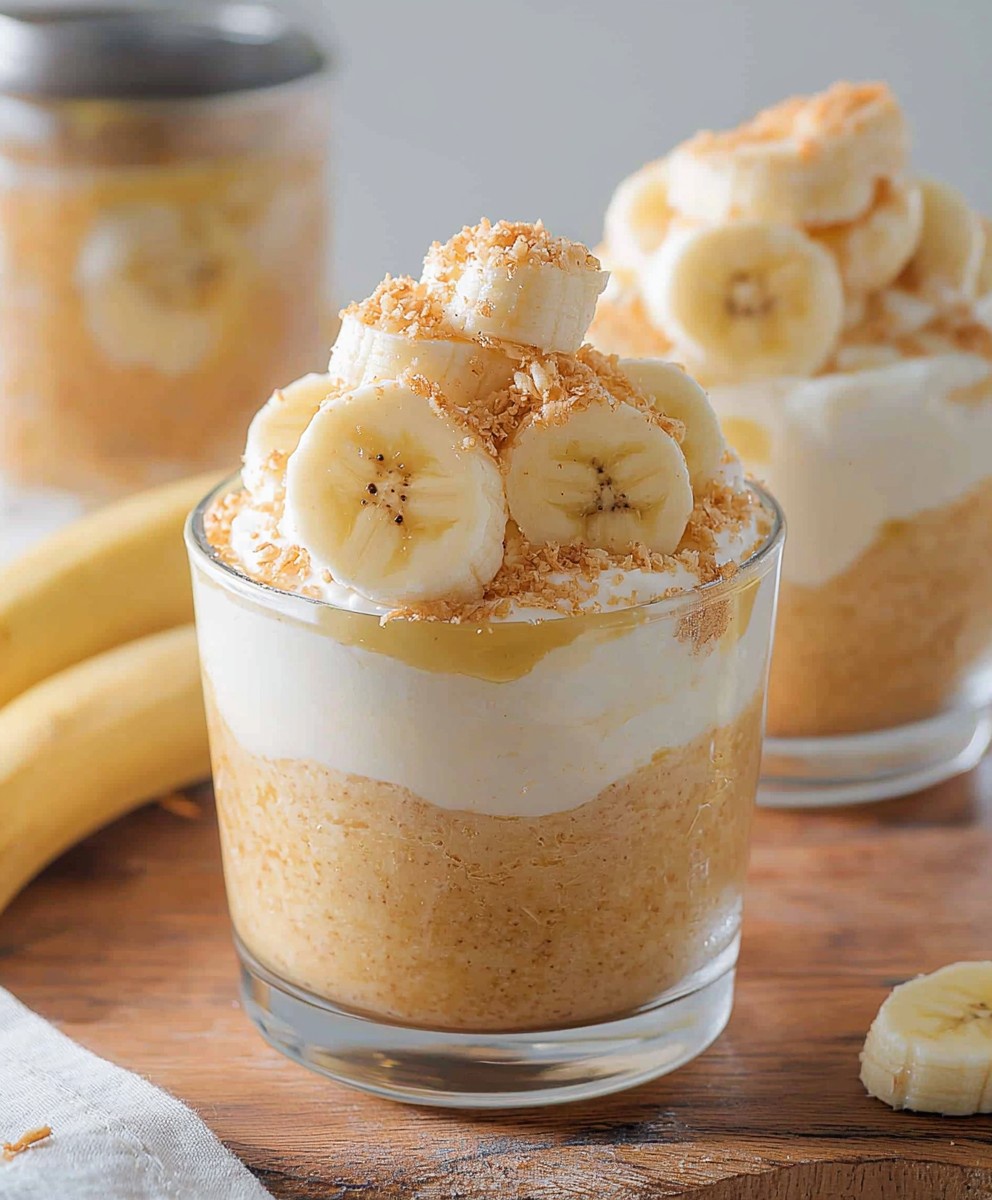
Conclusion:
In summary, these Banana Pudding Cups are an absolute must-try for anyone looking to indulge in a delightful dessert that combines creamy textures with the sweet, comforting flavor of bananas. The layers of velvety pudding, crunchy vanilla wafers, and fresh banana slices create a harmonious balance that is sure to please your taste buds and impress your guests. For serving suggestions, consider topping your Banana Pudding Cups with a dollop of whipped cream or a sprinkle of crushed nuts for added texture. You can also experiment with variations by incorporating different flavors, such as chocolate or caramel, or even adding a hint of cinnamon for a warm twist. I encourage you to give this recipe a try and make it your own! Whether you’re serving it at a family gathering, a potluck, or simply enjoying it at home, I would love to hear about your experience. Share your thoughts and any creative twists you come up with, as I believe that cooking is all about sharing and enjoying together. So grab your ingredients and get started on these delicious Banana Pudding Cupsyou wont regret it! Print
Banana Pudding Cups: A Delicious and Easy Dessert Recipe
- Total Time: 135 minutes
- Yield: 6–8 cups 1x
Description
Enjoy these Banana Pudding Cups, a delightful dessert with layers of creamy vanilla pudding, fresh bananas, and crunchy vanilla wafers. Perfect for any occasion, this easy-to-make treat is sure to impress with its beautiful presentation and delicious flavors.
Ingredients
- 4 ripe bananas
- 1 box (3.4 oz) instant vanilla pudding mix
- 2 cups cold milk
- 1 cup heavy whipping cream
- 1/2 cup powdered sugar
- 1 teaspoon vanilla extract
- 1 box (12 oz) vanilla wafers
- Fresh mint leaves (for garnish, optional)
Instructions
- In a medium-sized mixing bowl, combine the instant vanilla pudding mix and cold milk. Whisk until smooth and thickened, about 2 minutes. Cover with plastic wrap and refrigerate for 15 minutes.
- In a large mixing bowl, pour in the heavy whipping cream. Beat on medium-high speed until it thickens. Gradually add powdered sugar and vanilla extract, continuing to beat until stiff peaks form, about 3-5 minutes.
- Remove the pudding from the refrigerator and gently fold the whipped cream into the pudding mixture using a spatula.
- Peel and slice the bananas into thin rounds, about 1/4 inch thick.
- In clear serving cups, layer the ingredients starting with vanilla wafers, followed by banana slices, and then a layer of the pudding mixture. Repeat the layering process until the cups are filled, finishing with pudding on top. Optionally, crush leftover wafers and sprinkle on top.
- Cover the assembled cups with plastic wrap or lids and refrigerate for at least 2 hours, or overnight.
- Before serving, add a dollop of whipped cream on top of each cup and garnish with a mint leaf. Serve chilled and enjoy the layers of creamy pudding, sweet bananas, and crunchy wafers.
Notes
- For a mixed fruit version, consider adding strawberries or blueberries.
- For a chocolate twist, substitute chocolate pudding mix for vanilla.
- Use gluten-free vanilla wafers for a gluten-free option.
- Prep Time: 15 minutes
- Cook Time: 0 minutes
Leave a Comment