

Mixed Berry Jam (No Pectin) is what I’m making when the summer berries are at their peak and I want to capture that fresh-picked flavor. Making jam at home is incredibly rewarding, and this mixed berry version is one of my favorites to can for gifts or just to spread on toast. The beauty of this recipe is that it doesn’t rely on added pectin. Instead, we’ll coax the natural pectin from the berries themselves and let the sugar help preserve it. This results in a jam with a wonderfully tender texture and a concentrated berry flavor that store-bought varieties often lack. The tartness of the lemon juice is essential here; it brightens the flavor and aids in setting the jam. Ingredients: 16 oz of strawberries, (about 3 cups coarsely chopped) 10 oz of blueberries, (2 cups/pint) 6 oz of blackberries, (1 heaped cup) 6 oz of raspberries, (1 heaped cup) 1 cup of granulated sugar 1/4 cup + 1 tablespoon of fresh lemon juice Cooking Instructions: Prepare the Berries Start by preparing your berries. For the strawberries, hull them and give them a coarse chop. I like to leave them a little chunky for texture. If your blueberries are large, you can gently crush a few, but most can be left whole. Blackberries and raspberries can usually go in as they are, though sometimes larger blackberry pieces might benefit from being halved. Gently combine all the prepared berries in a large, heavy-bottomed pot or Dutch oven. A heavy pot is key to preventing scorching and ensuring even cooking. Macerate and Cook the Berries Add the granulated sugar and the fresh lemon juice to the berries. Stir everything toget
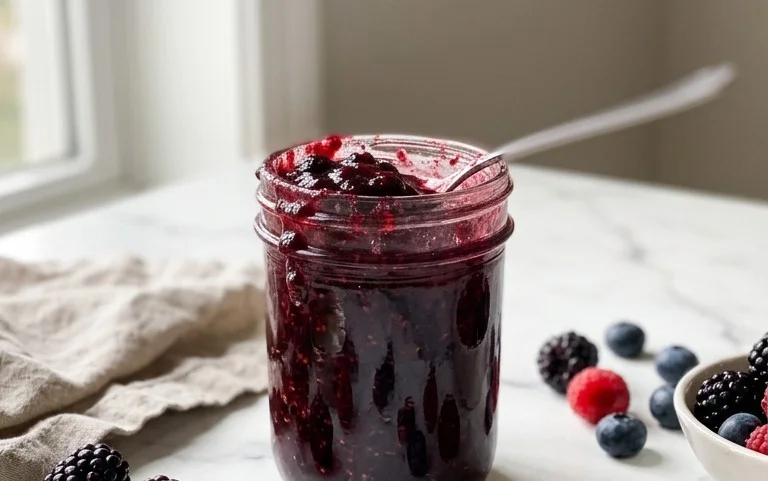
Mixed Berry Jam (No Pectin)
Making jam at home is incredibly rewarding, and this mixed berry version is one of my favorites to can for gifts or just to spread on toast. The beauty of this recipe is that it doesn’t rely on added pectin. Instead, we’ll coax the natural pectin from the berries themselves and let the sugar help preserve it. This results in a jam with a wonderfully tender texture and a concentrated berry flavor that store-bought varieties often lack. The tartness of the lemon juice is essential here; it brightens the flavor and aids in setting the jam.
Ingredients:
- 16 oz of strawberries, (about 3 cups coarsely chopped)
- 10 oz of blueberries, (2 cups/pint)
- 6 oz of blackberries, (1 heaped cup)
- 6 oz of raspberries, (1 heaped cup)
- 1 cup of granulated sugar
- 1/4 cup + 1 tablespoon of fresh lemon juice
Cooking Instructions:
-
Prepare the Berries
Start by preparing your berries. For the strawberries, hull them and give them a coarse chop. I like to leave them a little chunky for texture. If your blueberries are large, you can gently crush a few, but most can be left whole. Blackberries and raspberries can usually go in as they are, though sometimes larger blackberry pieces might benefit from being halved. Gently combine all the prepared berries in a large, heavy-bottomed pot or Dutch oven. A heavy pot is key to preventing scorching and ensuring even cooking.
-
Macerate and Cook the Berries
Add the granulated sugar and the fresh lemon juice to the berries. Stir everything together well. The sugar will start to draw out the juices from the berries, a process called maceration. Let this mixture sit for about 15 to 30 minutes. You’ll see more liquid pooling at the bottom of the pot. Now, place the pot over medium-high heat. Bring the mixture to a rolling boil, stirring occasionally. Once boiling, reduce the heat slightly to maintain a vigorous simmer. You’ll see foam rising to the surface; skim this off with a spoon as it appears. This foam is mostly air and impurities and skimming it results in a clearer, smoother jam. Continue to simmer and stir frequently. The jam will gradually thicken. This initial cooking phase, before it reaches setting point, usually takes about 30 to 40 minutes, but it can vary based on the ripeness and water content of your berries.
-
Test for Set Point
This is the most important part of making jam without pectin. You need to determine when the jam has thickened enough to set properly. There are a few ways to test this. The ‘wrinkle test’ is a classic: place a small plate in your freezer before you start cooking. When you think the jam is ready, spoon a tiny bit onto the cold plate and return it to the freezer for a minute or two. Then, push the edge of the jam with your finger. If the surface wrinkles, it’s ready. Another method is the ‘sheeting test’: dip a spoon into the boiling jam and lift it. Let the jam drip off the spoon. When the last few drops fall together in a sheet rather than individually, the jam is likely ready. It’s better to err on the side of slightly undercooked than overcooked, as the jam will continue to thicken as it cools. The target temperature is typically around 220°F (104°C) on a candy thermometer, but visual tests are often more reliable for home cooks.
-
Sterilize Jars and Prepare for Canning (Optional but Recommended)
While the jam is simmering and you’re watching for the set point, it’s a good time to sterilize your canning jars, lids, and rings if you plan to can your jam for shelf storage. Wash jars, lids, and rings in hot, soapy water and rinse well. You can sterilize the jars by boiling them in water for at least 10 minutes, or by placing them in a 225°F (107°C) oven until needed. Keep the jars hot. If you’re just making jam for immediate consumption and storing it in the refrigerator, you can skip the extensive sterilization, but clean jars are always a good idea.
-
Fill Jars and Process
Once your jam has reached its set point, remove the pot from the heat. Carefully ladle the hot jam into your prepared, hot jars, leaving about 1/2 inch of headspace (the space between the jam and the rim of the jar). Wipe the rims of the jars clean with a damp cloth to ensure a good seal. Place the lids on the jars and screw on the rings until they are fingertip tight – don’t overtighten. If you are water bath canning for shelf stability, place the filled jars into a boiling water bath canner, ensuring the water covers the tops of the jars by at least an inch. Process the jars for 10 minutes (adjusting for altitude if necessary). After processing, carefully remove the jars from the canner and let them cool undisturbed on a wire rack for 12-24 hours. You’ll know they have sealed when the lids are concave and don’t flex when pressed. If a lid doesn’t seal, refrigerate that jar.
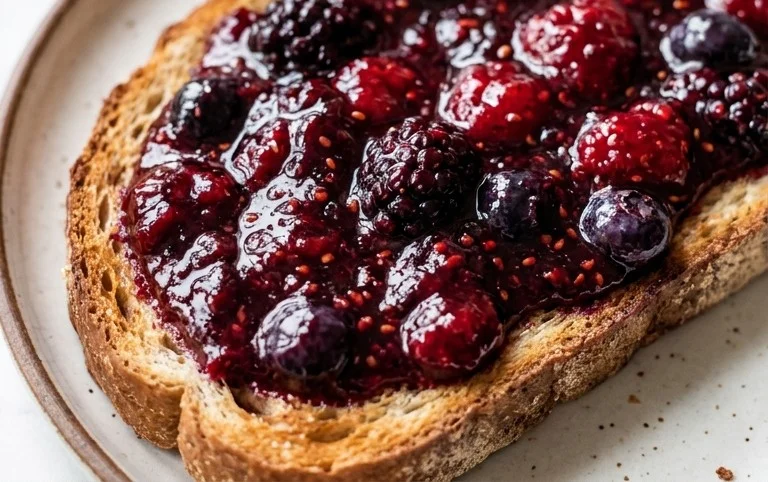
This jam is delicious on toast, scones, or even swirled into yogurt or ice cream. Stored in the refrigerator, it should last for a few weeks. Properly canned, it can last for up to a year. Enjoy the taste of summer, preserved!
Conclusion:
This Mixed Berry Jam (No Pectin) is a simple way to enjoy the taste of summer all year long. Because it uses the natural pectin from the berries and relies on sugar for preservation, it has a softer set and a more intense berry flavor than pectin-added versions. It’s incredibly satisfying to open a jar of homemade jam, knowing you made it yourself without any artificial thickeners. It’s wonderful on toast, scones, or even swirled into yogurt. For a change, try adding a pinch of cinnamon or a splash of vanilla extract when the jam is nearly done cooking. You can also experiment with different berry combinations; a handful of cherries or a bit of plum can add interesting depth.
Frequently Asked Questions:
Why is my jam not setting?
Jams made without added pectin sometimes have a softer set, which is part of their charm. Ensure you cooked the jam to the correct temperature (around 220°F or 104°C), which is the setting point. You can also test for set by placing a small amount on a chilled plate; if it wrinkles when pushed, it’s ready.
Can I use less sugar?
Reducing sugar significantly can affect both the set and the preservation of the jam. Sugar acts as a preservative and helps the jam thicken. While some small reductions are possible, a substantial decrease may lead to a jam that doesn’t set properly or spoil more quickly.
How long does this jam last?
Properly canned, this jam can last for a year or more in a cool, dark place. Once opened, store it in the refrigerator and consume within 3-4 weeks. Always check for signs of spoilage before eating.
Mixed Berry Jam (No Pectin)
A delicious and easy mixed berry jam made without pectin, highlighting the natural sweetness and flavor of fresh berries.
Ingredients
-
16 oz of strawberries, coarsely chopped
-
10 oz of blueberries
-
6 oz of blackberries
-
6 oz of raspberries
-
1 cup of granulated sugar
-
1/4 cup + 1 tablespoon of fresh lemon juice
Instructions
-
Step 1
Gently wash and prepare the berries. Hull and coarsely chop the strawberries. Ensure other berries are clean and free of stems. -
Step 2
In a large, heavy-bottomed pot or Dutch oven, combine the prepared berries, granulated sugar, and fresh lemon juice. -
Step 3
Stir well to combine and let the mixture sit for about 10-15 minutes to allow the sugar to start dissolving and the juices to release. -
Step 4
Place the pot over medium-high heat and bring the mixture to a rolling boil, stirring occasionally. Once boiling, reduce heat to medium and continue to cook, stirring frequently, for about 20-25 minutes. -
Step 5
The jam is ready when it has thickened significantly and a spoonful dropped onto a chilled plate sets up with a slight jiggle. Skim off any foam that rises to the surface during cooking. -
Step 6
Carefully ladle the hot jam into sterilized jars, leaving about 1/4 inch headspace. Wipe the rims clean, attach lids, and process in a water bath canner or let cool completely and store in the refrigerator.
Important Information
Nutrition Facts (Per Serving)
It is important to consider this information as approximate and not to use it as definitive health advice.
Allergy Information
Please check ingredients for potential allergens and consult a health professional if in doubt.


Leave a Comment