

Brownie Truffles turn a pan of boxed brownies into rich, bite-size treats with a soft, fudgy center and a smooth chocolate shell. I make them by crumbling completely cooled brownies with softened cream cheese, chilling the mixture, then rolling it into balls and dipping each one in melted chocolate. The cream cheese gives the center a soft, almost cheesecake-like texture, while the chocolate coating adds a crisp finish once it sets.
This recipe is handy when you want a dessert that can be made ahead without baking another batch from scratch. You can use your favorite brownie mix, and the truffles are easy to portion for a party platter, holiday tin, or afternoon coffee break. Brownie Truffles also leave room for small changes: add a little vanilla to the mixture, use dark chocolate for dipping, or finish the coating with a pinch of flaky salt. Chill the rolled centers well before dipping so they keep their shape.
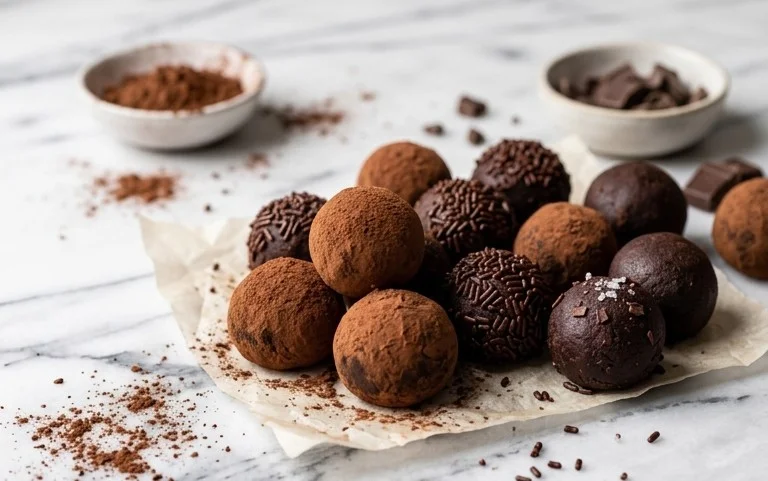
Ingredients:
- 1 box of brownie mix, cooked according to the instructions on the box and cooled completely
- 8 ounces cream cheese, softened
- 16 ounces chocolate chip morsels
Prepare the Brownie Mixture
- Bake and cool the brownies. Prepare the brownie mix according to the package instructions, using the pan size and baking time listed on the box. Let the brownies cool completely before mixing them with the cream cheese. Warm brownies can soften the cream cheese too much and make the mixture greasy or difficult to roll. If you are short on time, cut the cooled brownie slab into pieces and spread them out on a plate so they lose heat more quickly.
- Break up the brownies. Remove any hard, overbaked edges, then crumble the rest into a large bowl. Use clean hands or a fork to break up large pieces until the crumbs are fairly even. Small crumbs make a smooth truffle mixture, while big chunks can leave weak spots that crack when you roll the balls. A few soft brownie bits are fine, but avoid leaving large pieces.
- Work in the cream cheese. Add the softened cream cheese to the brownie crumbs. Mash and stir until the mixture looks evenly moist and holds together when pressed between your fingers. A sturdy spoon works well, though clean hands are useful if the mixture is dense. If the cream cheese is still cold and firm, let it soften further rather than trying to force it through the crumbs. Scrape the sides and bottom of the bowl so no plain cream cheese remains in one spot.
- Chill the mixture. Cover the bowl and refrigerate it for about 30 minutes. Chilling firms the mixture and makes it easier to portion without sticking to your hands. If it still feels very soft after chilling, leave it in the refrigerator for another 15 minutes. Keep it covered so the surface does not dry out or pick up other refrigerator smells.
Shape and Coat the Truffles
- Roll the portions. Scoop out small portions, about 1 tablespoon each, and roll them between your palms into balls. Place them on a lined tray with a little space between each one. Try to keep the truffles close in size so they chill and coat at the same rate. If the mixture begins sticking to your hands, wash and dry them, then continue; damp hands can make the outside tacky.
- Chill the brownie balls. Refrigerate the tray for at least 30 minutes, until the balls feel firm when gently touched. This step helps them keep their shape when they meet the melted chocolate. If you need to pause, the shaped balls can stay covered in the refrigerator for several hours. Avoid freezing them until solid, since a very cold center can make the coating set unevenly or crack as it warms.
- Melt the chocolate chips. Put the chocolate chip morsels in a microwave-safe bowl. Heat them in 20- to 30-second bursts, stirring well after each burst, until the chocolate is mostly melted. Stirring helps distribute the heat and prevents scorching around the edges. Stop heating when a few small pieces remain, then keep stirring until they melt from the warmth of the bowl. The chocolate should be smooth enough to coat a truffle without clumps.
- Dip each truffle. Lower one chilled brownie ball into the melted chocolate and turn it with a fork until it is covered. Lift it out with the fork, then tap the fork gently against the bowl to let excess chocolate drip back. Set the coated truffle on the lined tray. If the chocolate thickens while you work, warm it briefly and stir again. Avoid adding water, since even a small amount can make melted chocolate seize and turn grainy.
- Let the coating set. Continue dipping the remaining balls, returning the tray to the refrigerator if the centers begin to soften. Once coated, chill the truffles until the chocolate is firm, usually about 20 to 30 minutes. For a neater finish, use a toothpick to guide each ball in the chocolate and smooth over the small opening left by the pick with a little melted chocolate.
Storage and Serving
Store the finished brownie truffles in a covered container in the refrigerator, where the cream cheese filling stays firm. Separate layers with parchment or waxed paper so the chocolate shells do not rub against one another. They are easiest to handle straight from the refrigerator, but letting them sit at room temperature for about 10 minutes softens the center and brings out the fudgy brownie texture.
These are useful for making ahead because the brownie mixture can be shaped and chilled before dipping. For the cleanest coating, keep the brownie balls cold and work with a few at a time, leaving the rest in the refrigerator. If you have leftover melted chocolate, drizzle it over the set truffles; if the coating feels thick, warm it in short bursts and stir before using. Keep the finished truffles chilled until serving, and return any leftovers to the refrigerator promptly.
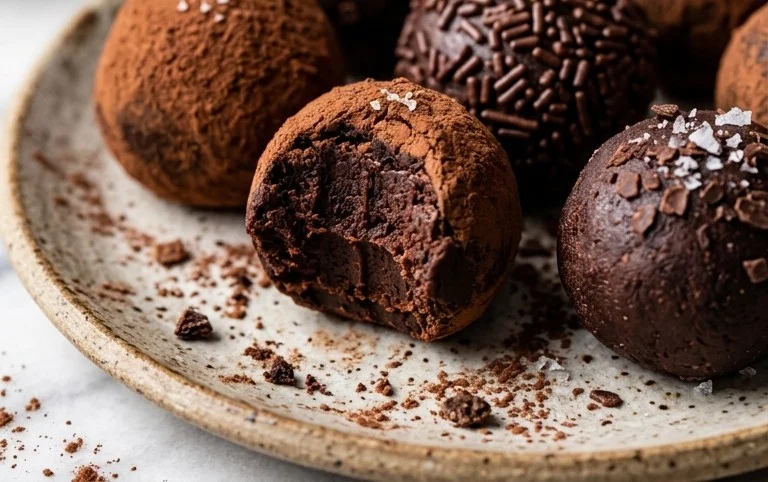
The texture should be dense and soft inside, with a thin shell that snaps gently when bitten. If the centers seem crumbly, the brownie mixture may need more mixing so the cream cheese reaches all the crumbs. If they feel sticky after shaping, chill them longer before dipping rather than adding extra ingredients. Taking time to cool the brownies fully and firm the rolled balls makes the coating step much easier.
Conclusion:
Brownie Truffles are a simple way to turn cooled boxed brownies, cream cheese, and chocolate chips into rich little treats. The chilled brownie center stays soft and fudgy beneath its set chocolate coating, and making them ahead gives the coating time to firm up before serving. Arrange them on a dessert plate with coffee, or tuck a few into a covered tin for a party or holiday table.
For a different finish, dip the truffles in dark or white chocolate, then add finely chopped nuts or a light sprinkle of flaky salt before the coating sets. Keep them refrigerated in a covered container, and let them sit at room temperature for a few minutes before serving for a softer center. I like this recipe when I have brownies to use up and want a dessert that is easy to portion. Chill the mixture well, work in small batches, and give these truffles a try.
Can I make Brownie Truffles ahead?
Yes. Make them up to several days ahead and store them in a covered container in the refrigerator. The coating helps keep the centers neat for serving.
Why are my truffles difficult to roll?
If the mixture feels sticky or soft, chill it longer before shaping. If it seems dry and crumbly, mix in a small amount of softened cream cheese until it holds together.
Brownie Truffles
Rich brownie and cream cheese truffles coated in melted chocolate chip morsels.
Ingredients
-
1 box of brownie mix (cooked according to the instructions on the box)
-
8 ounces cream cheese (softened)
-
4 ounces chocolate chip morsels
-
4 ounces chocolate chip morsels
-
4 ounces chocolate chip morsels
-
4 ounces chocolate chip morsels
Instructions
-
Step 1
Prepare and bake the brownie mix according to the instructions on the box. -
Step 2
Let the brownies cool completely, then crumble them into a large bowl. -
Step 3
Add the softened cream cheese and mix until thoroughly combined. -
Step 4
Roll the mixture into bite-size balls and chill until firm. -
Step 5
Melt the chocolate chip morsels in batches, stirring until smooth. -
Step 6
Dip each chilled ball in the melted chocolate, then place it on a lined tray to set.
Important Information
Nutrition Facts (Per Serving)
It is important to consider this information as approximate and not to use it as definitive health advice.
Allergy Information
Please check ingredients for potential allergens and consult a health professional if in doubt.


Leave a Comment