

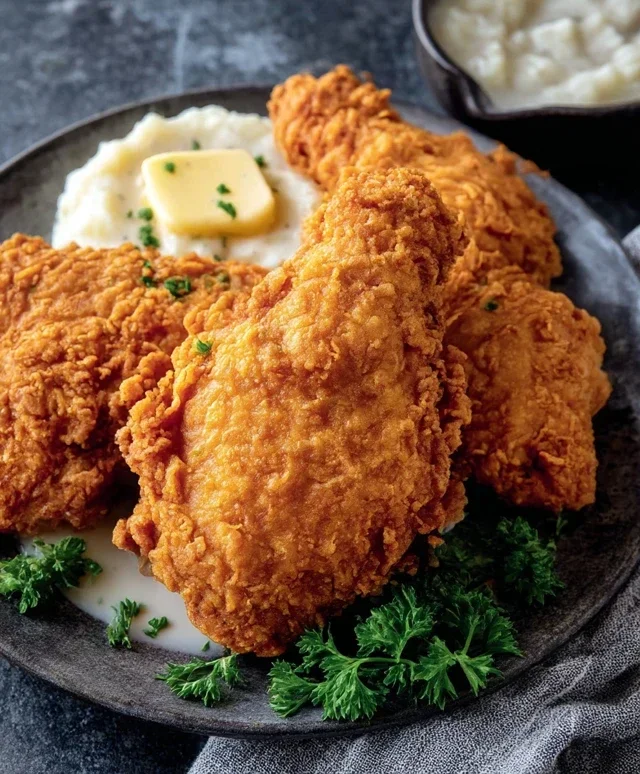
Chicken Fried Chicken. Ah, just the name conjures up images of golden-brown perfection, a symphony of crispy coating and tender, juicy chicken. It’s the kind of comfort food that wraps you in a warm hug, a dish that’s a staple for a reason. What is it about this classic that makes us all swoon? It’s the glorious paradox: the unparalleled crunch of the fried exterior giving way to the most succulent chicken breast imagin extractable. This isn’t just fried chicken; it’s a culinary masterpiece where simple ingredients are transformed into something truly extraordinary. We’re talking about a dish that can elevate a weeknight dinner to a celebratory feast and leave you feeling utterly satisfied. Get ready to learn how to create your own perfect plate of Chicken Fried Chicken.
Chicken Fried Chicken
There’s something undeniably comforting about a plate of Chicken Fried Chicken. The crispy, golden exterior giving way to tender, juicy chicken, all smothered in a rich, creamy gravy – it’s a classic for a reason. This recipe aims to deliver that perfect balance of crunch and flavor, making it a standout dish for any occasion. It might seem a little involved, but trust me, the payoff is absolutely worth it. We’ll break it down into manageable steps, and I’ll share my tips for achieving that restaurant-quality result right in your own kitchen. Get ready to impress yourself and anyone lucky enough to be at your table.
Ingredients:
Preparing the Chicken and Dredgin extractg Station
The key to incredibly tender chicken fried chicken starts with the chicken itself. Using thin-sliced chicken breasts is crucial. If your breasts are thick, you can gently pound them to an even thickness, about ½ inch. This ensures they cook through quickly and evenly without drying out.
Next, let’s set up our dredgin extractg station, which is where all the magic begin extracts. In a shallow dish or pie plate, combine 2 cups of flour, baking powder, baking soda, 1 teaspoon each of salt, pepper, and garlic powder. Whisk these dry ingredients together thoroughly. This mixture is our first layer of coating.
In a separate, medium-sized bowl, whisk together the buttermilk, egg, and hot sauce. The hot sauce might seem surprising, but it adds a subtle warmth and depth of flavor without making the chicken spicy. It also helps to tenderize the chicken.
Now, we’ll prepare the chicken for its coating. Place the thin-sliced chicken breasts into the buttermilk mixture. Make sure each piece is fully submerged. Let the chicken soak in the buttermilk for at least 15-20 minutes. This is another important step for tenderizing the chicken and helping the flour coating adhere beautifully.
The Dredgin extractg Process
After the chicken has had its bath in the buttermilk, it’s time to get it coated. Working with one piece of chicken at a time, lift it from the buttermilk, letting any excess drip off for a moment. Then, place it directly into the seasoned flour mixture. Press the flour onto the chicken, ensuring it’s completely coated on all sides. Don’t be shy; you want a good, thick coating.
Once coated, place the floured chicken pieces on a wire rack set over a baking sheet. This allows the coating to set a bit, which will help it stay on during frying and create an even crispier crust. Let the chicken rest in the flour for at least 10 minutes. You can even let it rest for up to 30 minutes if you have the time; this step is crucial for a truly crispy coating that doesn’t fall off in the fryer. You should see a slightly “pasty” or “clumpy” coating on the chicken – this is exactly what you want for that authentic texture.
Frying the Chicken
Now for the fun part: frying! Pour enough oil into a heavy-bottomed skillet, like a cast-iron skillet, to reach about 2-3 inches deep. Heat the oil over medium-high heat until it reaches about 350°F (175°C). If you don’t have a thermometer, you can test the oil by dropping a tiny pinch of flour into it. It should sizzle immediately and float to the surface.
Carefully place 2-3 pieces of chicken into the hot oil, being careful not to overcrowd the pan. Overcrowding will lower the oil temperature, leading to greasy chicken. Fry the chicken for about 4-6 minutes per side, or until it’s a deep golden brown and cooked through. The exact time will depend on the thickness of your chicken. You can test for doneness by inserting a meat thermometer into the thickest part of a piece; it should register 165°F (74°C).
Using tongs, carefully remove the fried chicken from the oil and place it back onto the wire rack set over a baking sheet. This allows any excess oil to drain off. Repeat this process with the remaining chicken pieces.
Making the Creamy Gravy
While the chicken is resting and draining, we’ll whip up a quick and delicious gravy. Carefully pour out most of the frying oil from the skillet, leaving about ¼ cup. Be sure to strain out any little bits of flour or chicken that might have fallen into the oil.
Place the skillet with the reserved oil back over medium heat. Whisk in ⅓ cup of flour. Cook this mixture, stirring constantly, for about 1-2 minutes. This is your roux, and cooking it for a bit helps to get rid of the raw flour taste.
Gradually whisk in 2 cups of milk, a little at a time, making sure to incorporate each addition before adding more. Continue to whisk until the gravy is smooth and starts to thicken. Bring the gravy to a gentle simmer and let it cook for a few minutes, stirring occasionally, until it reaches your desired consistency. Season generously with salt and pepper to taste. If the gravy is too thick, you can add a splash more milk. If it’s too thin, let it simmer a little longer.
Serving Your Masterpiece
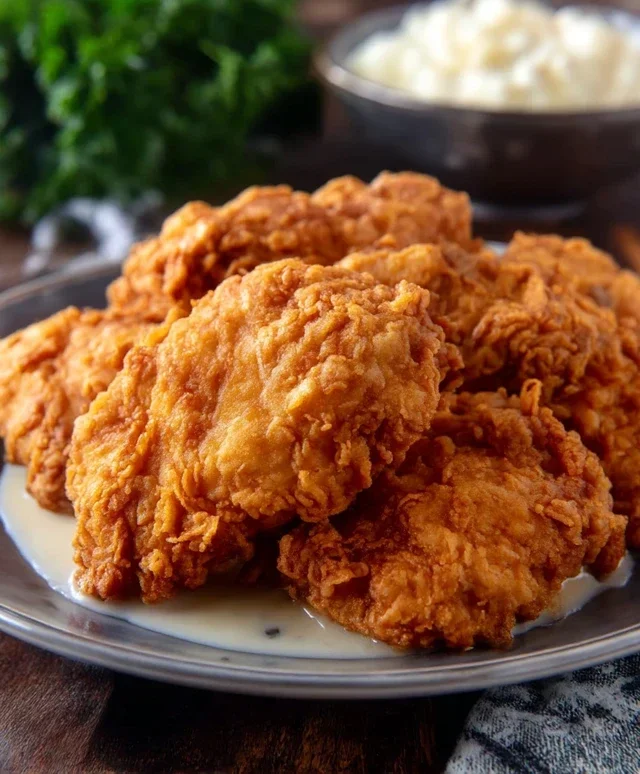
Once your chicken is fried and your gravy is ready, it’s time to plate up! Arrange the crispy chicken fried chicken pieces on your serving plates. Spoon a generous amount of the warm, creamy gravy over the top of each piece. This gravy is the perfect complement to the crispy chicken, adding a rich, savory element that ties the whole dish together.
Chicken Fried Chicken is fantastic served with classic sides like mashed potatoes, green beans, or a simple side salad. The beauty of this dish is its versatility and its undeniable ability to bring smiles to faces. Enjoy every bite of this comforting classic!
Conclusion:
There you have it! This Chicken Fried Chicken recipe is a true classic for a reason. It’s all about achieving that perfect crispy, golden-brown crust enveloping a juicy, tender chicken breast. The blend of seasoned flour and the double-dip dredgin extractg ensures an unforgettable texture that’s both satisfying and delicious. This dish is incredibly versatile and pairs wonderfully with a variety of sides. We love serving it with creamy mashed potatoes, a vibrant green bean casserole, or a tangy coleslaw. For a lighter option, a simple side salad is also a fantastic choice.
Don’t be afraid to get creative with your seasonings! You can add a pinch of cayenne pepper to the flour for a little heat, or incorporate smoked paprika for a deeper, richer flavor. Some people even add a bit of garlic powder or onion powder directly to the chicken before breading. The possibilities are endless! So, gather your ingredients, put on your apron, and give this amazing Chicken Fried Chicken recipe a try. You won’t regret it!
Frequently Asked Questions:
Can I make this recipe ahead of time?
While the best texture is achieved when freshly fried, you can prepare the chicken and coat it in the breading up to a few hours in advance and refrigerate it. However, frying right before serving is highly recommended for optimal crispiness.
What kind of oil is best for frying Chicken Fried Chicken?
A neutral-flavored oil with a high smoke point is ideal. Vegetable oil, canola oil, or peanut oil are all excellent choices. Ensure you have enough oil to come at least halfway up the sides of your pan for even cooking.
How do I prevent the breading from falling off during frying?
The key is the double-dip method: flour, then egg wash, then flour again. Make sure to press the flour firmly onto the chicken after each dip. Allowing the coated chicken to rest for a few minutes before frying can also help the breading adhere better.
Chicken Fried Chicken
Crispy, golden-fried chicken cutlets coated in a seasoned flour mixture, served with a creamy, savory gravy. A Southern comfort food classic.
Ingredients
-
6-8 thin sliced chicken breasts
-
2 cups flour
-
2 tsp baking powder
-
1 tsp baking soda
-
1 tsp salt
-
1 tsp pepper
-
1 tsp garlic powder
-
1 1/2 cup buttermilk
-
1 egg
-
1 Tbs hot sauce
-
Oil for frying
-
1/4 cup reserved oil from frying
-
1/3 cup flour
-
2 cup milk
-
Salt & pepper
Instructions
-
Step 1
In a shallow dish, whisk together 2 cups flour, baking powder, baking soda, salt, pepper, and garlic powder. -
Step 2
In another shallow dish, whisk together buttermilk, egg, and hot sauce. -
Step 3
Dip each chicken breast first in the buttermilk mixture, then coat thoroughly in the flour mixture, pressing to adhere. Place on a wire rack and let sit for 10 minutes. -
Step 4
Heat about 1 inch of oil in a large skillet over medium-high heat to 350°F (175°C). Carefully place chicken in the hot oil, working in batches if necessary. Fry for 3-4 minutes per side, until golden brown and cooked through. Remove chicken and drain on paper towels. Reserve 1/4 cup of the frying oil. -
Step 5
To make the gravy, heat the reserved oil in the same skillet over medium heat. Whisk in 1/3 cup flour and cook for 1-2 minutes, stirring constantly, until lightly golden. -
Step 6
Gradually whisk in the milk until smooth. Bring to a simmer, stirring frequently, until the gravy thickens. Season with salt and pepper to taste. -
Step 7
Serve the chicken fried chicken immediately with the hot gravy.
Important Information
Nutrition Facts (Per Serving)
It is important to consider this information as approximate and not to use it as definitive health advice.
Allergy Information
Please check ingredients for potential allergens and consult a health professional if in doubt.
Leave a Comment